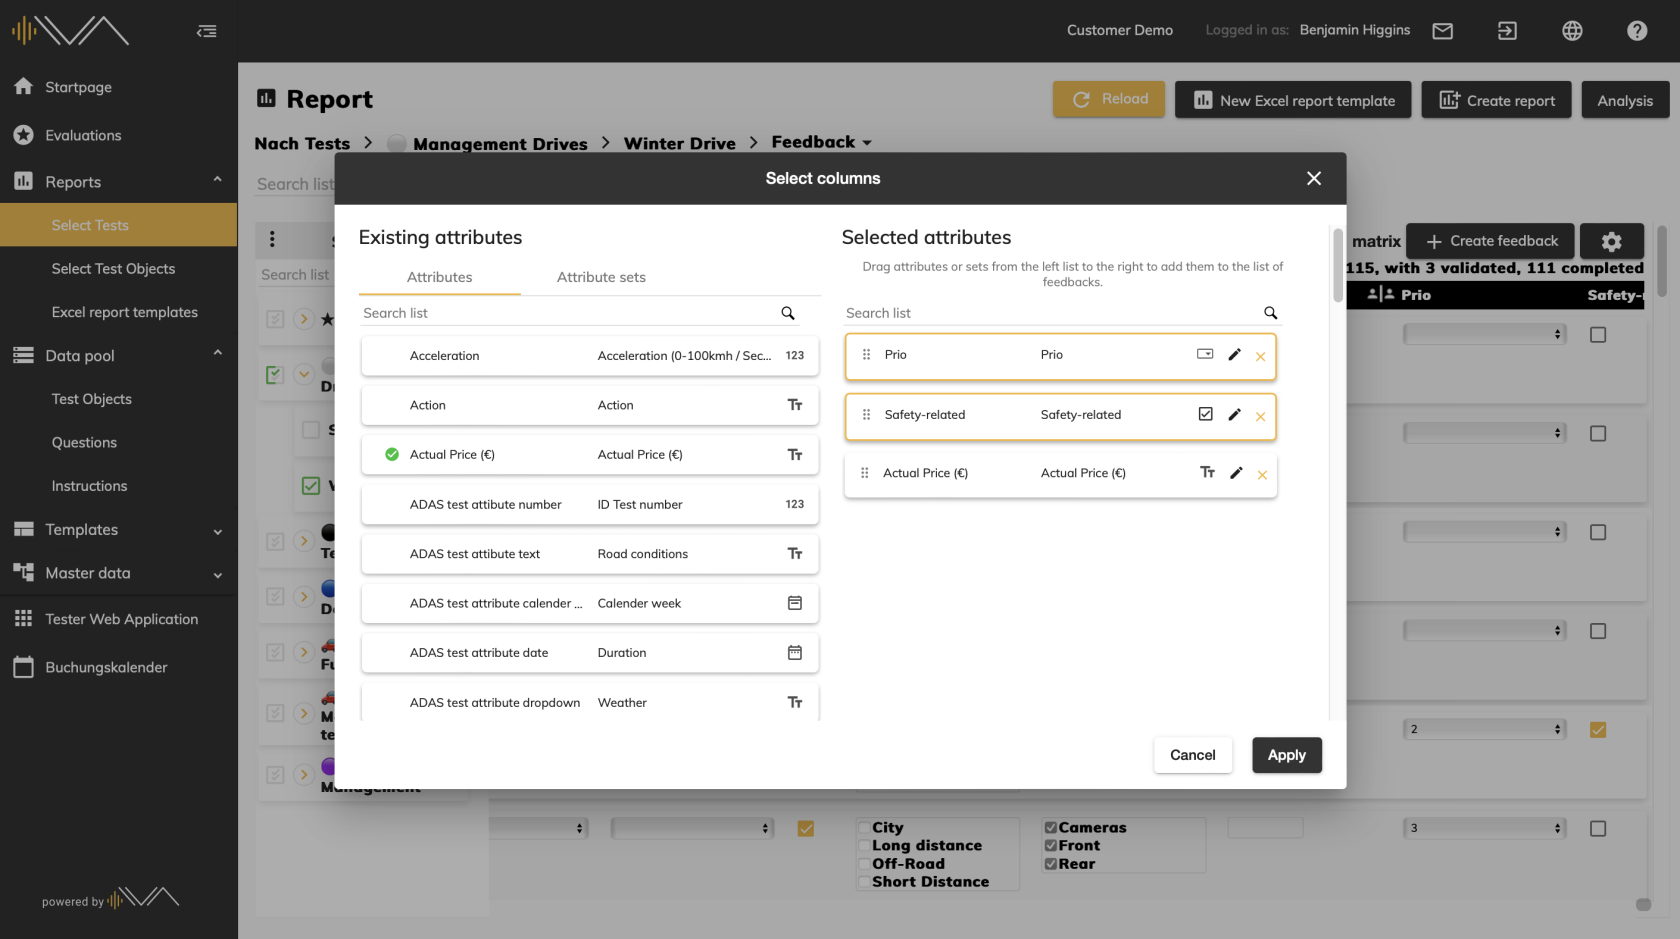
How do I add (additional) columns to the feedback list?
First you need to navigate to the appropriate menu item. To do this, click on Evaluation-> Select Tests in the left navigation bar and click on the relevant test under the relevant evaluation. Now you can select the desired test object and click on the "Feedback" tile. You will now be taken to a new page. Click on the "Validate feedback" button in the upper right corner. You will now be taken to a new page.
Then click on the button with the gear symbol in the top right above the feedback list.
A pop-up with two columns opens. In the left column you see a searchable list with all attributes or attribute sets available in the system. If you would like to adopt an attribute as an additional column, simply double-click on the corresponding row or drag and drop it to the right-hand side. To add an attribute set as columns, drag and drop the set to the right side. Then click on "Apply".
You can configure additional attributes here as required and add, delete or edit them. These attributes are then displayed in the additional columns.
To make it easier to distinguish the overview of attributes used in the additional columns, a new label with six states has been introduced in the left-hand column:
| not assigned | assigned and without value | assigned and with value | |
| Tester Attribute |
No change | grayed out | Border with accent color |
| Planer Attribute |
No change | ✅ green check Icon |
✅ green check Icon and border with accent color |

