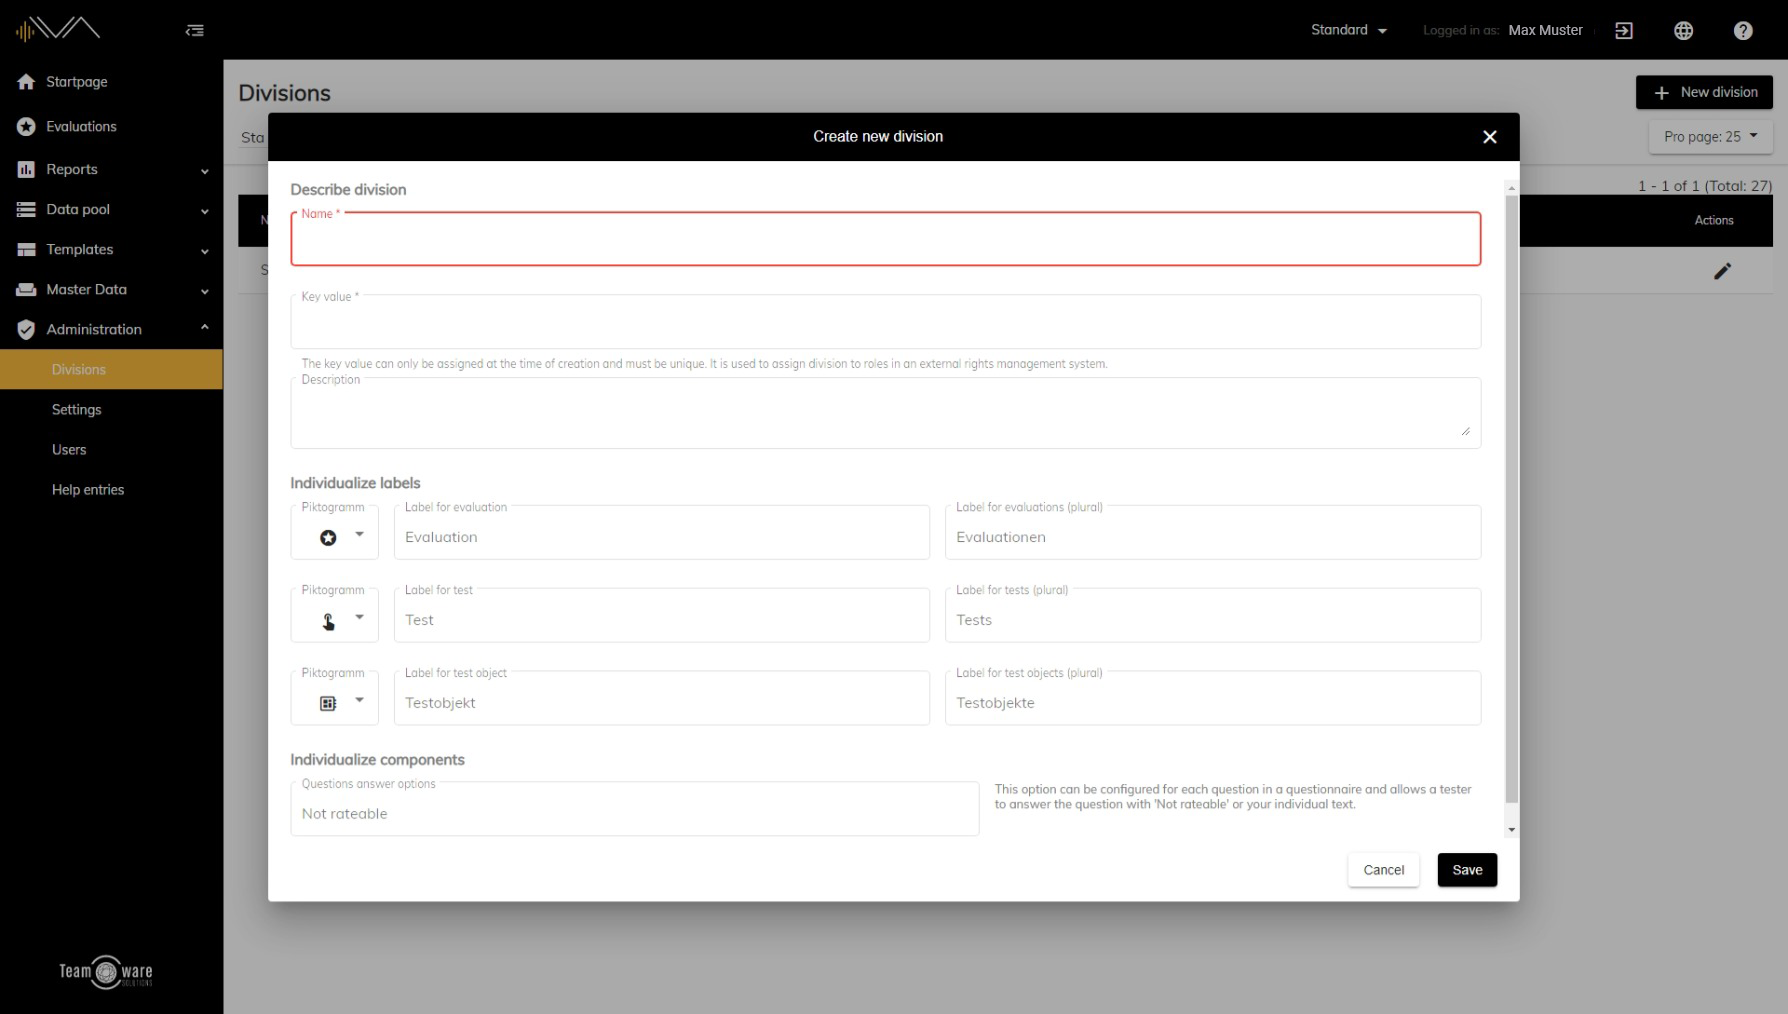
How do I create a new division?
First of all, you must have the appropriate authorization for the administration. If this is the case, you will see "Administration" as the last menu item in the left navigation. Now please open this item and click on "Divisions". Now you will find a button called "+ New division" in the upper right corner. After you have pressed this button a pop-up window "Create new division" will open. Now you can fill in the following items:
- Name (mandatory field): Please enter a name for the division here (for example, a department or a product division).
- Key value (mandatory field): Please enter a unique key value here. This cannot be changed once the area has been created. It is primarily used to be able to create division roles in an external user administration. But it is also necessary if you use an external user administration.
- Description (optional): Here you can insert an optional description of the division.
- Designation for evaluation (optional): Here you can enter your own description for evaluation, e.g. study or similar. If not, the default name Evaluation will be used. You can also select a suitable pictogram for your company and determine the designation for the plural.
- Designation for test (optional): Here you can enter your own designation for test such as e.g. test drive or similar. If not, the default name Test will be used. You can also select a suitable pictogram for your company and determine the designation for the plural.
- Designation for test object (optional): Here you can enter your own designation for the test object, e.g. vehicle or similar. If not, the standard designation test object will be used. You can also select a suitable pictogram for your company and determine the designation for the plural.
When you have filled in all relevant fields, you can click Save.

