How do I create a new evaluation?
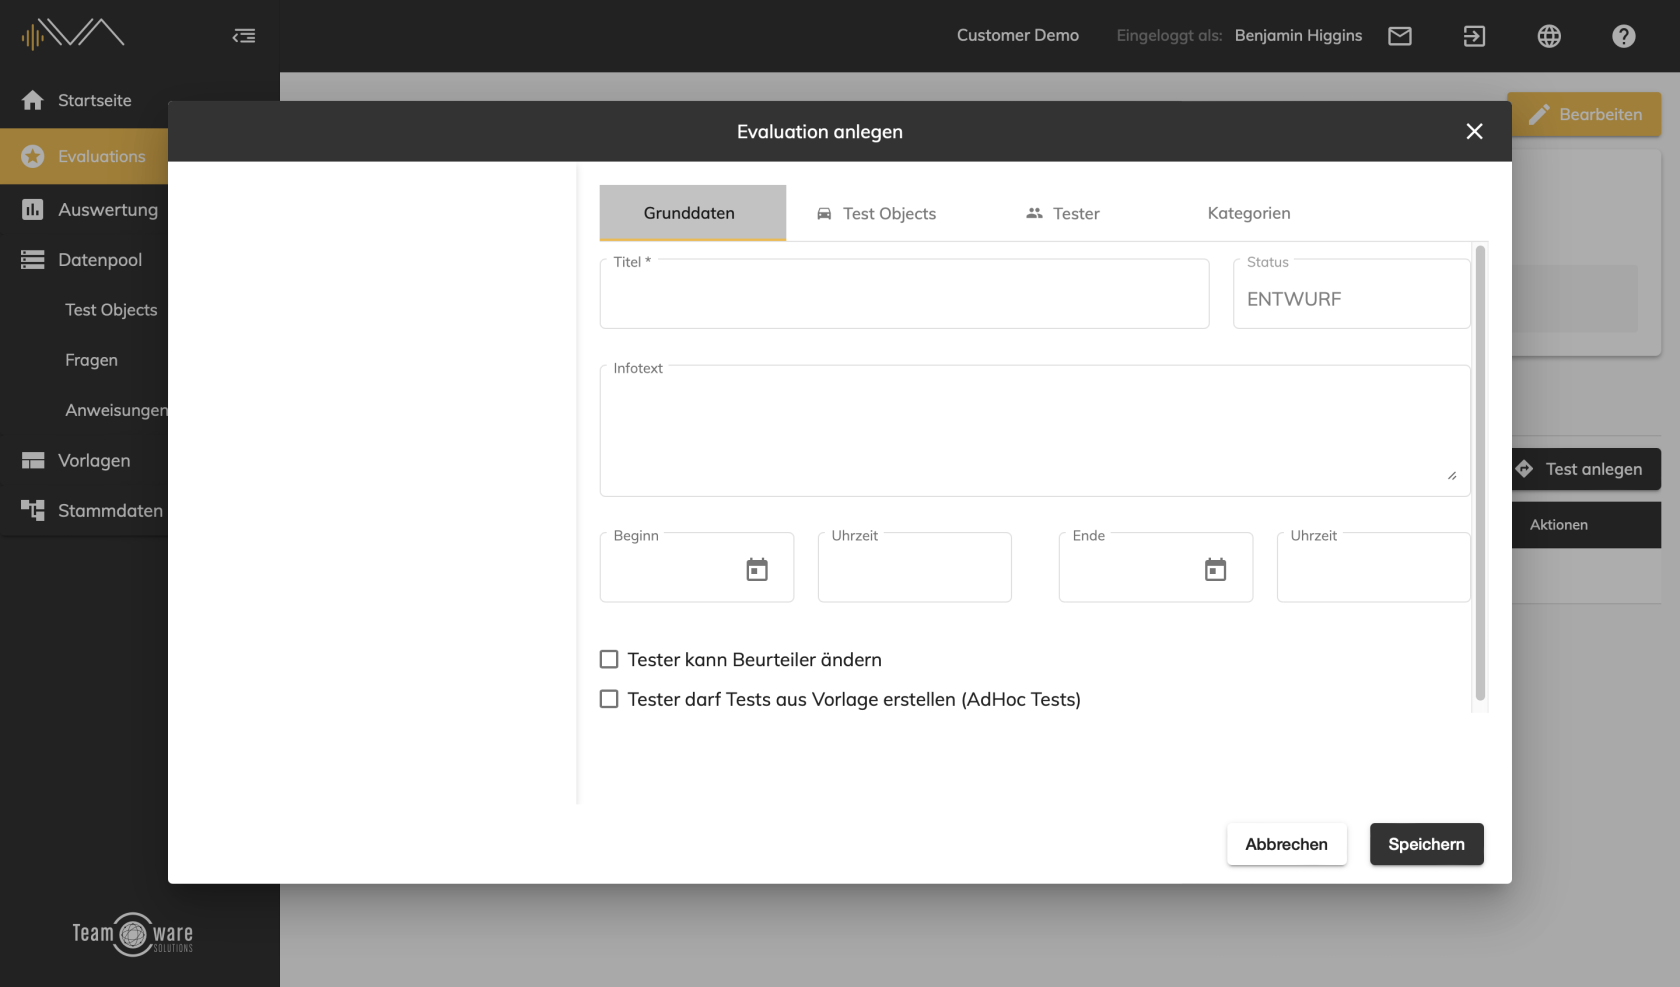
To create a new evaluation, click on Evaluations in the left navigation bar. Then click on the button at the top right called "+ Create evaluation" to open a popup window.
Basic data
- Now enter a suitable title for your evaluation.
- The status will be set to DRAFT by default.
- Optional: If your evaluation needs explanation, you can add an info text.
- Please add a start date (Optional: Time) as well as an end date (Optional: Time). You can always change these dates later.
- If the tester should be able to change the reviewer, please activate the check mark.*
- If the tester is allowed to create tests from templates (AdHoc tests), please activate the corresponding checkbox.
*Alternative reviewers can be used if, for example, several people are testing a test object together but only have one device available. A tester who is not logged in on the device now wants to give feedback and it should also be assigned to him in the system. In this case, the entering tester selects the appropriate name under "Alternative assessor".
Test objects
The screen is divided in two. On the left side you will find all objects from the data pool. You can also search this list. You can add a test object from the data pool to the evaluation by double-clicking or using drag & drop. You can also create a new test object.
On the right side you will find all test objects that are assigned to the evaluation. You will see the picture, the name, the key value and the attributes. You can also search this list. If an added test object is not used in at least one test, you can remove the test object from the evaluation by clicking on the X symbol (wait a moment until the symbol turns red and press again to confirm). With a click on the pencil symbol you can edit details about the vehicle and, for example, enter values for the attributes assigned to the vehicle.
Tester
The screen is also divided into two here. On the left side you will find all available testers from the data pool and you can search this list. You can add a tester from the data pool to the evaluation by double-clicking or using drag & drop. You can also create a new tester.
On the right side you will find all testers who are assigned to the evaluation. You will see the first name, last name, company/department, e-mail address and whether the user has permissions in the currently selected division. You can also search this list. If an added tester is not yet assigned to at least one test, you can remove the tester from the evaluation by clicking on the X symbol (wait a moment until the symbol turns red and press again to confirm).
Categories
The screen is also split in two here. On the left you will find all available categories and category sets. You can search this list. You can add a category to the evaluation by double-clicking or using drag & drop.
On the right side you will find all categories and subcategories that are assigned to the evaluation. If added, you will see an icon and the name of the category. If a down arrow icon appears in front of the icon, it is a category with subcategories. This means that this list can be expanded. If there is no arrow, it is a normal category or subcategory. In the end, a category hierarchy can be built that contains many sub-levels. If an added category is not yet assigned to at least one test, you can remove the category from the evaluation by clicking on the X symbol (wait a moment until the symbol turns red and press again to confirm).
Clicking on Save closes the pop-up window and takes you to the overview page.
Words marked in bold indicate mandatory entries.

