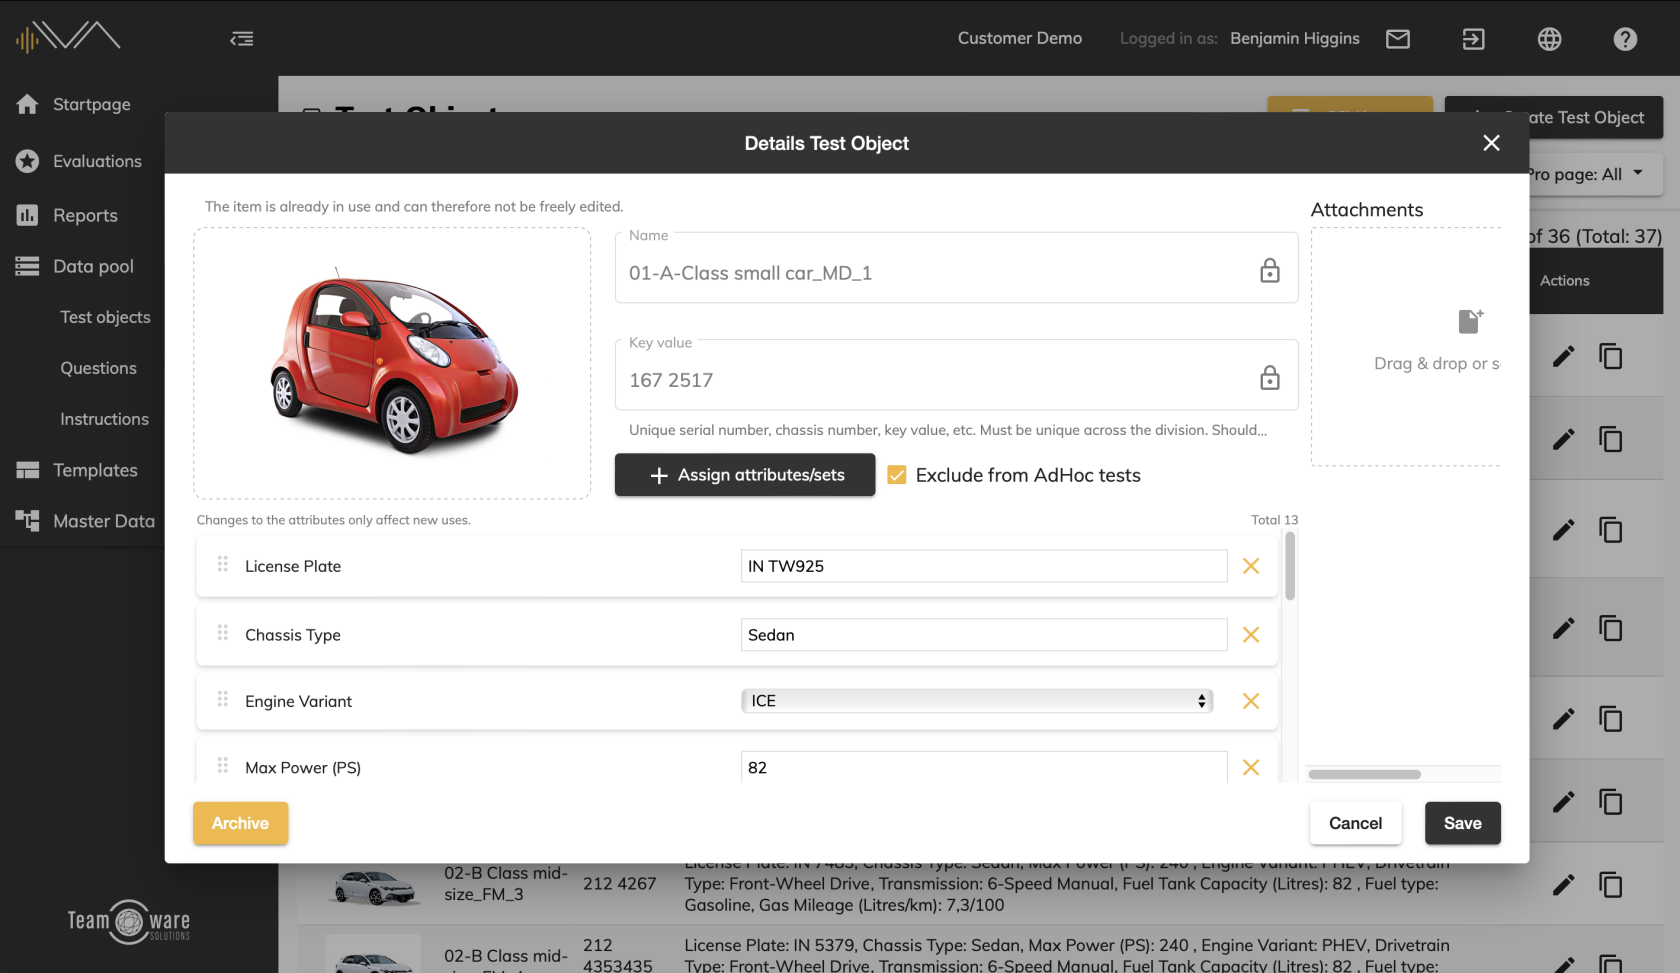
How do I edit an existing test object?
Name (mandatory field): This is an easily recognizable name for the test object. This field can be changed freely without hesitation as long as the test object is not yet used in any evaluations or tests. As soon as the test object is used in one or more evaluations and tests, this field is locked. However, this field can be unlocked and edited again if required by clicking on the lock symbol.
Key value (mandatory field): This is a specific key number that uniquely identifies the test object for this division. This field can be freely changed without hesitation as long as the test object is not yet used in any evaluations or tests. As soon as the test object is used in one or more evaluations and tests, this field is locked. However, this field can be unlocked and edited again if required by clicking on the lock symbol.
Add image (optional): You can add a photo for the test object. To do so, simply drag and drop the image file onto the designated area or click the area to select a file from your device. To remove the current image, hover over the image and click the Red Cross in the upper right corner. Supported file formats: JFIF, JPEG, JPG, PJPEG, PJP, PNG, GIF, SVG
Attach PDF (optional): If required, you can upload a PDF document with more detailed specifications of the current test object. To do so, simply drag and drop the PDF file onto the marked field or click the area to select a file on your device. To remove the current PDF file, hover over the PDF file and click the red cross in the upper right corner.
Add Attributes (optional): When you click on the "Assign attributes/sets..." button, another pop-up dialog opens, which is divided into two columns. In the left column you can search through the attributes and attribute sets that have already been created for the current division. To add an instruction or a set to the test object, drag&drop it to the right side or double-click it. The selected statements are now listed on the right side under "Selected Attributes". If you would like to remove a selected attribute, click on the red cross to the right of the corresponding attribute. As soon as you are satisfied with your selection, you can save your entry by clicking on the "Apply" button.
You can also create a new attribute. To do this, click the "+ Create new attribute" button. Another pop-up dialog opens. Enter a unique name, a description and the type for the new attribute. The following types are available: text, number, drop-down list, value list, active/inactive, calendar-week and date. Decide whether or not you want to hide the new attribute in the web tester and app. Then click on the "Save" button to create the attribute in the master data and add it to your test object.
Then the selected attributes will appear listed one below the other and you can enter and change a value for the current test object depending on the type of attribute. Here, too, you can remove individual attributes by clicking on the cross on the right.
Exclude from AdHoc tests (optional): Check this box if you want to exclude the new test object from being used for AdHoc-tests. Test objects blocked in this way are still visible to testers in lists but cannot be selected for AdHoc-tests. Blocked test objects are marked with a block-symbol in the iOS-App.

