Master data
Master data is the necessary basis for working with IVA. We distinguish between attributes for describing test objects and linking them to questions, categories for grouping categories and questions, and testers.
- Attributes
- What are attributes?
- How can I create a new attribute?
- How can I edit an attribute?
- How do I delete an attribute?
- Categories
- What are categories?
- How can I add a category?
- How can I edit the categories?
- How do I delete a category?
- Tester
Attributes
What are attributes?
Attributes are primarily used to describe the test objects. In addition, attributes can also be assigned to questions, whereby a relationship between test objects and questions can be established. Attributes can have different characteristics, from paint color to price, everything can be mapped.
How can I create a new attribute?
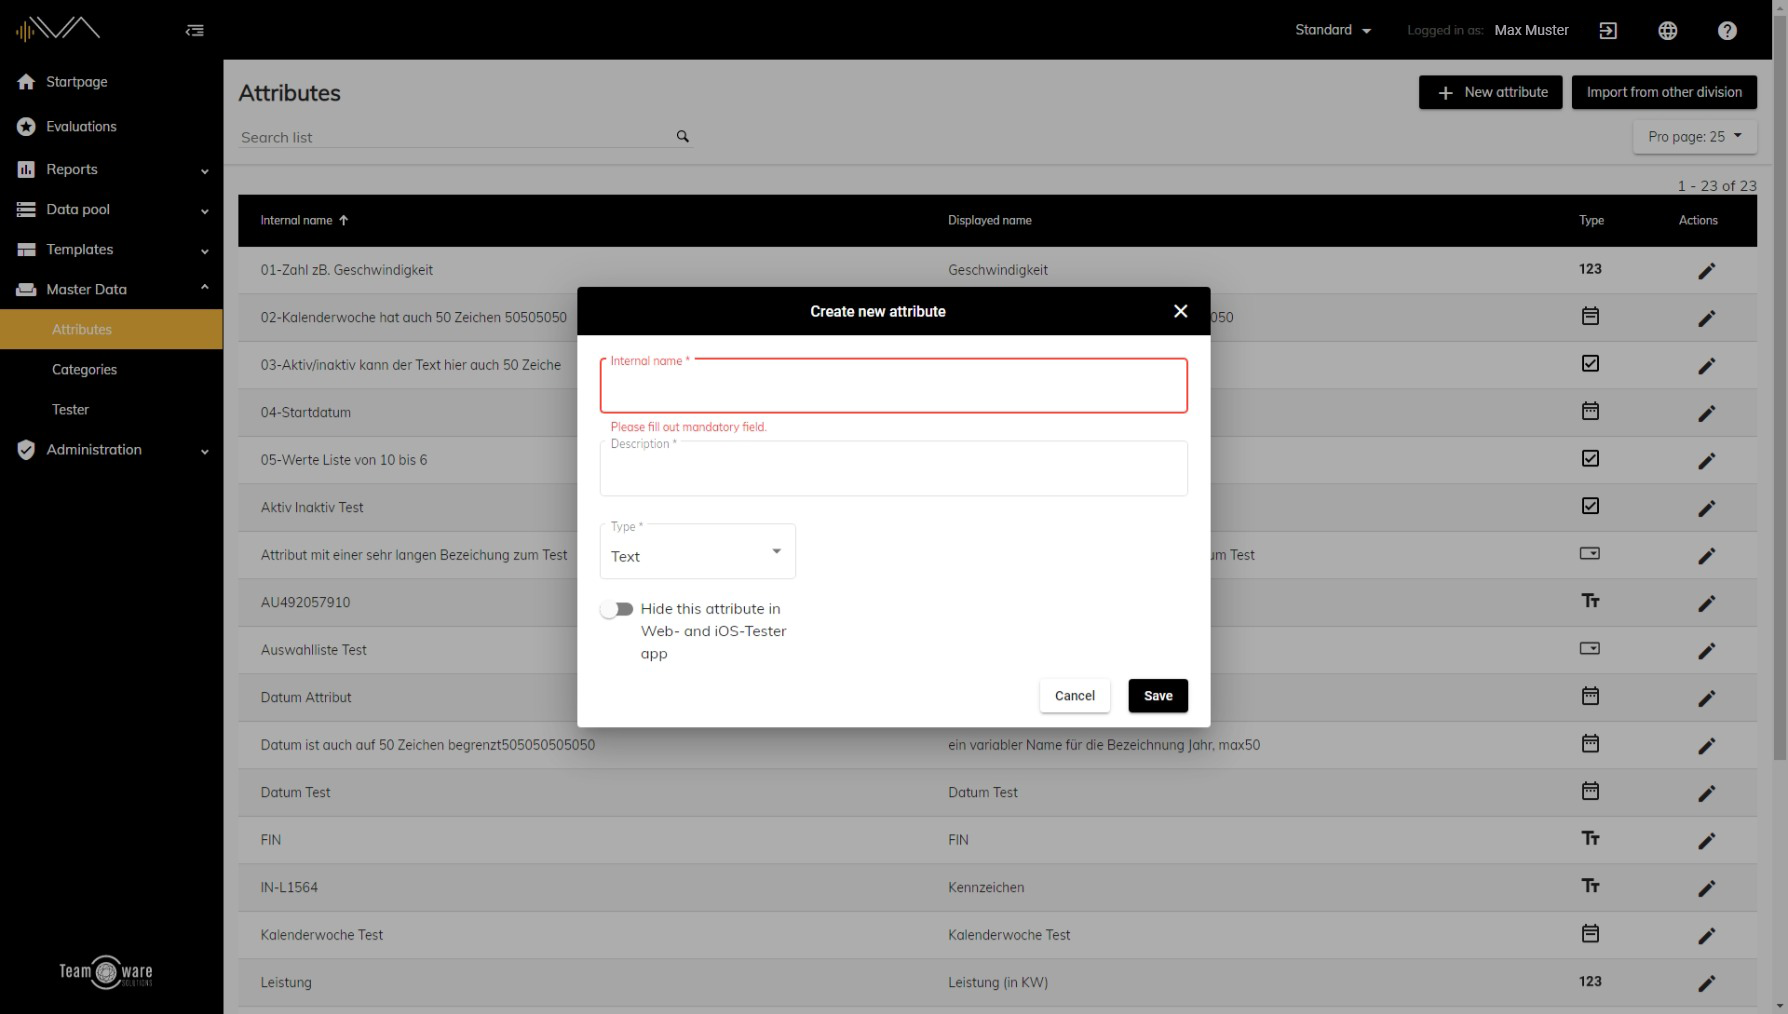
To create a new attribute, please click on Master data in the left navigation and then on Attributes. Now click on the button in the upper right corner " + New attribute". Now please enter a name (mandatory field) as well as a description (mandatory field, often identical with name). Afterwards you have to choose a type. You can choose between text, number, drop-down list, calender week, date, active/inactive and value list (add predefined selection options), calendar week and date.
Afterwards please click on "Save". Now you have successfully created your first attribute.
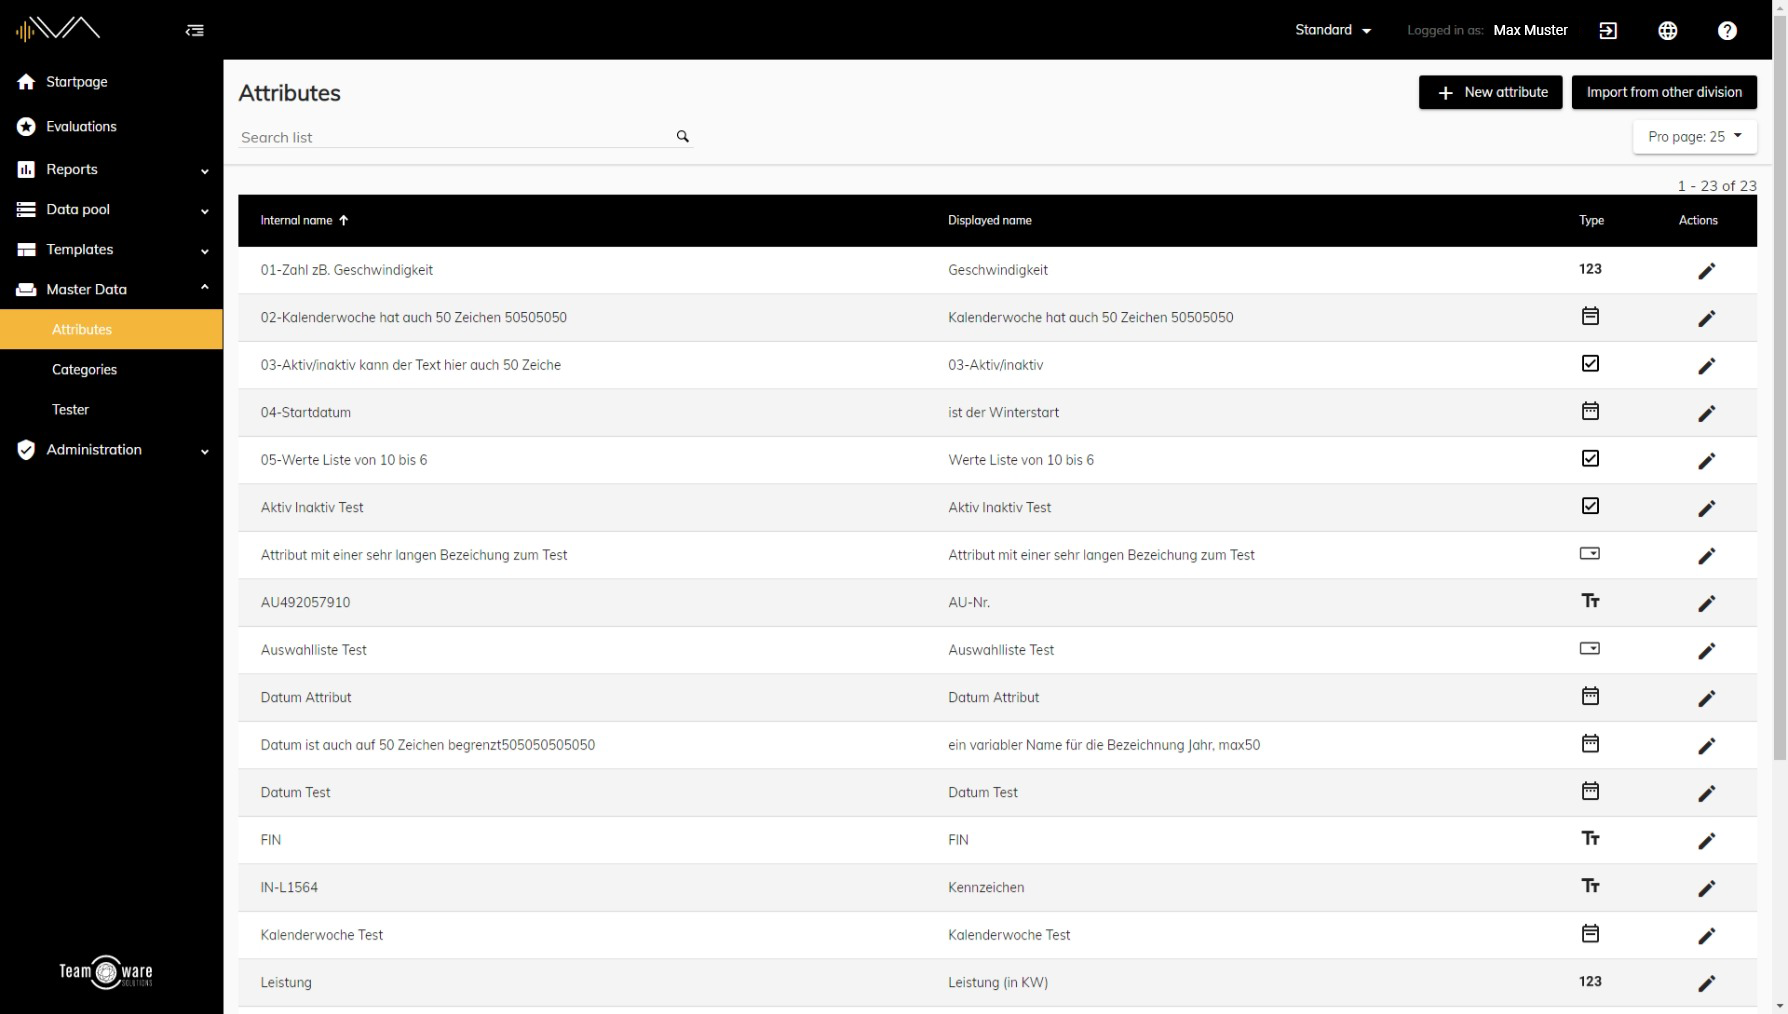
How can I edit an attribute?
To do this, please click on Master data in the navigation on the left side and then on Attributes. You will now see an overview of all attributes and can also search for attributes. If you have selected an attribute, you can access the editing window by double-clicking on the corresponding line or alternatively by clicking on the pencil icon.
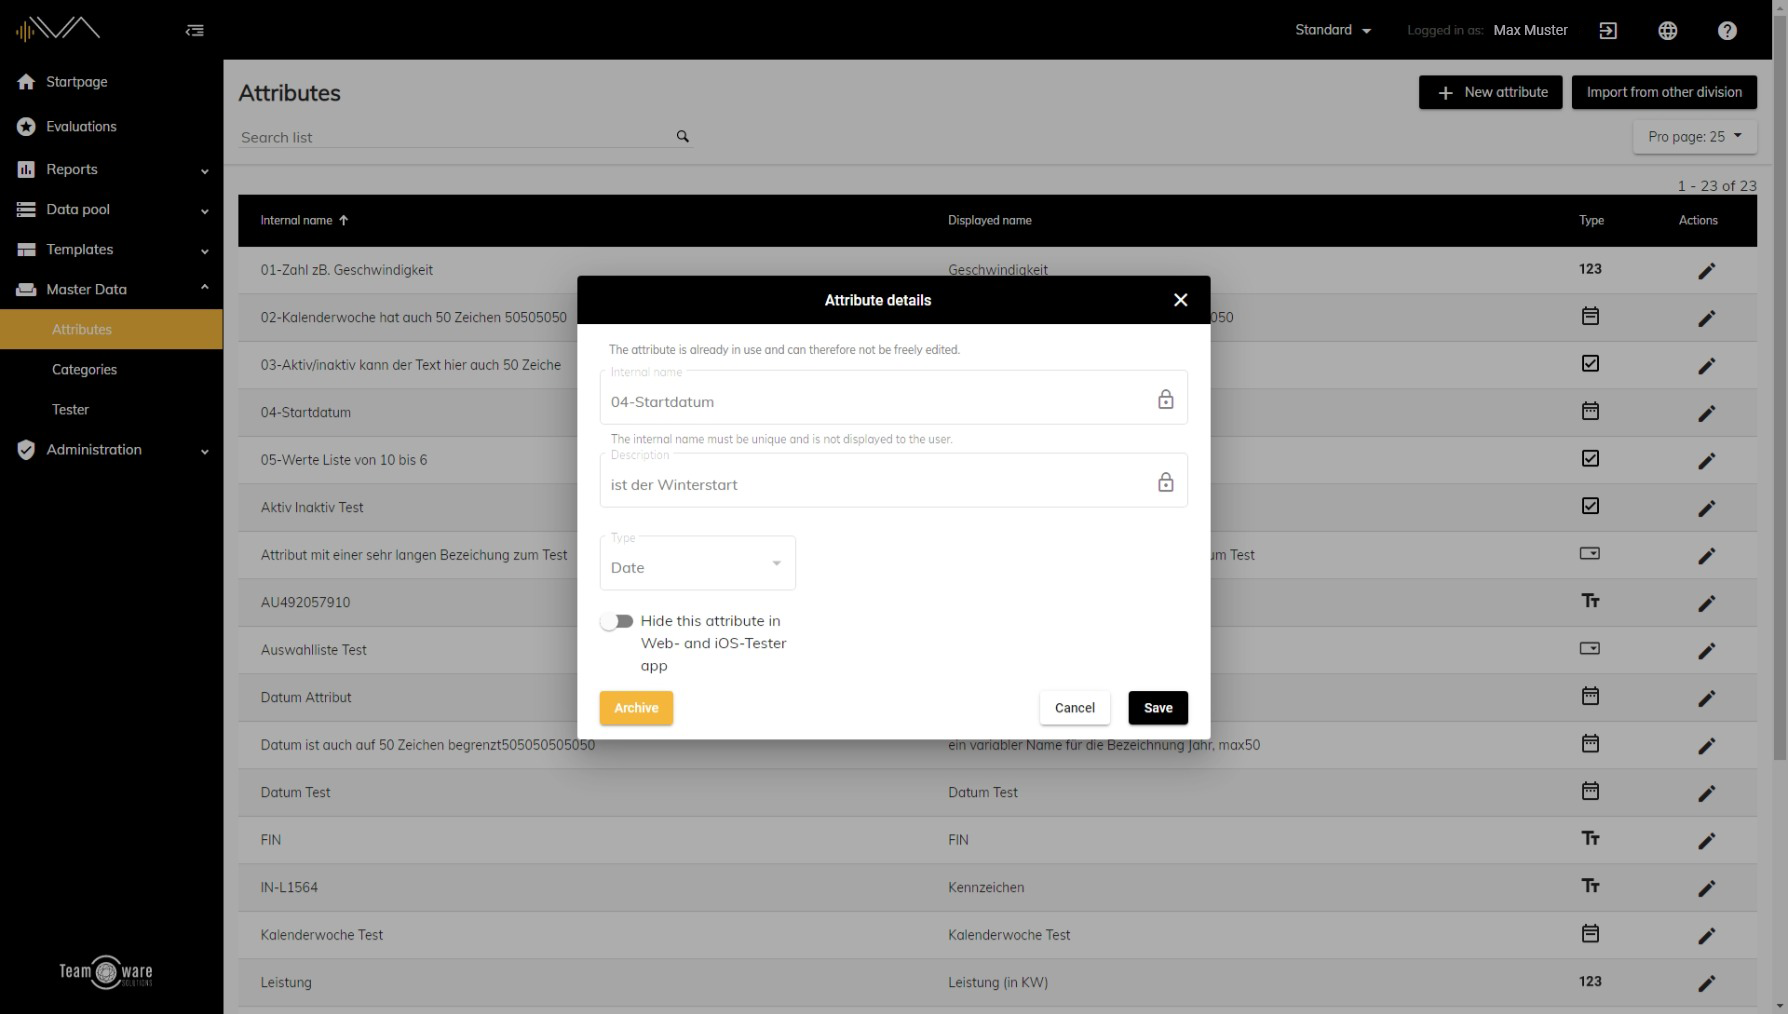
Here you can now change the name (note: this must be unique!), the description, the attribute type and the setting as to whether the attribute should be hidden in the web tester and the app. The Name and Description fields can be freely changed without hesitation as long as the attribute is not yet used in any evaluations or tests. As soon as the attribute is used in one or more evaluations and tests, these fields are locked. However, by clicking on the lock symbol, the respective field can be unlocked and edited again if required.
Don't forget to click "Save" when you're done editing.
How do I delete an attribute?

To delete an attribute, first navigate to Master Data -> Attributes. There you will find a list of all attributes. Now double-click on the corresponding attribute or click on the pencil symbol. Now you can click on "Delete" on the bottom left. Please wait a moment and then click again on the button that now says Confirm deletion. If the attribute is already in use, it can only be archived using the button at the bottom left and cannot be deleted.
Categories
What are categories?

Categories are master data and can therefore also be found under this menu item. They are used so that testers can assign free feedback to a category in a test (e.g. transmission in the context of a vehicle or processor in the context of a smartphone). Categories can be included in different category sets.
How can I add a category?
To do this, first click on Master data in the navigation and then on Categories. You will now see a list of all existing categories. Hover your mouse over one of the existing categories. Two small symbols now appear to the right of the description. The first thing that appears is a pen for editing the category. The symbol next to it is for creating a subcategory. To create a new main category, click on the "+ Create main category" button at the top right, enter a name and then confirm with Enter.
How can I edit the categories?
First you have to navigate to the corresponding item under Master data -> Categories. Here you will now see an overview of your categories. You can search through them, expand and collapse the entire category hierarchy and show archived categories. In addition, you can drag and drop categories and subcategories to a different position. If a category has more subcategories, an arrow pointing to the right appears next to the category image. When you click on it, the next category level unfolds.
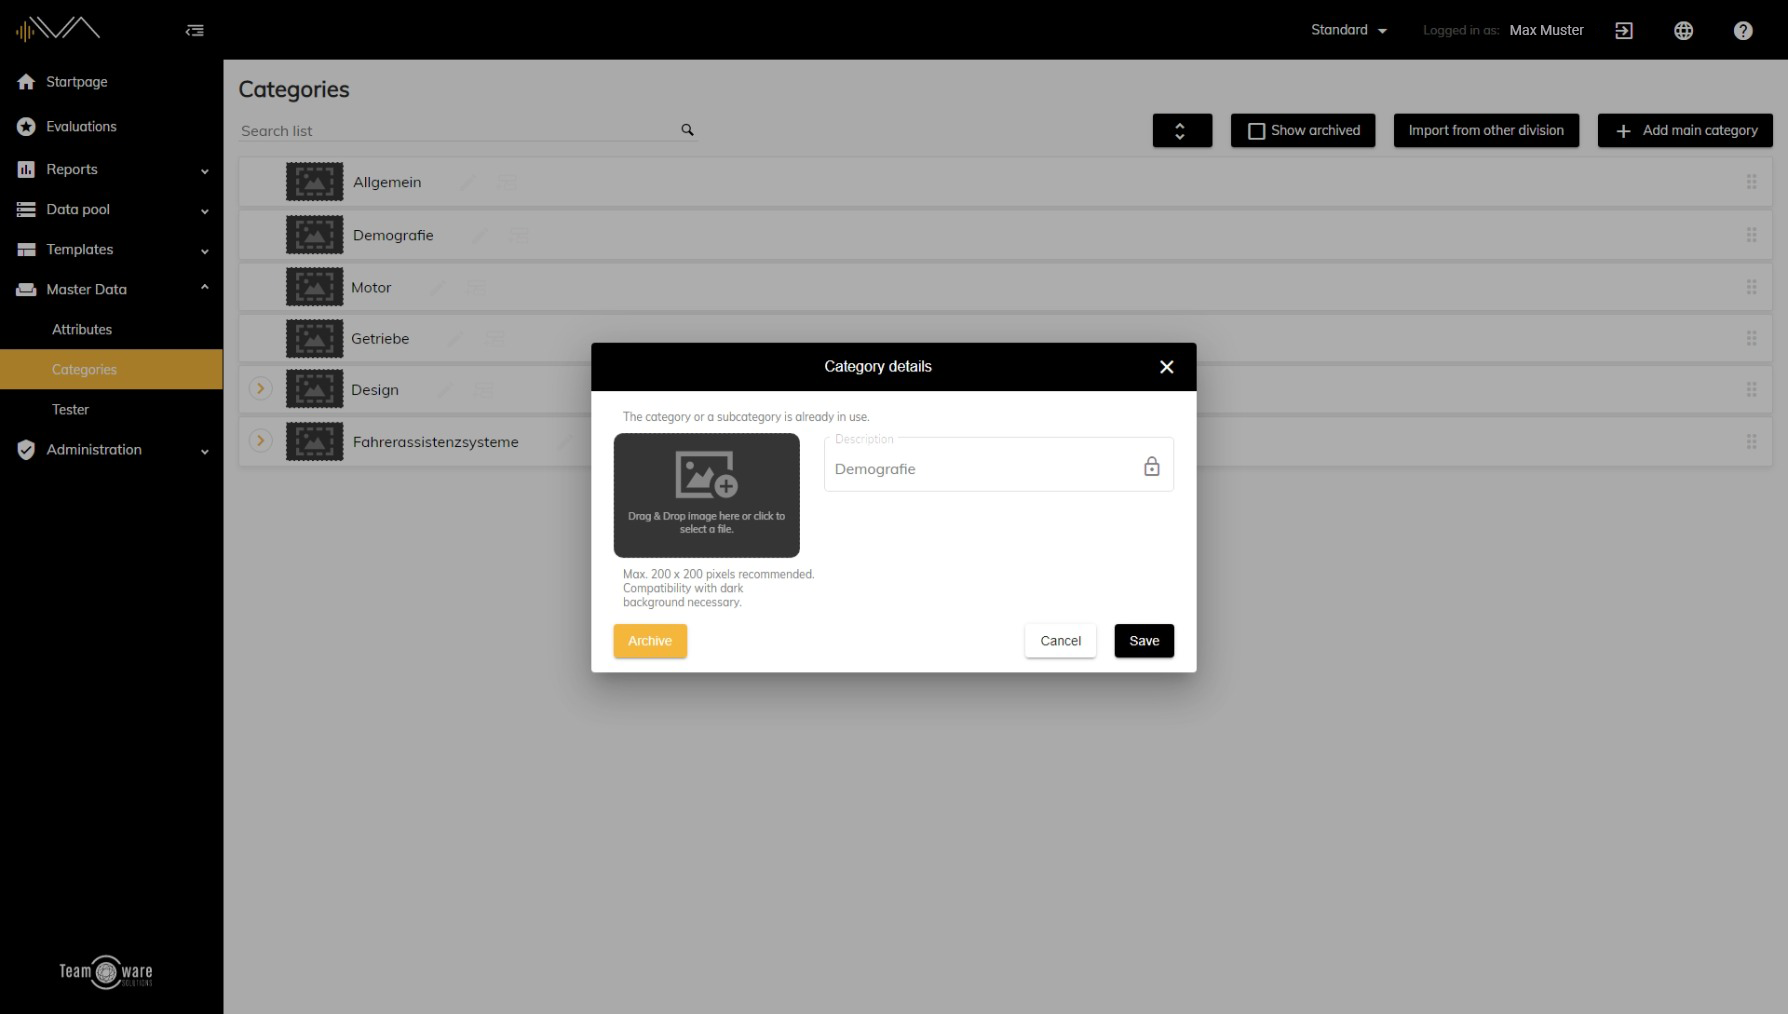
For each category at each level, you can add a category at the level below. In addition, you can also edit a category. To do this, simply click on the pencil icon or double-click on the corresponding category.
Now a new window opens with the category details. Here you can change the name (mandatory field) and optionally add a (new) image. To do this, simply drag and drop an image to the appropriate place or select one manually from your file explorer. Now click on Save to save your changes.
How do I delete a category?
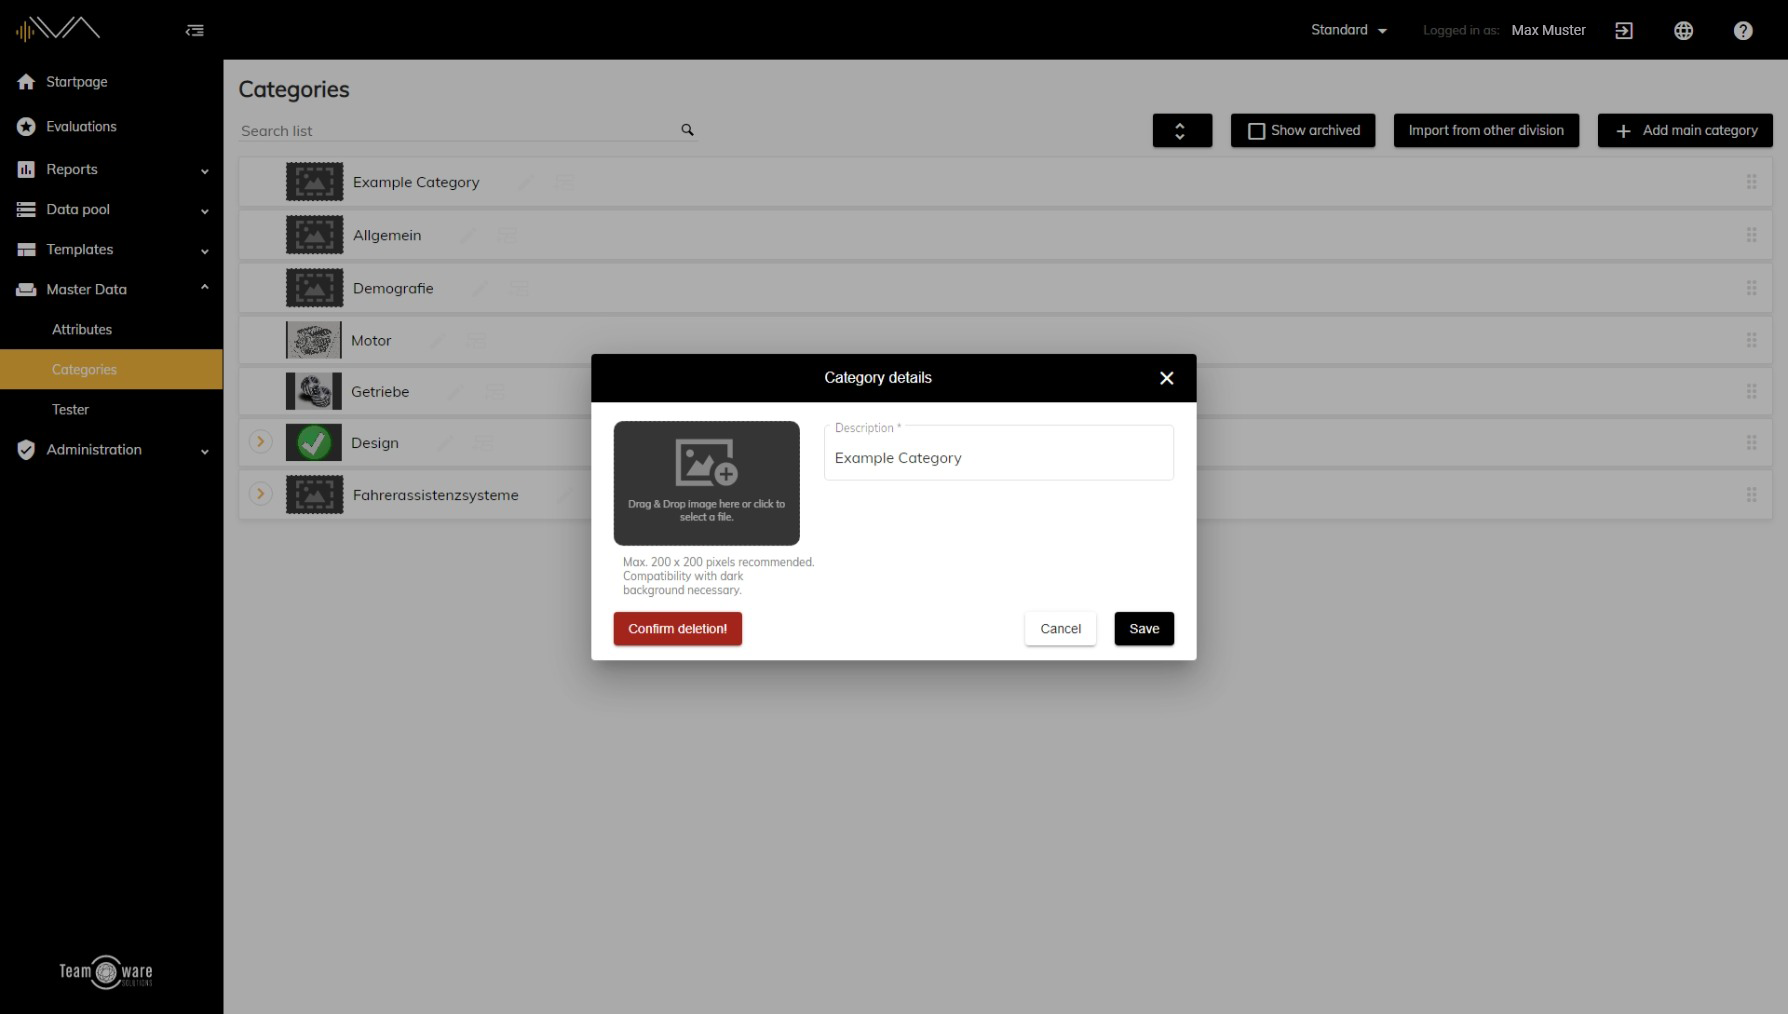
To delete a category, first navigate to Master data -> Categories. There you will find a list of all categories. Now double-click the corresponding category or click the pencil icon. Now you can click on "Delete" at the bottom left. Please wait a moment. Now you can click again on "Confirm deletion!" and the category will be deleted.
Tester
How can I add a new tester?
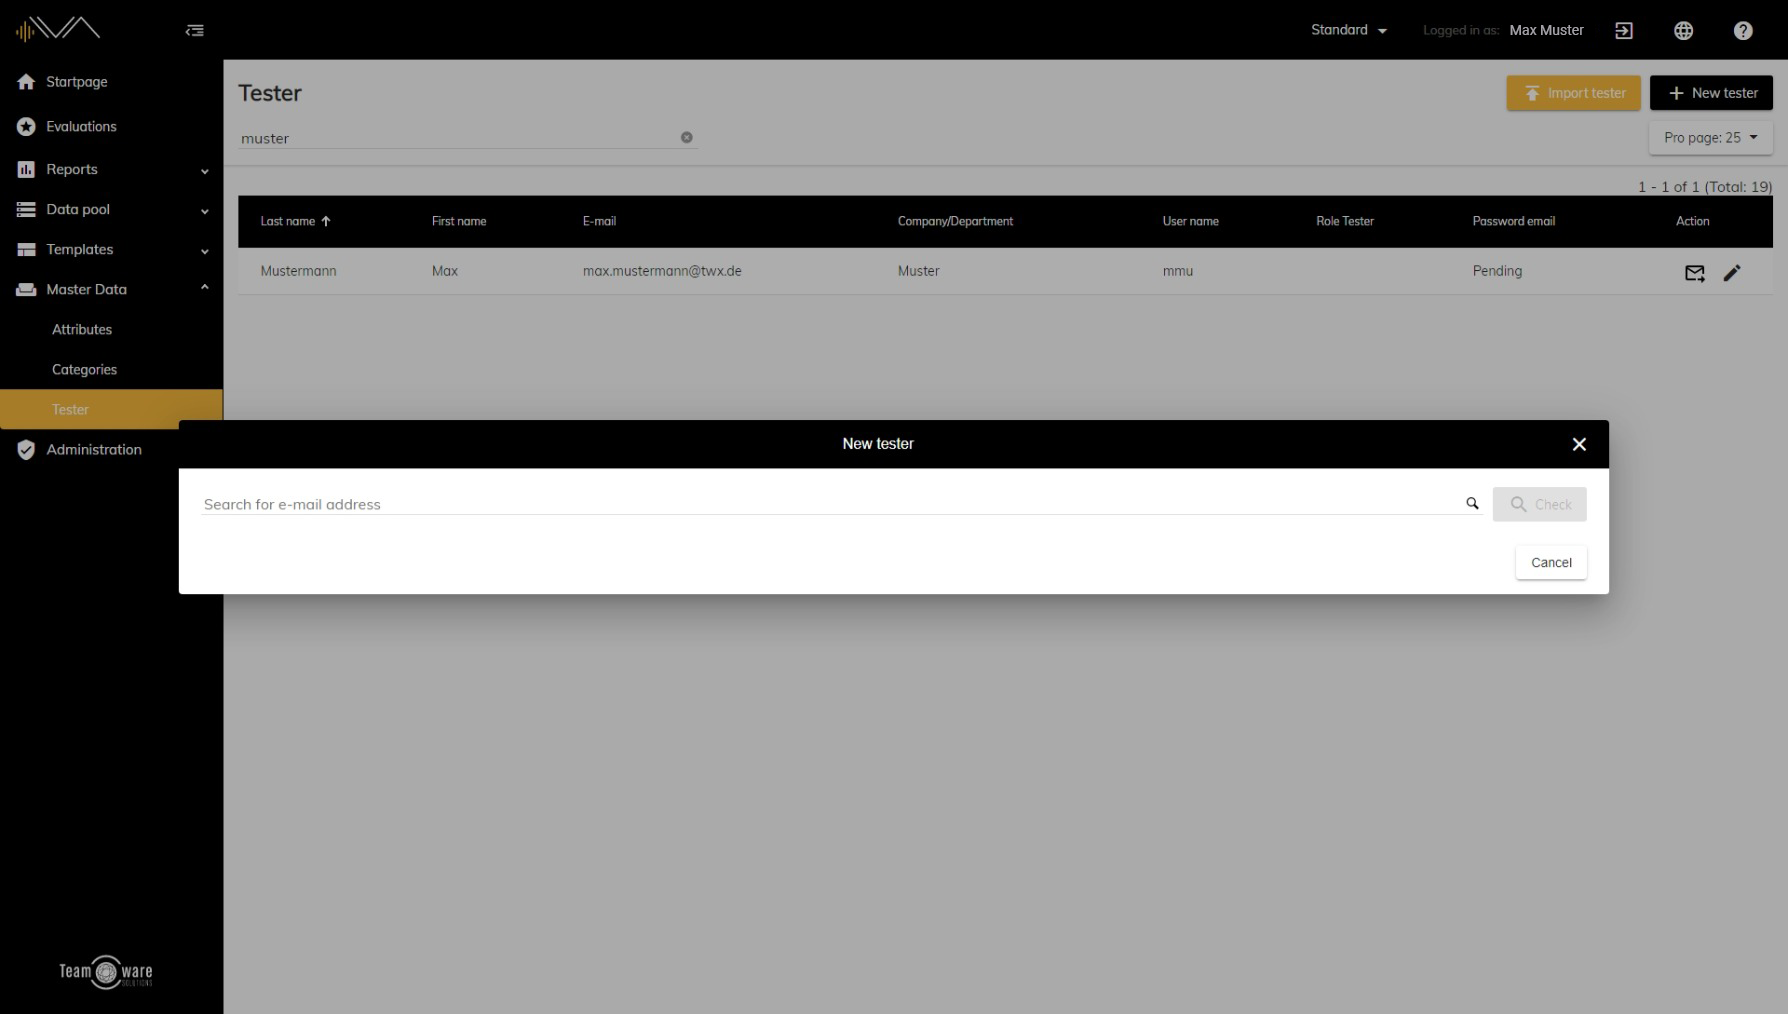
To do this, first click on Master data in the navigation and then on Testers. Now you will see a list of all existing testers. You now have the option to import testers or to manually create a new tester. For the first option, a CSV template is available for download, which you can upload again after filling it with your data. For the second option, a popup opens where you enter the corresponding e-mail address. Then it will be checked if the e-mail is already stored in the system. If not, a new button called "Create new tester" will appear. There you enter the first name, the last name, the e-mail and optionally the company or department. In addition, you can decide whether your own login data should be generated for the user. This is the prerequisite for the tester to be able to log in to the (web) app himself. In this case, you still specify a user name. At the end, remember to press the Save button.
How can I edit a tester?
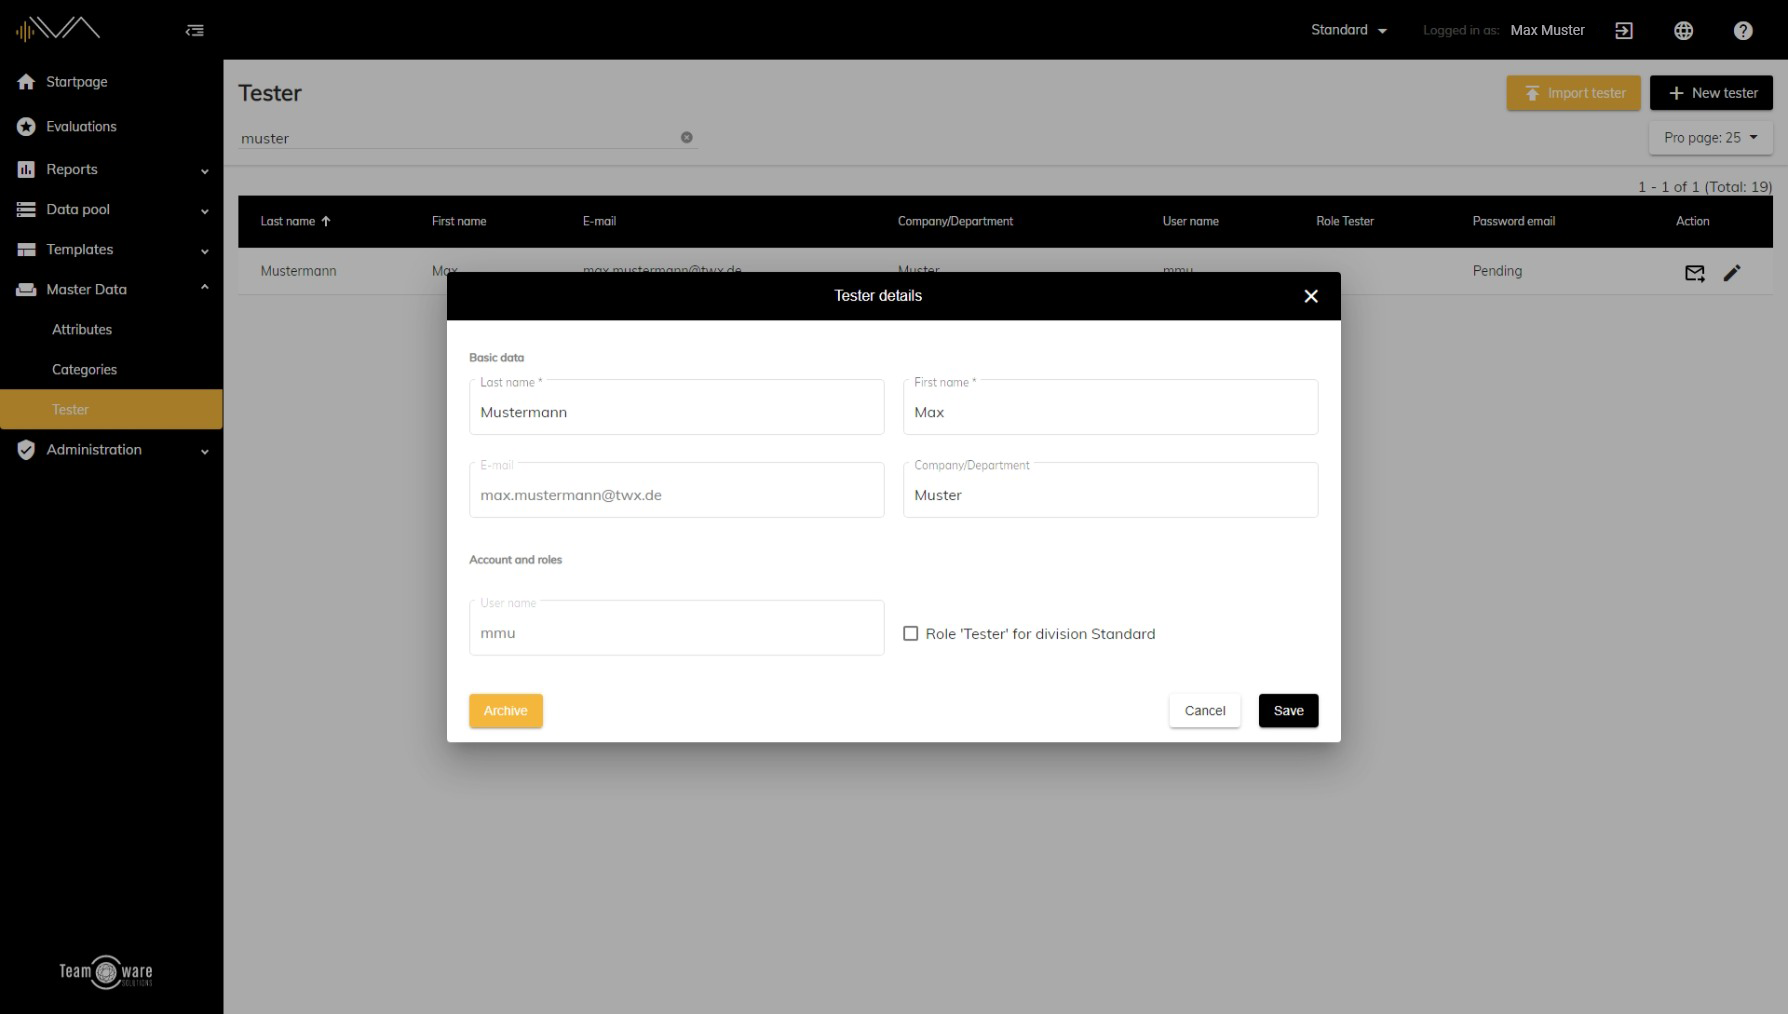
To do this, first click on Master data in the navigation and then on Testers. Now you will see a list of all existing testers. You now have the option of double-clicking on the corresponding line or on the pencil icon at the end of the respective line. With both options a popup opens. There you can change the first name, last name, e-mail and optionally the company or department. At the end, remember to press the Save button. At the end, remember to hit the "Save" button.