Manual: iOS App
- 1.0 Menu
- 2.0 My Account
- 3.0 Messages
- 4.0 Instances
- 5.0 Tests
- 6.0 Test Objects
- 7.0 Settings
- 8.0 Overview
- 9.0 Instructions
- 10.0 Feedback
- 11.0 Questionnaires
- 11.1 Questionnaire Overview
- 11.2 Starting a questionnaire
- 11.3 Selecting an alternative reviewer
- 11.4 Editing and submitting a questionnaire
- 11.5 Deleting answers
- 12.0 Driving Mode
- 13.0 Speech-to-Text
- Siri use in IVA
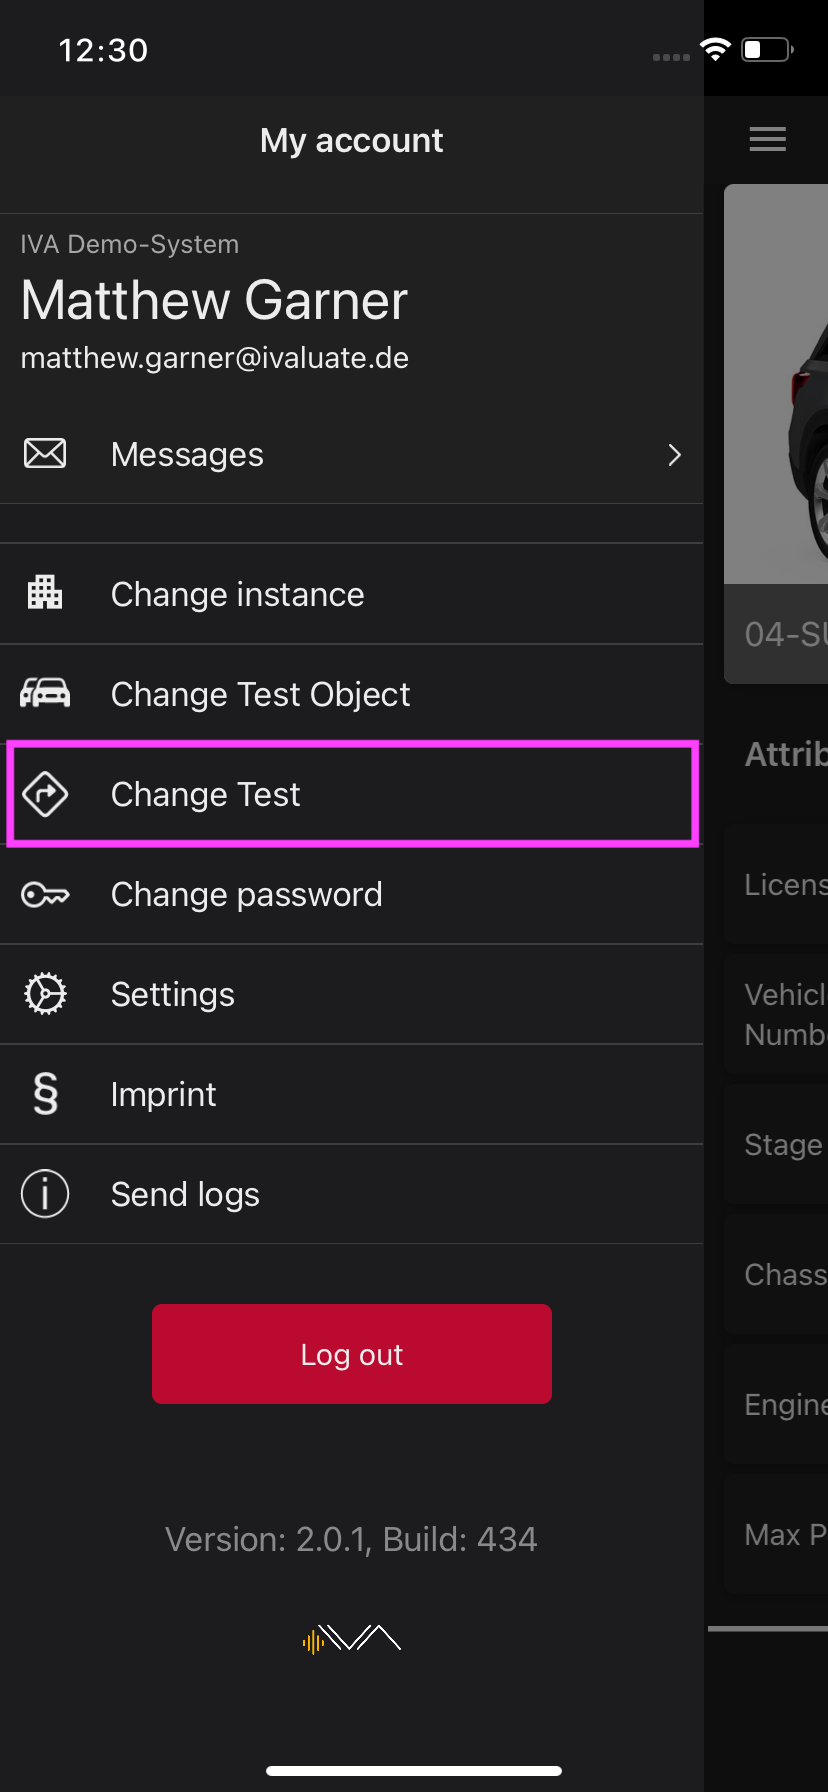
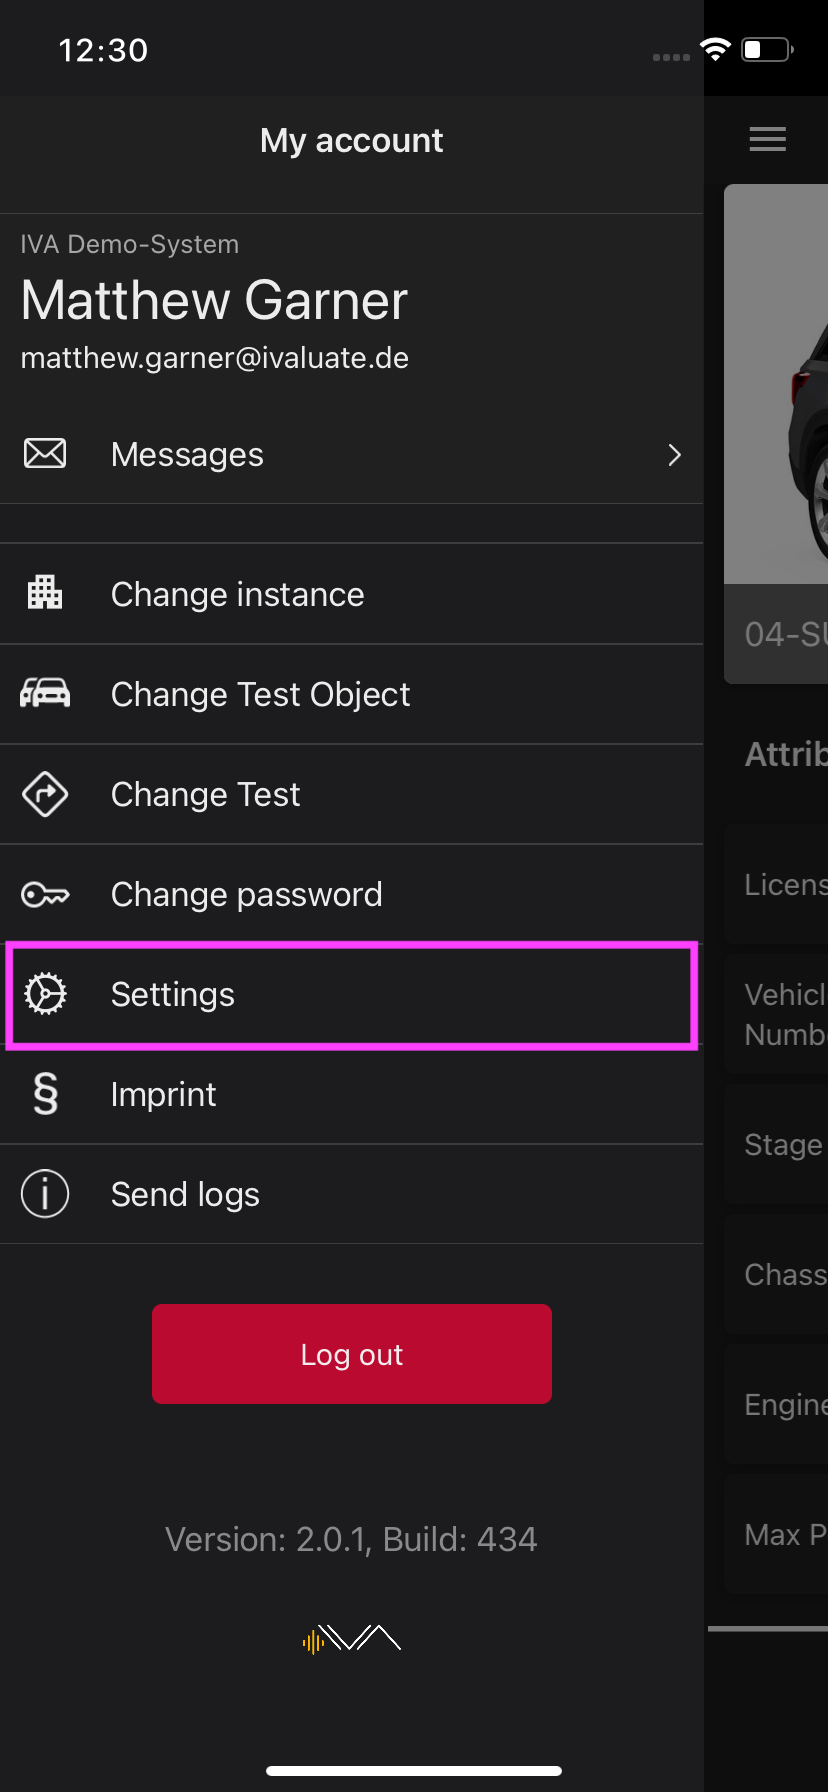
1.0 Menu
1.1 Menu items
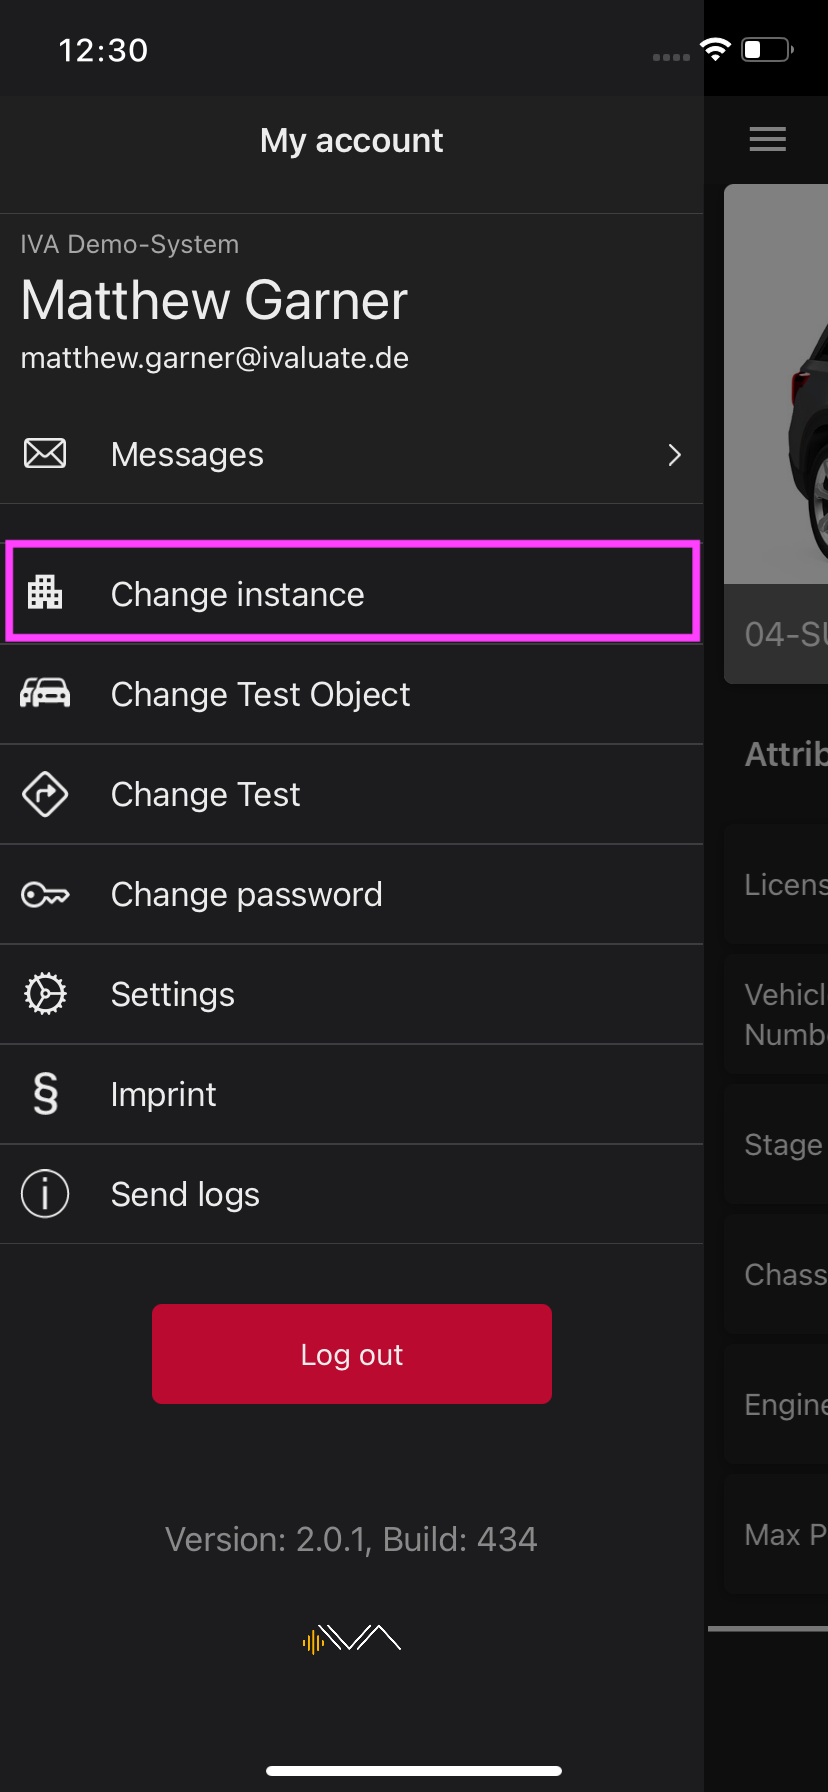
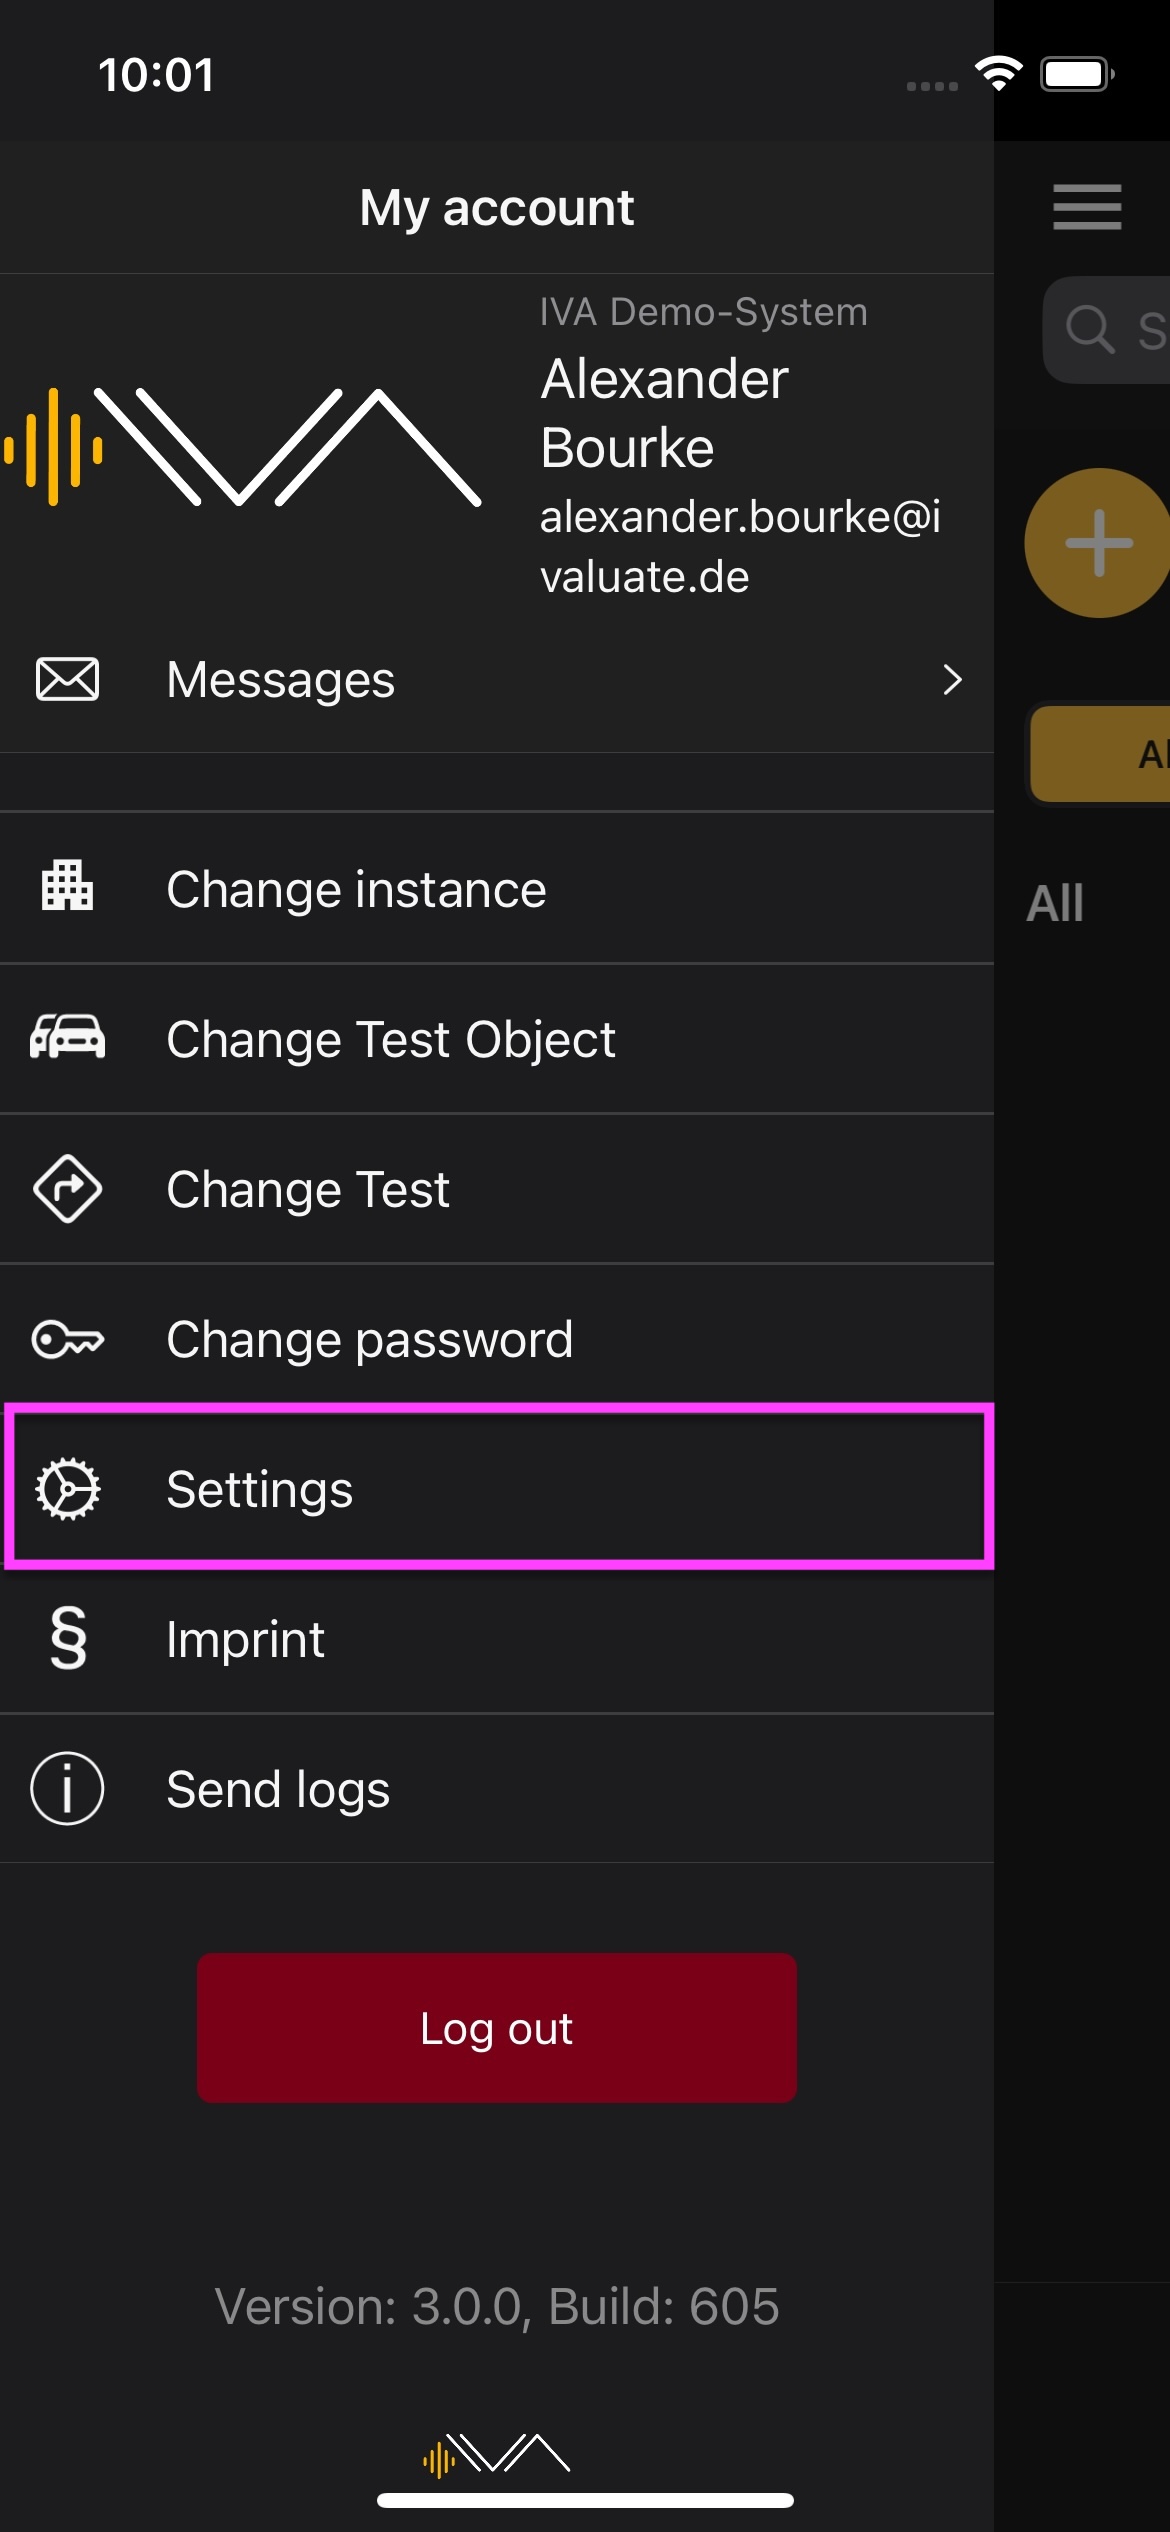
- My account
- Change instance
- Change test object
- Change test
- Change password
- Settings
- Imprint
- Send logs
You can also log out of the app here using the “Logout” button.
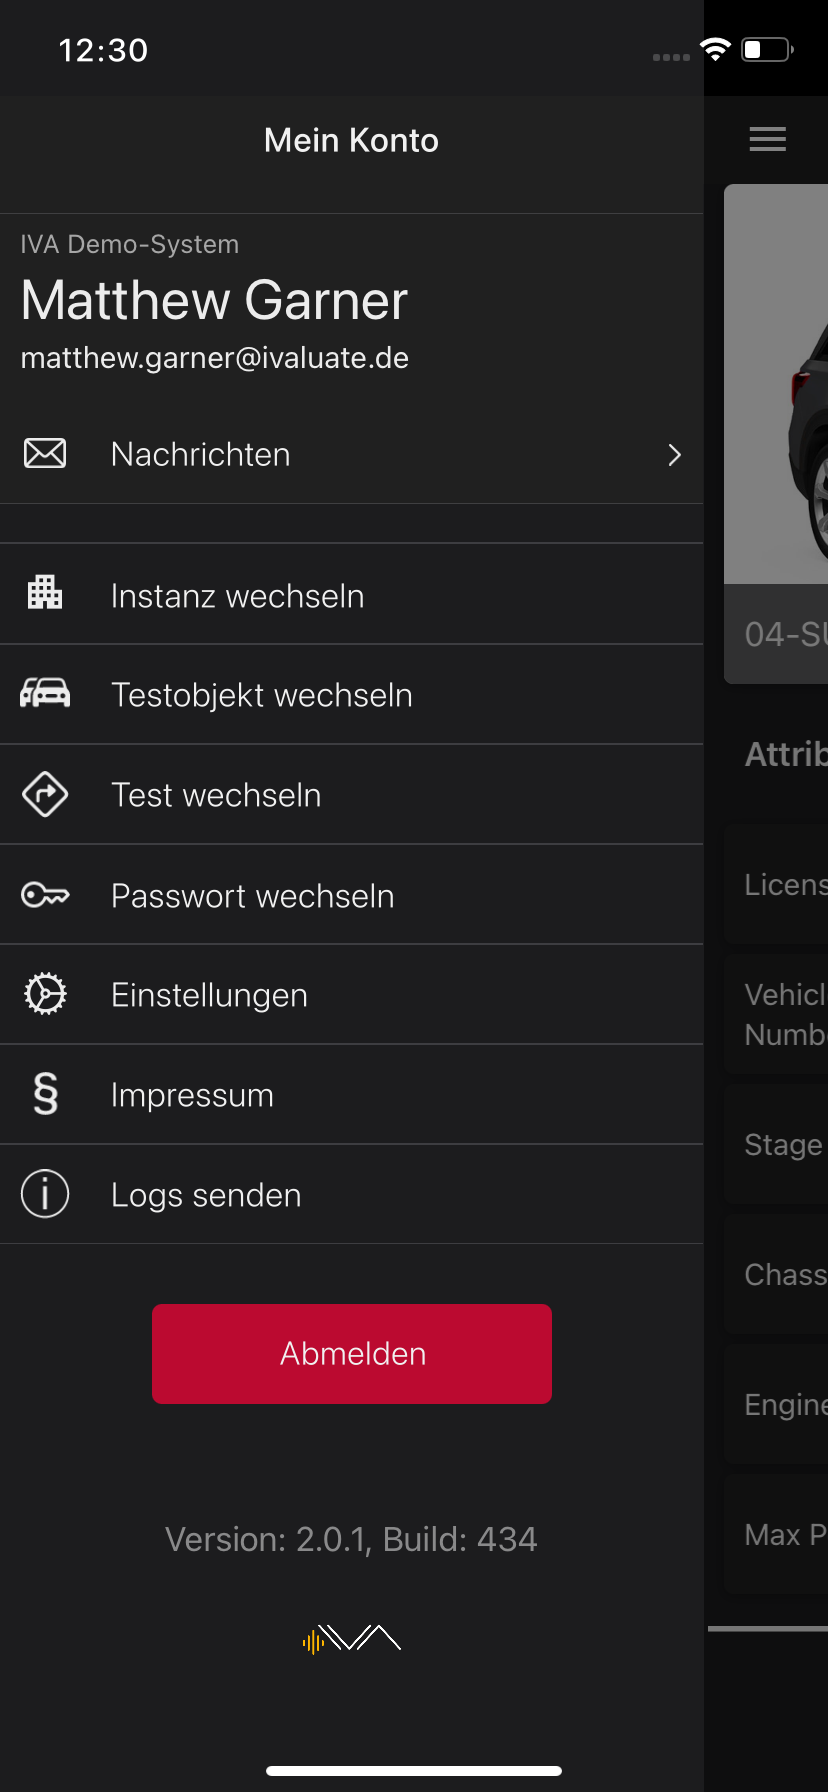
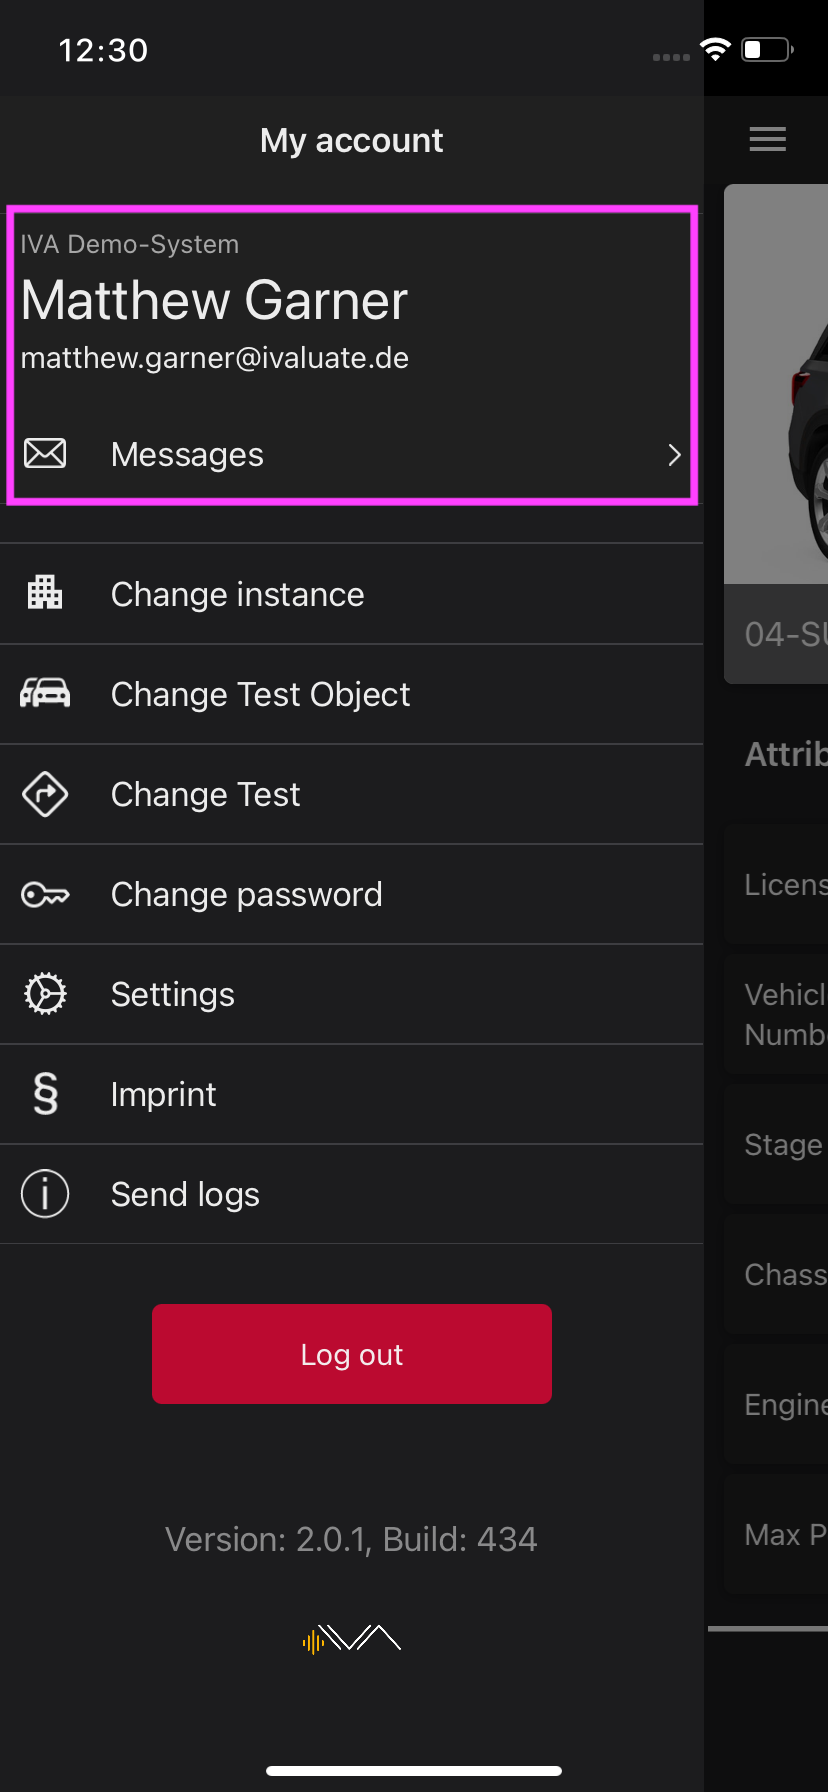
2.0 My Account
2.1 General Information
The following information can be found in the menu under “My account”:
- Name of the instance
- Name of the user
- E-mail address of the user
- Messages
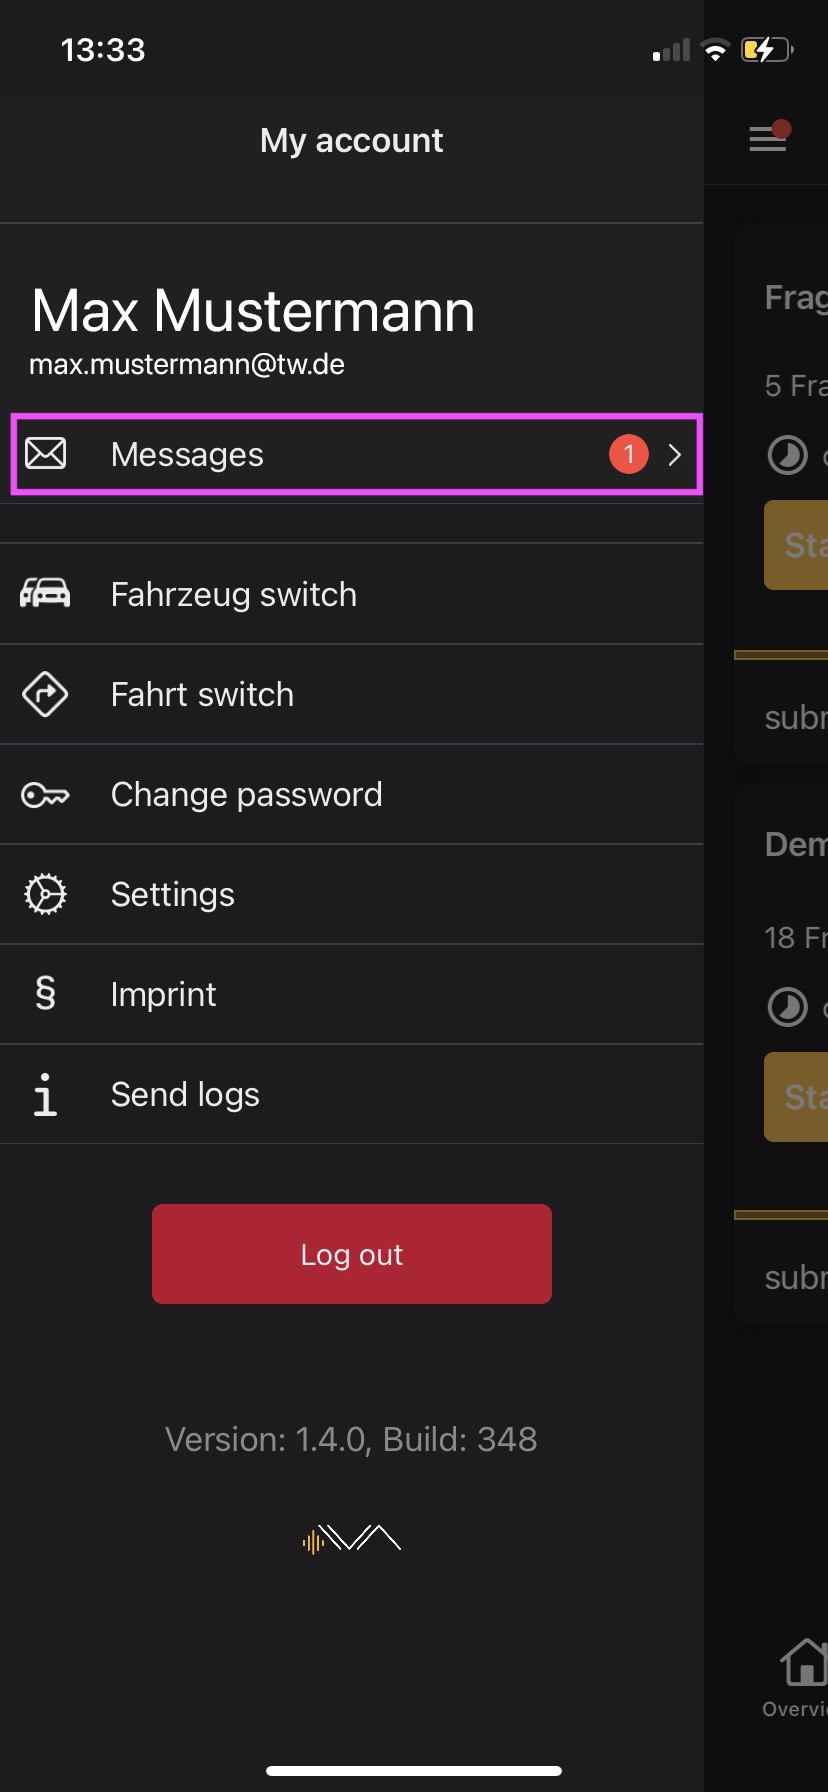
3.0 Messages
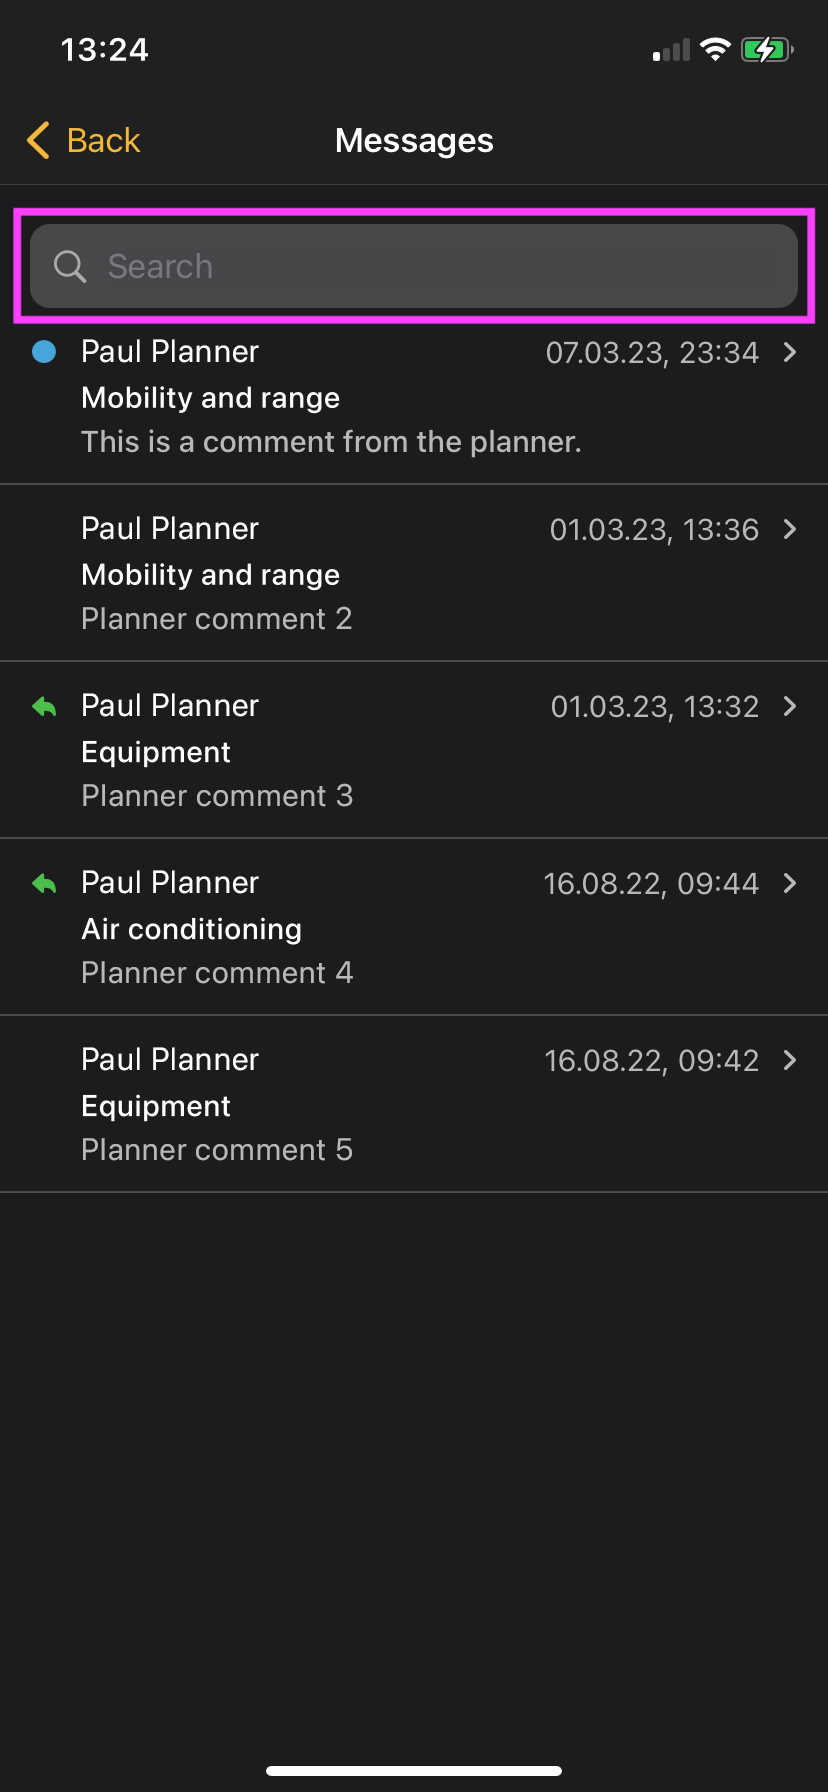
3.1 Receive and read messages
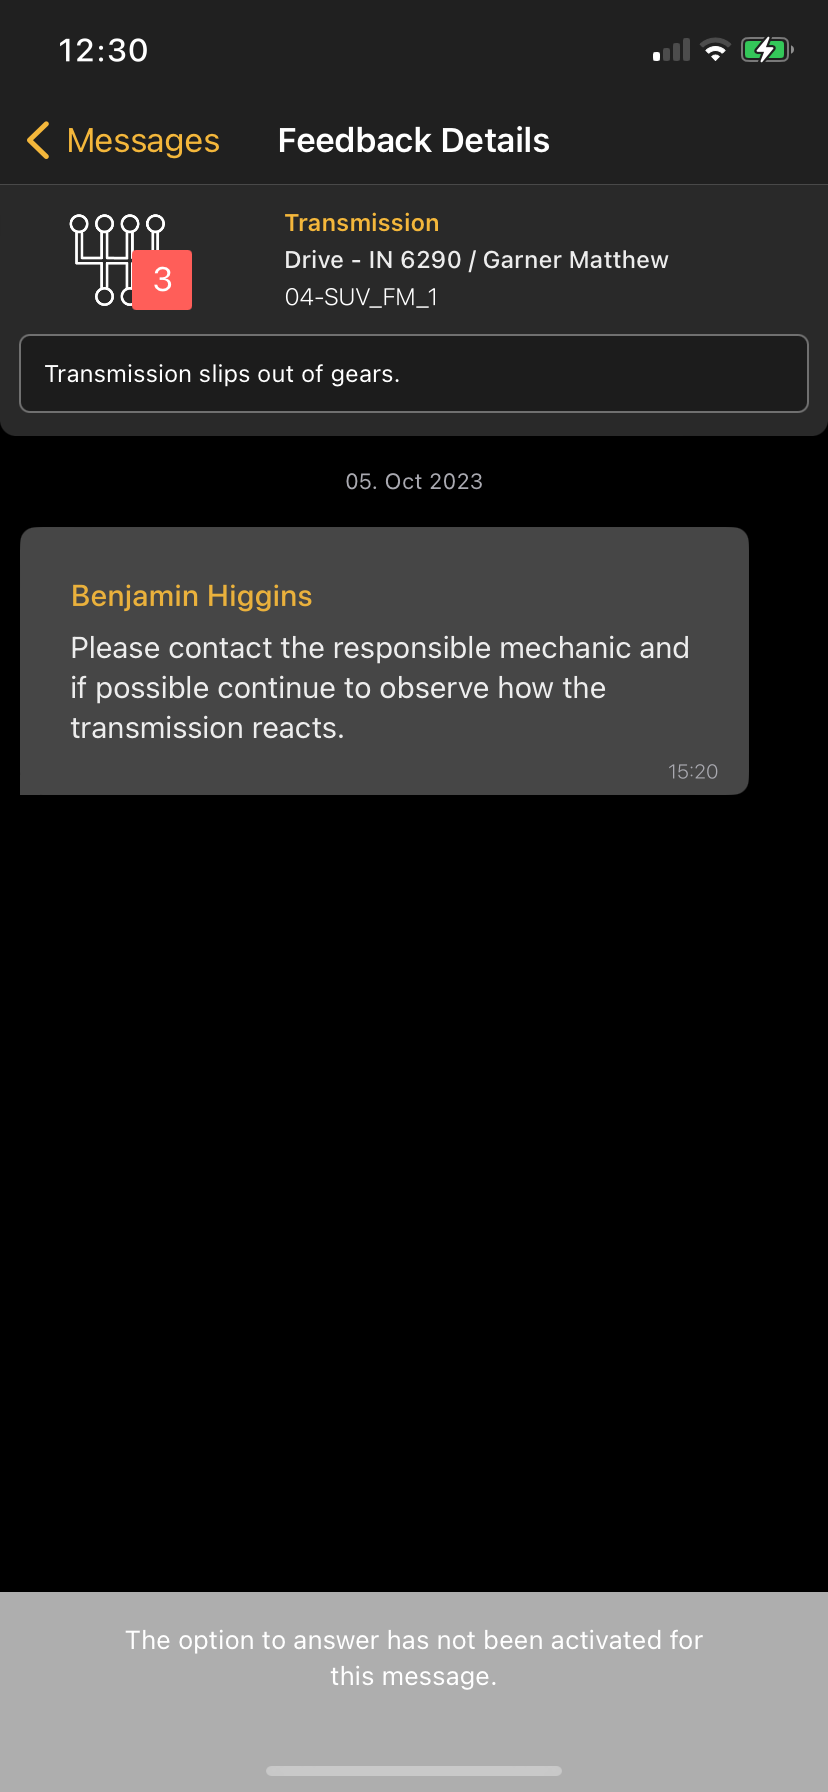
After a Tester creates a feedback, planners can add comments and communicate with the tester through them. All comments can be viewed via the menu under "Messages” at any time.
If there are unread messages, this is indicated by a red badge on the menu and message buttons.
![]()
3.2 Status of Messages
Within the message list, the statuses of messages are displayed using various icons on the left edge of the display:
- Blue “dot” icon: Message not yet read by the tester.
- Green “arrow” icon: Response from the tester has been successfully sent and arrived in the Control Center
- Gray “arrow” icon: Response from the tester has been sent, but has not yet arrived in the Control Center
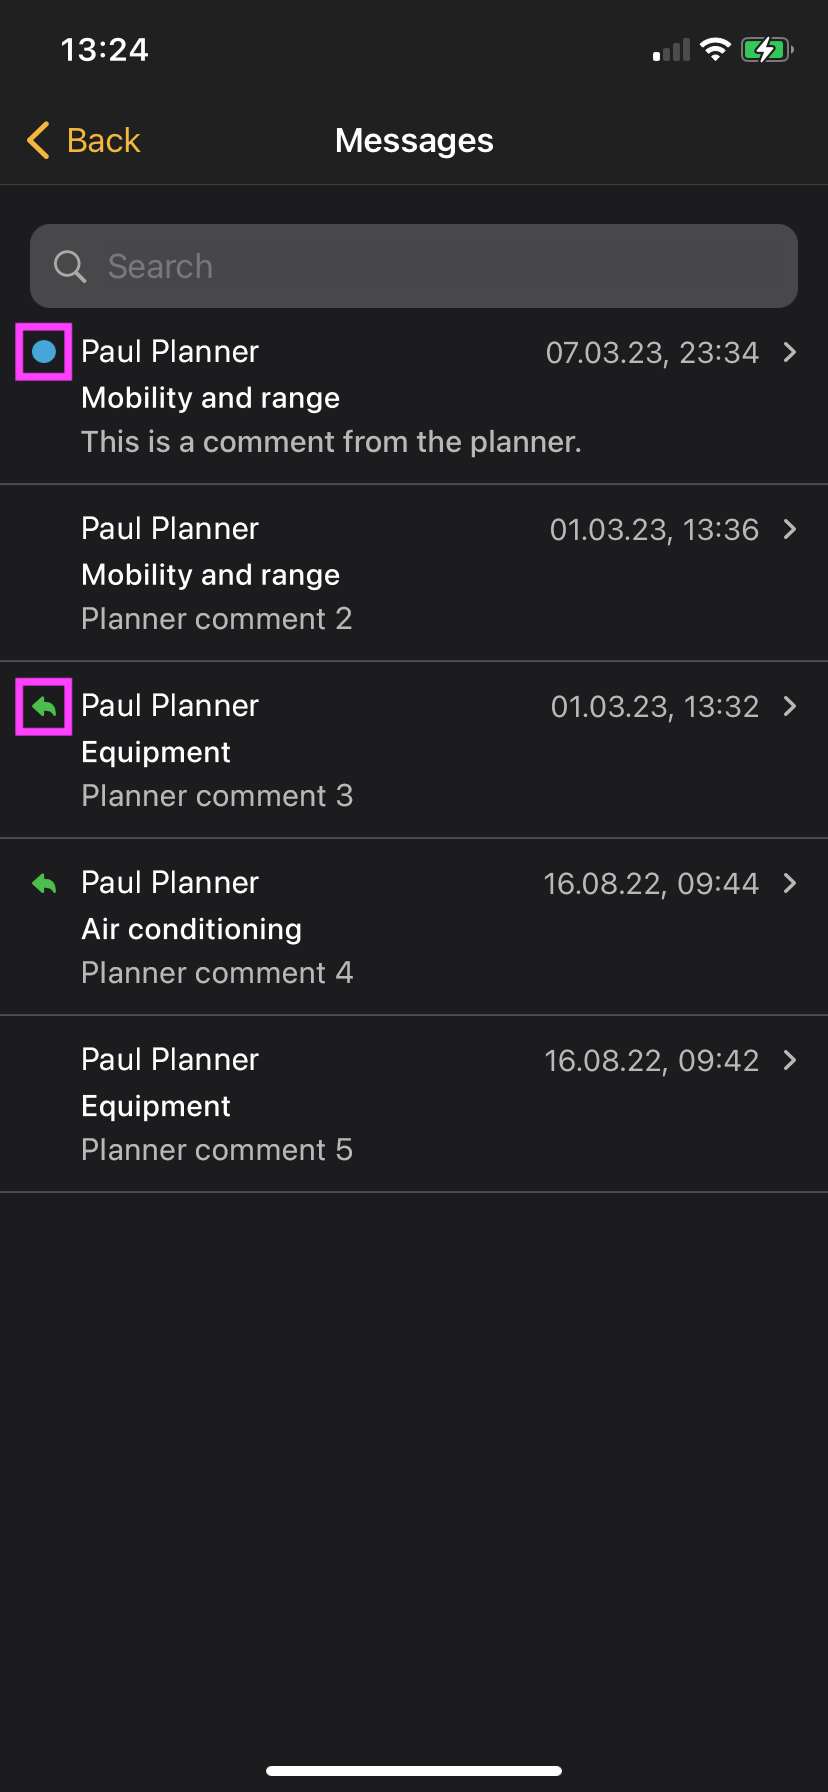
3.3. Search messages
Within the message list, you can search for specific messages using the search bar.
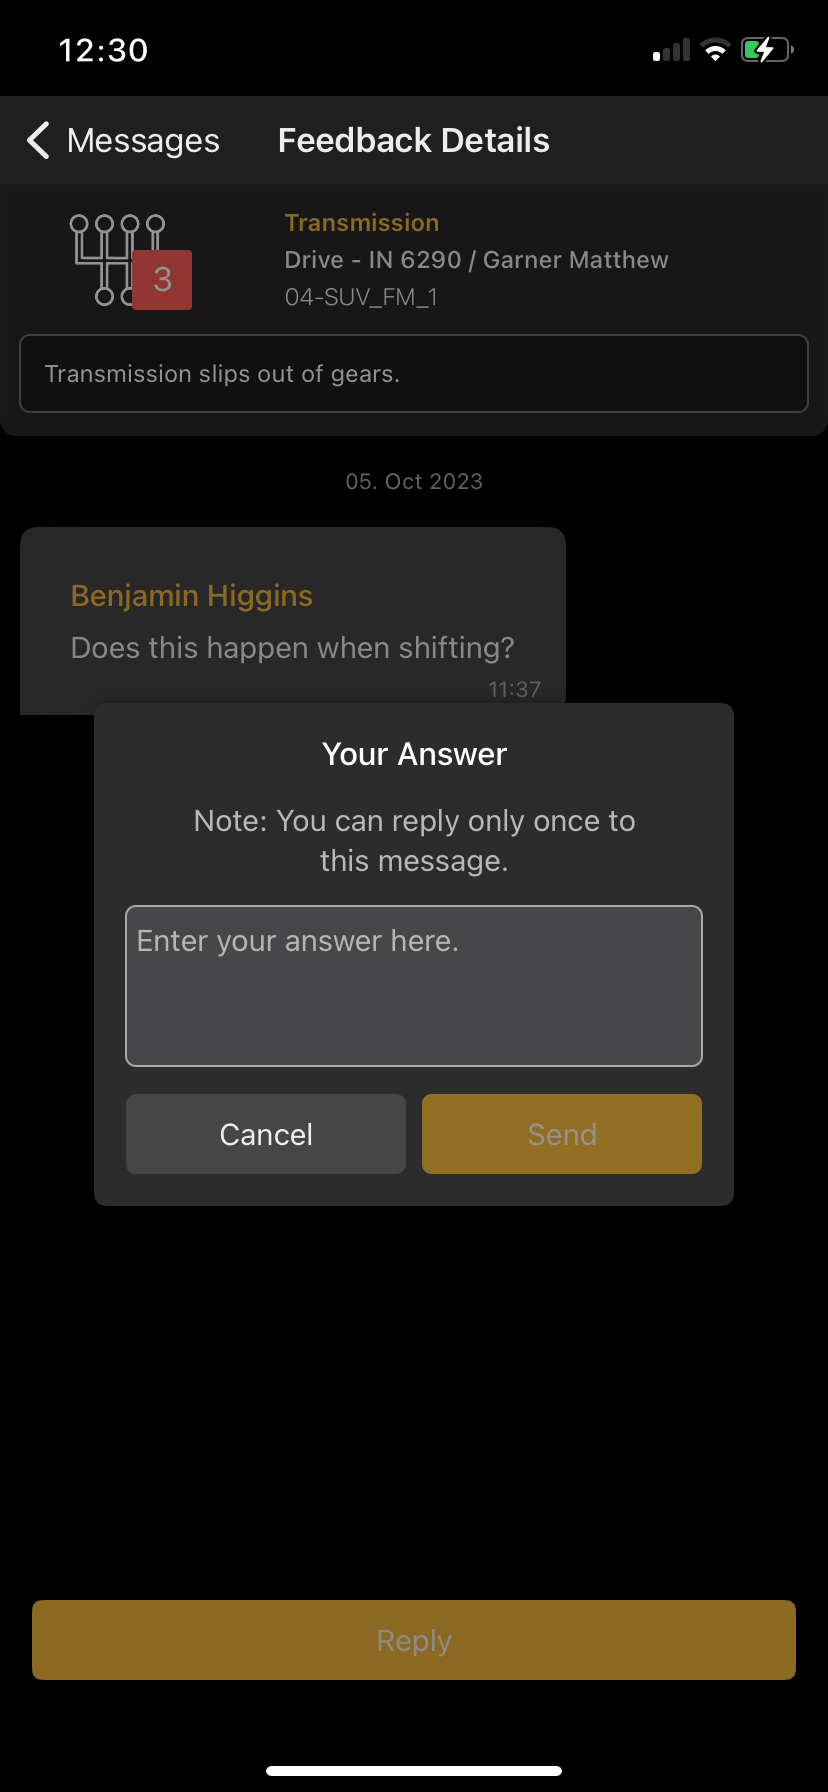
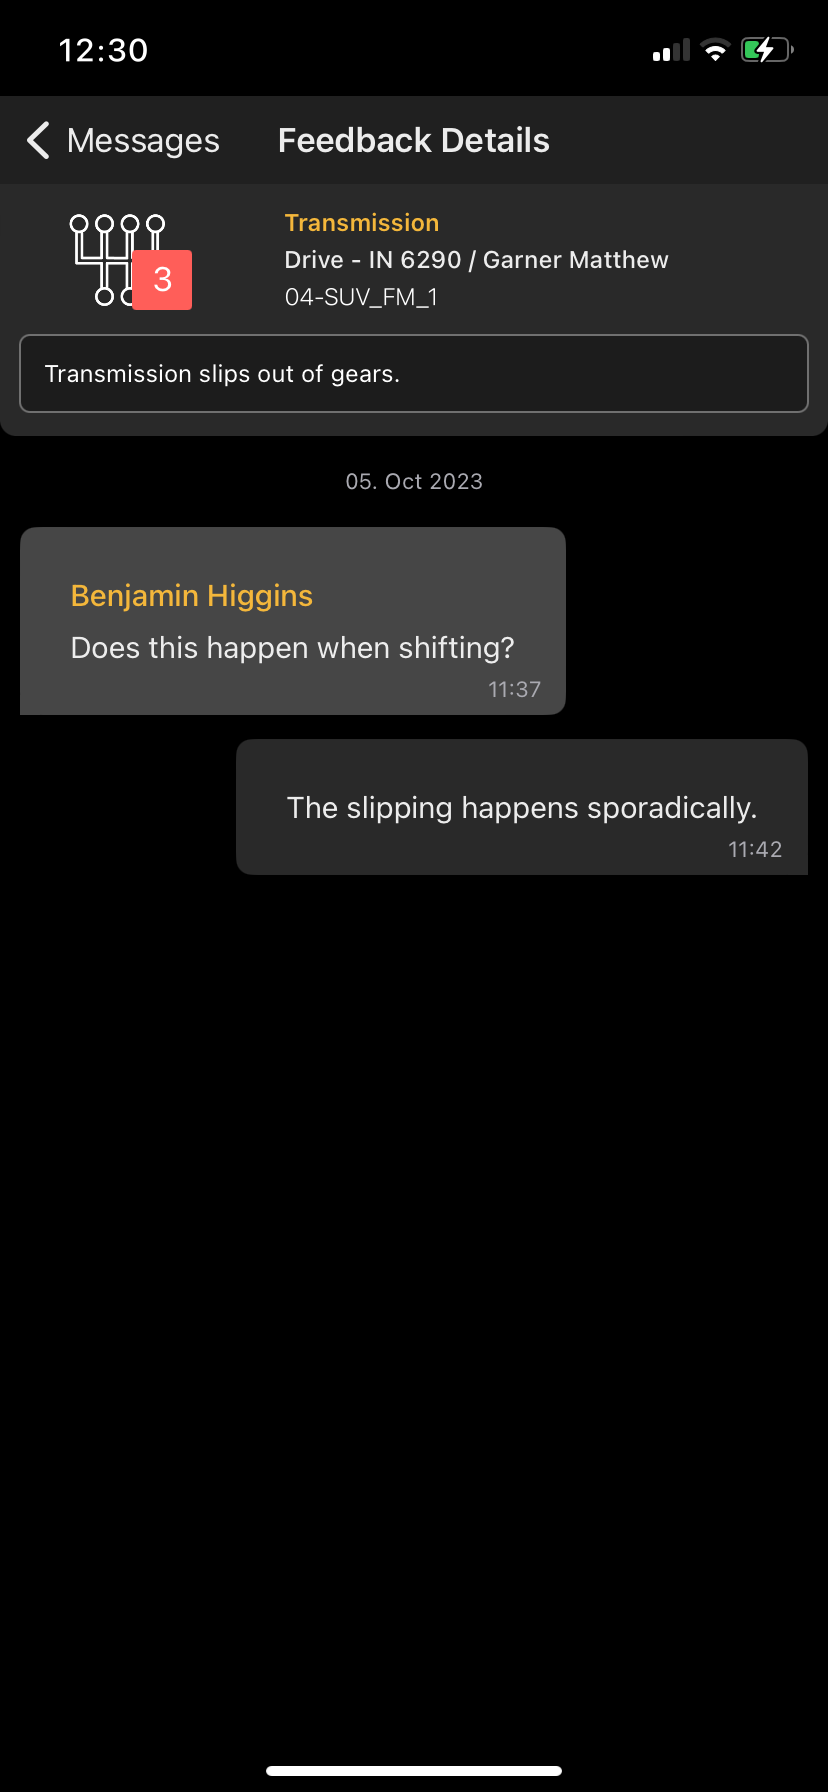
3.4 Replying to messages
The tester can only reply to a comment if the planner has previously specified this. If the planner has given the option to reply, there is a reply button below the message history, which the tester can use to write his reply. If the planner has not enabled the reply option, you will recognize this by a info text at the very bottom stating "The reply option was not given for this message". Each comment can be replied to only once at maximum.
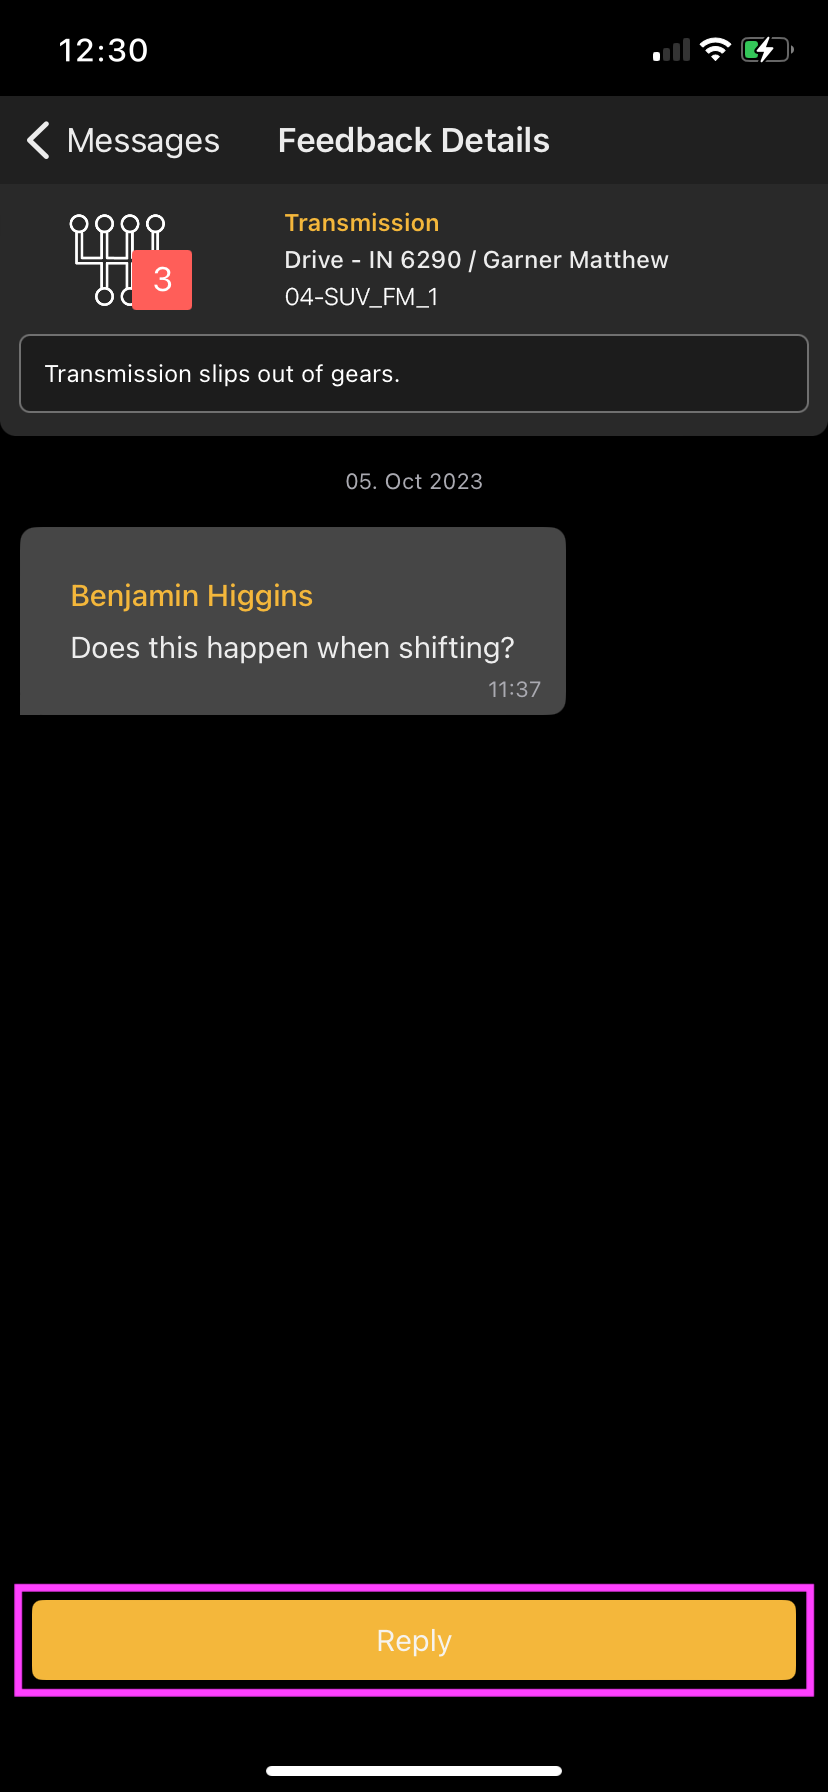
If the planner has not released the reply option, you can tell by the information displayed at the bottom “The reply option was not given for this message”.
4.0 Instances
4.1 Change instance
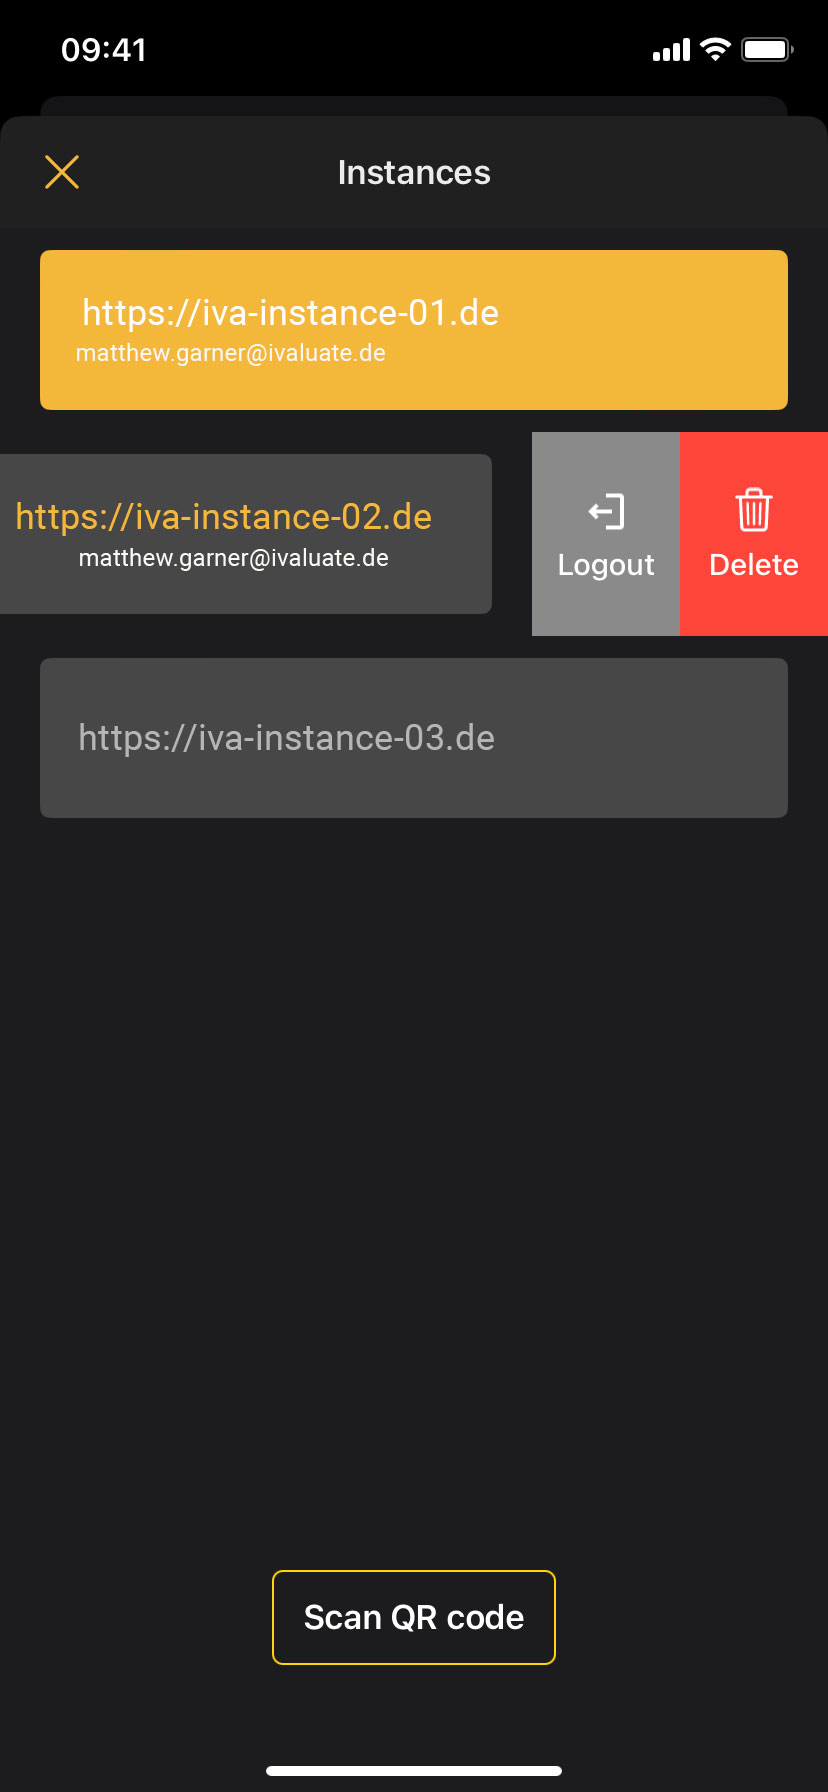
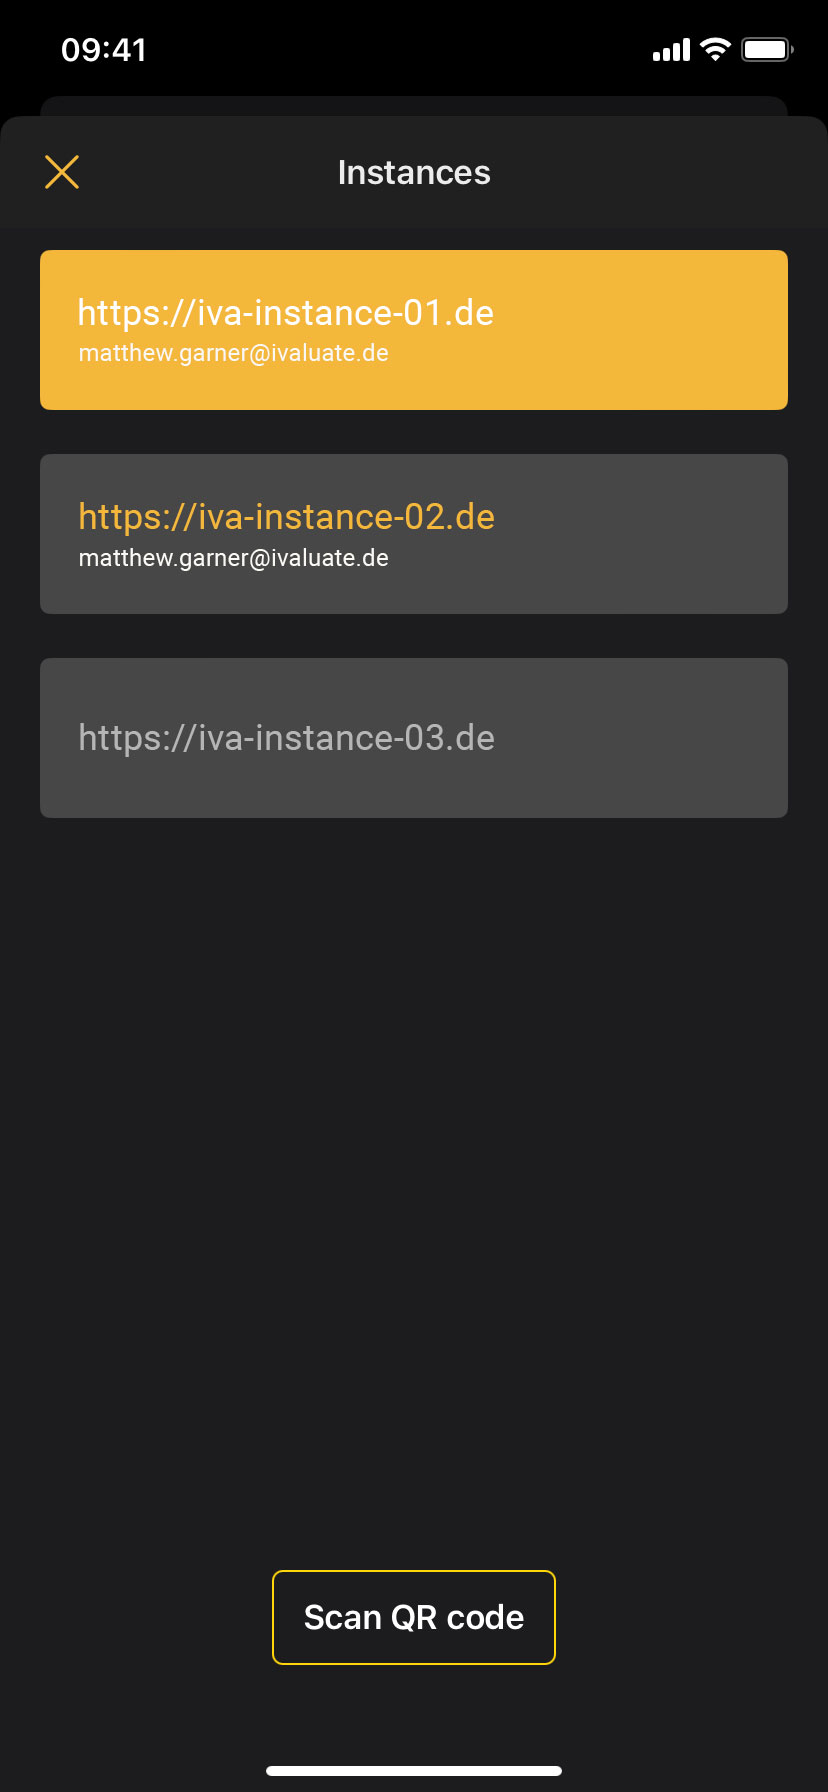
The overview of instances can be accessed by clicking on the menu icon. The menu item “Change instances” can be found directly under the user's account data.
Clicking on this menu item opens a new pop-up with the list of available instances. Each instance is displayed in a tile. At the bottom of the pop-up there is a “Scan QR code” button that enables you to scan a code provided by the planer.
4.2 States of instances
Click on the “Change instance” menu item to open a new pop-up with the list of available instances. Each instance is displayed in a tile.
At the bottom of the pop-up is a “Scan QR code” button, which you can use to scan codes provided by a planner. You can also use the photo app to scan a QR code and switch instances.
Each instance is displayed in a gray or yellow tile, depending on its status.
Instances can have the following states:
- Active (yellow tile, only one instance at a time): Instance you're currently logged into and that is selected
- Inactive (gray tiles, instance name in yellow): Instance you're logged into but isn't currently selected
- Logged out (gray tile, instance name in gray): Instance that you're currently not logged into
4.3 Instance tiles
An instance tile contains:
- Address of the instance
- E-mail address of the user
Various actions are possible via the instance tiles. To perform an action, you must swipe to the left on the tile.
The following actions are possible:
- Log out of an active instance
- Log out from an inactive instance
- Delete an inactive instance
- Delete a logged off instance
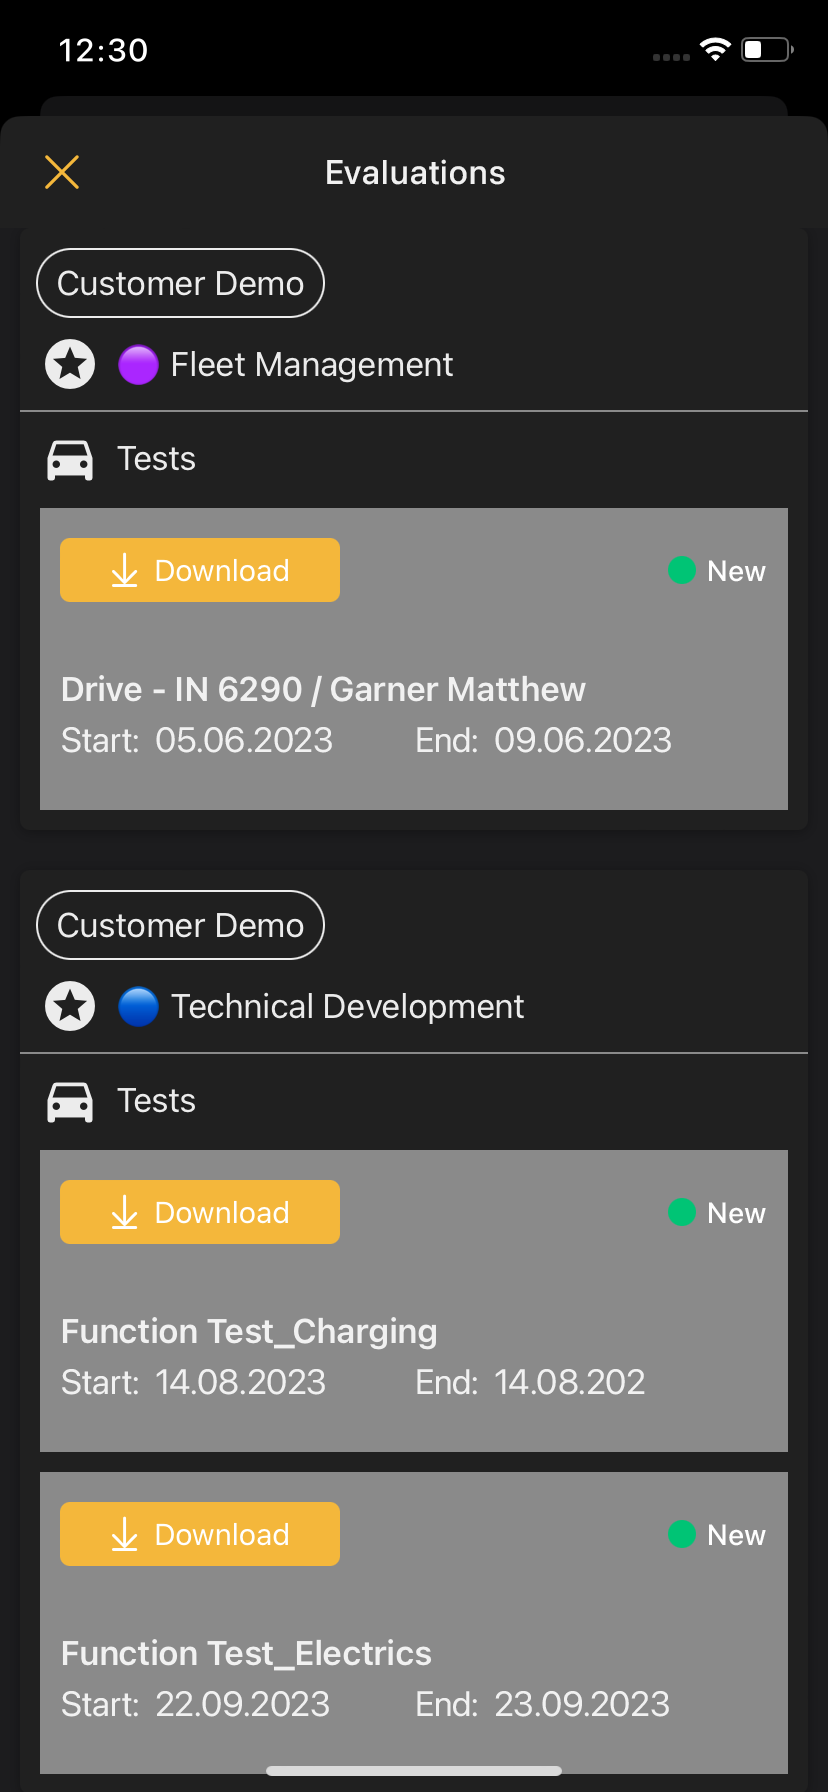
5.0 Tests
5.1 Change tests
Tests are the starting point for your work with IVA. The term "test" is variable and can be adapted and changed by the planner. Tests contain at least one test object and provide the framework for their evaluation.
A list of all tests is displayed under the menu item “Change test”. Select a test to evaluate relevant test objects. You select a test by clicking on the corresponding tile. From here, you will be taken to the list of all test objects associated with the test. You can switch between the different tests as required. The data of the current assessments are retained and saved and can be called up at any time.
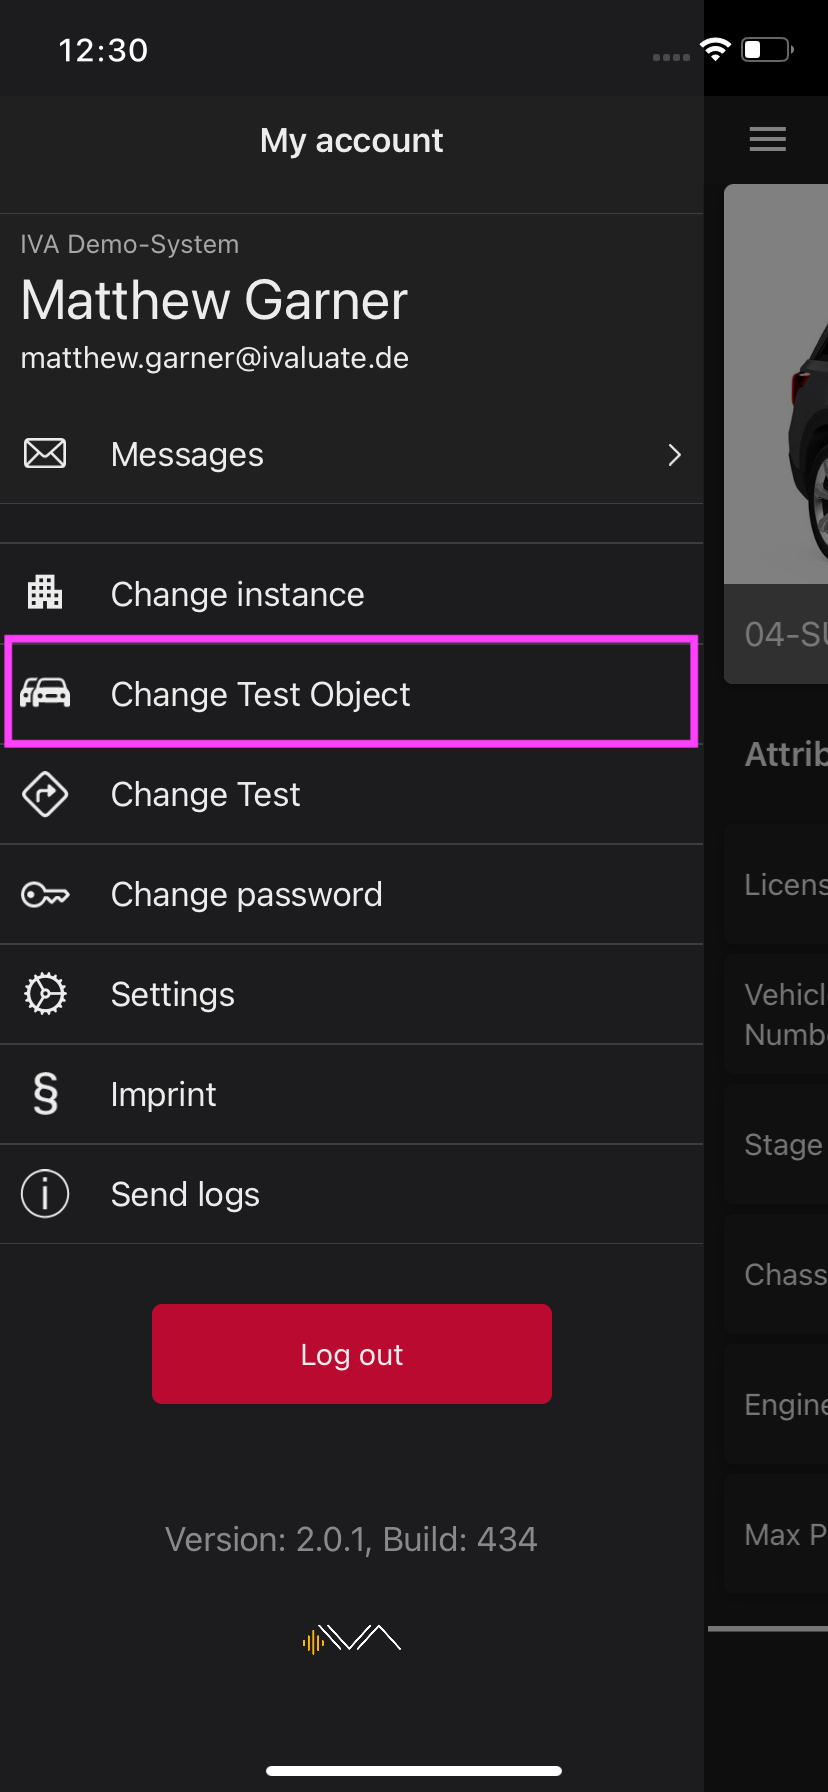
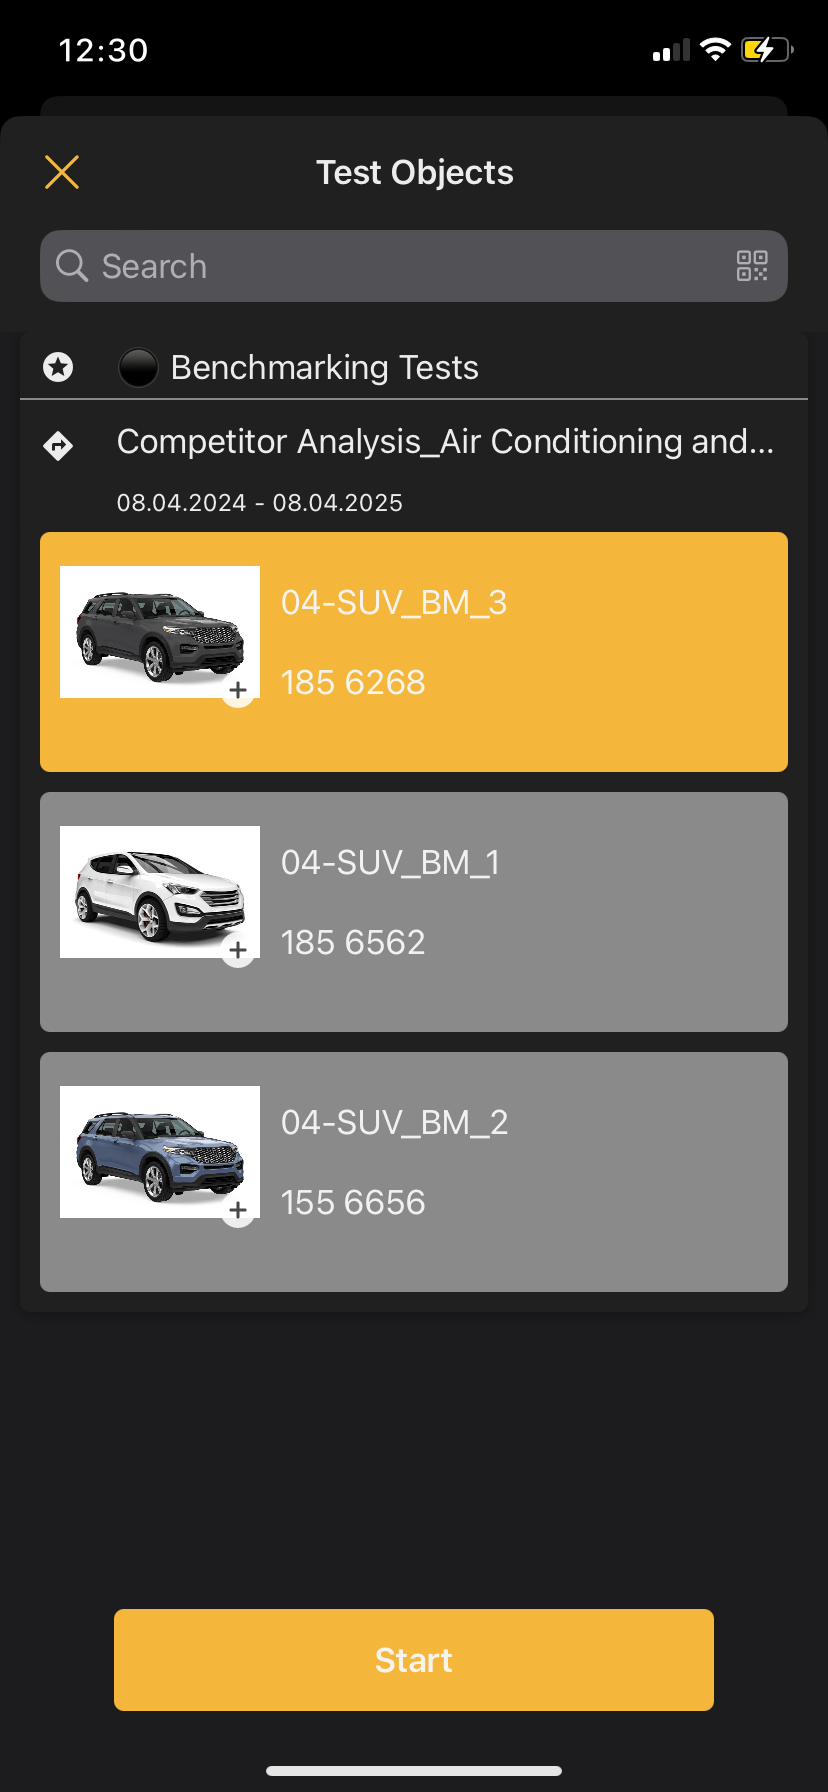
6.0 Test Objects
6.1 Change Test Object
Test objects are the subject of feedback and ratings given by the tester via the app. The term "test object" is variable and can be adapted and changed by the planner. Test objects are always part of a test. Each test contains at least one test object.
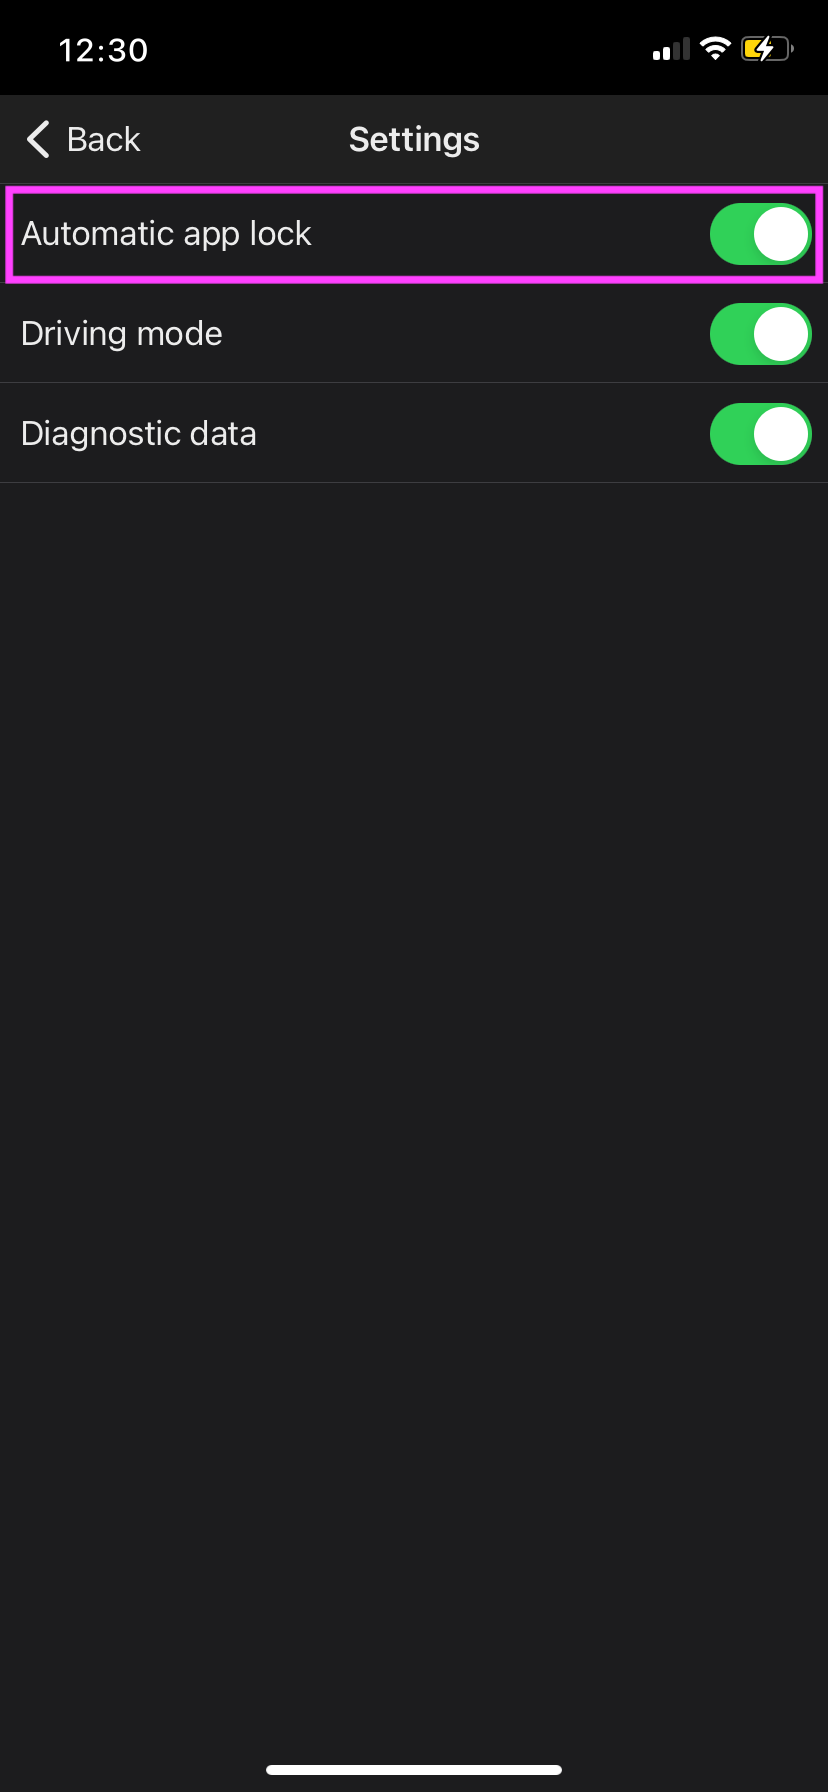
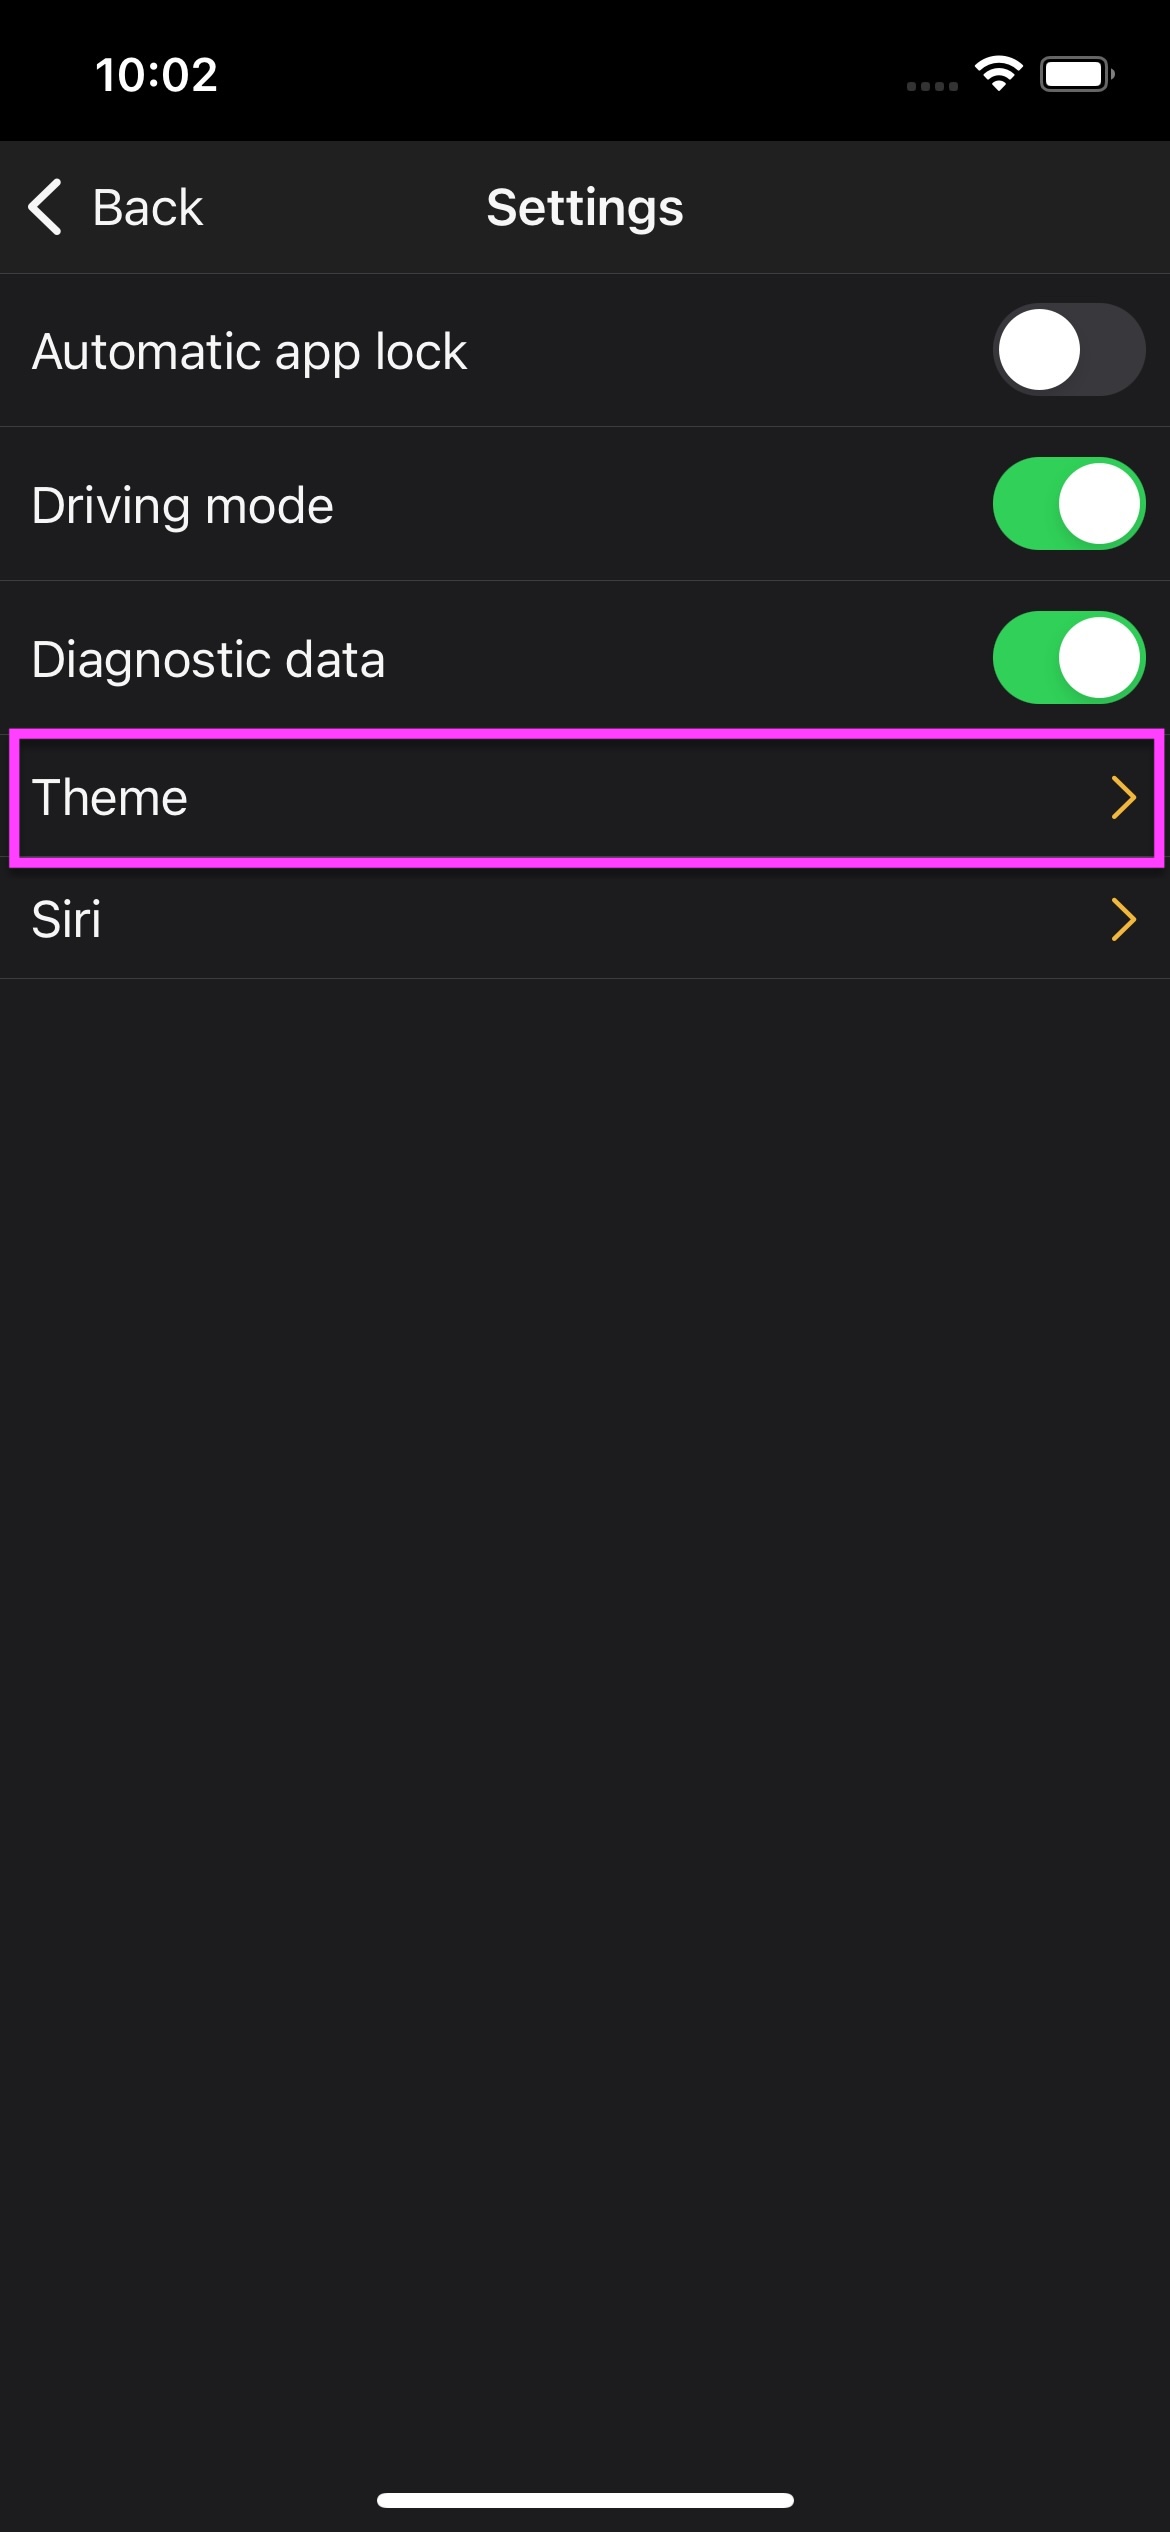
7.0 Settings
7.1 Automatic App Lock
The automatic app lock offers additional protection for your data. After activating this function, the app locks automatically after a certain period of inactivity and after closing the app.
Unlock the app using the device code you have set yourself or using your Face ID or Touch ID. To do this, you must first enable the use of Face ID or Touch ID via your device settings.
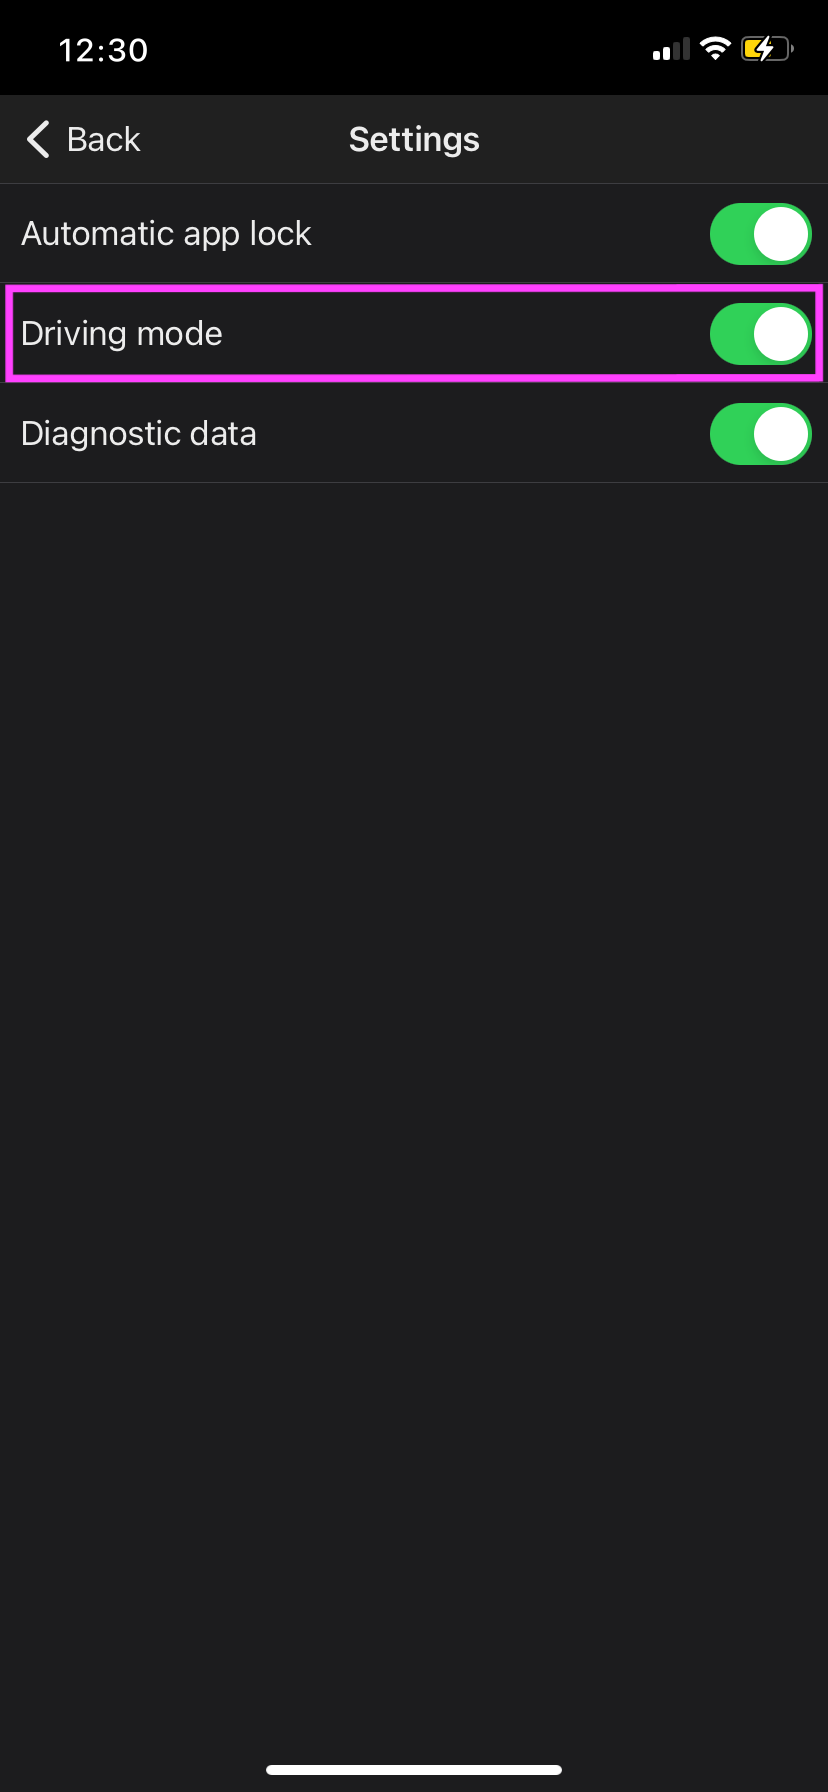
7.2 Driving Mode
After activating this function, the driving mode is started automatically when you are in a moving vehicle.
Driving mode allows you to use IVA safely and efficiently while driving as you can enter feedback directly and hands-free via the speech-to-text function.
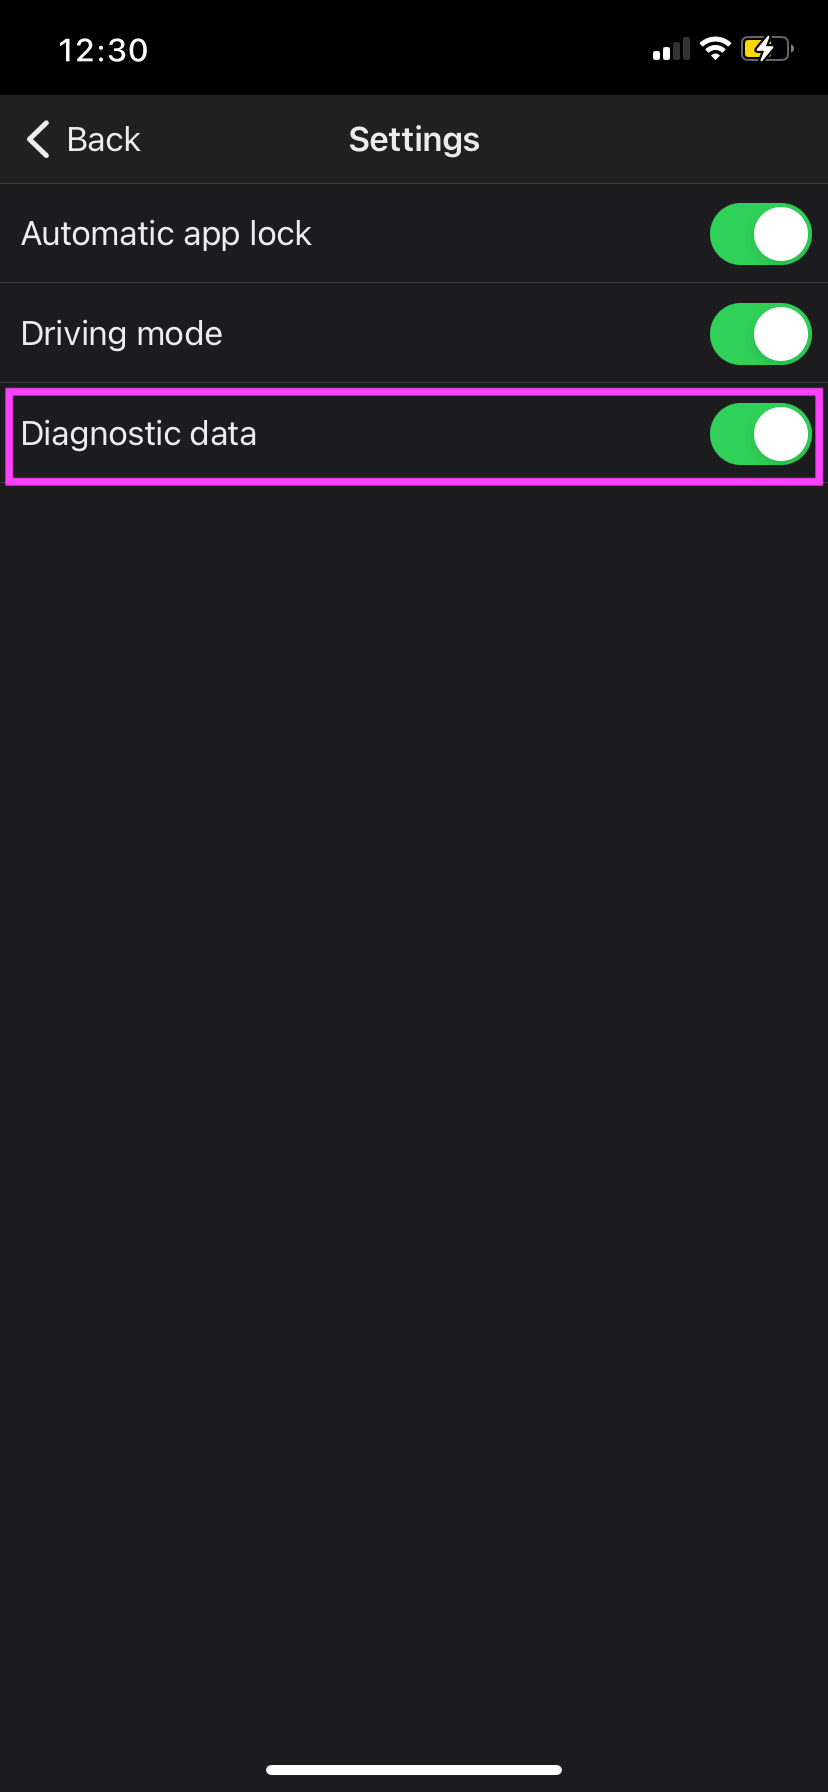
7.3 Diagnostic Data
By activating this function, you enable us to use data from your IVA app and your device for analysis purposes. With the help of this analysis data, for example information on system errors, we can continuously improve IVA and identify specific errors in the app.
- Open the settings of your device.
- Tap on “Privacy” in the left-hand column
- In the right-hand column, tap on “Analysis & improvements”
- Activate the “Share iPad analysis” toggle in the right-hand column
- Activate the “Share with app developers” toggle in the right-hand column
7.4 Light Theme
After activating this feature, the appearance will change depending on the device.

By clicking on it, the following three tabs will appear:
- Automatic – the appearance adjusts to the iOS device's settings.
- Light
- Dark
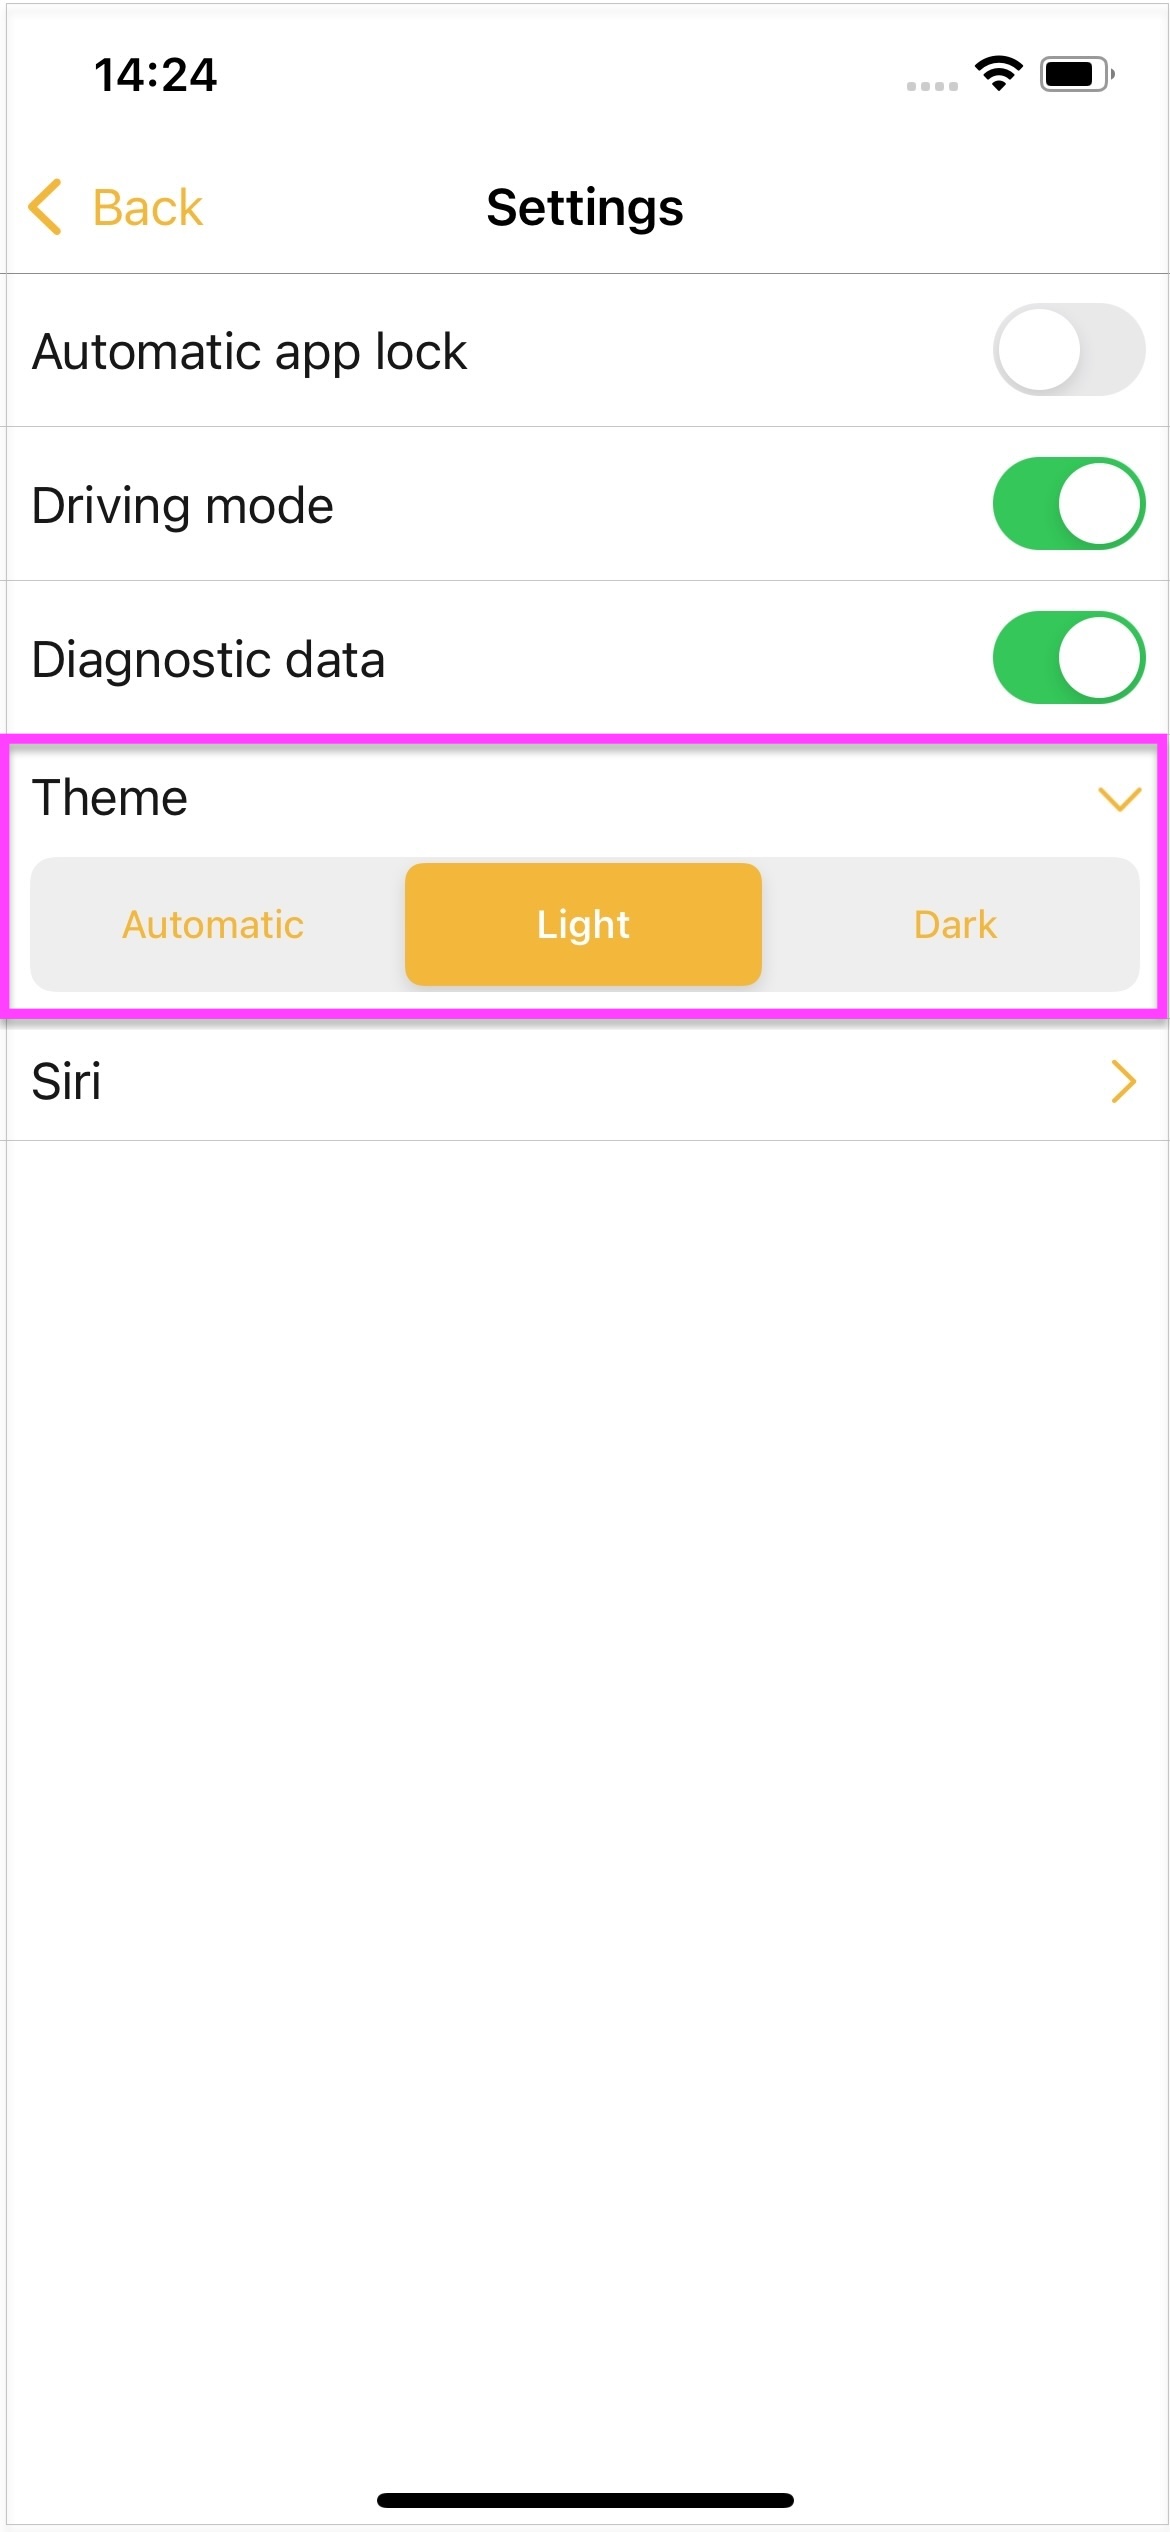
After selecting a tab, the appearance of the app will change."
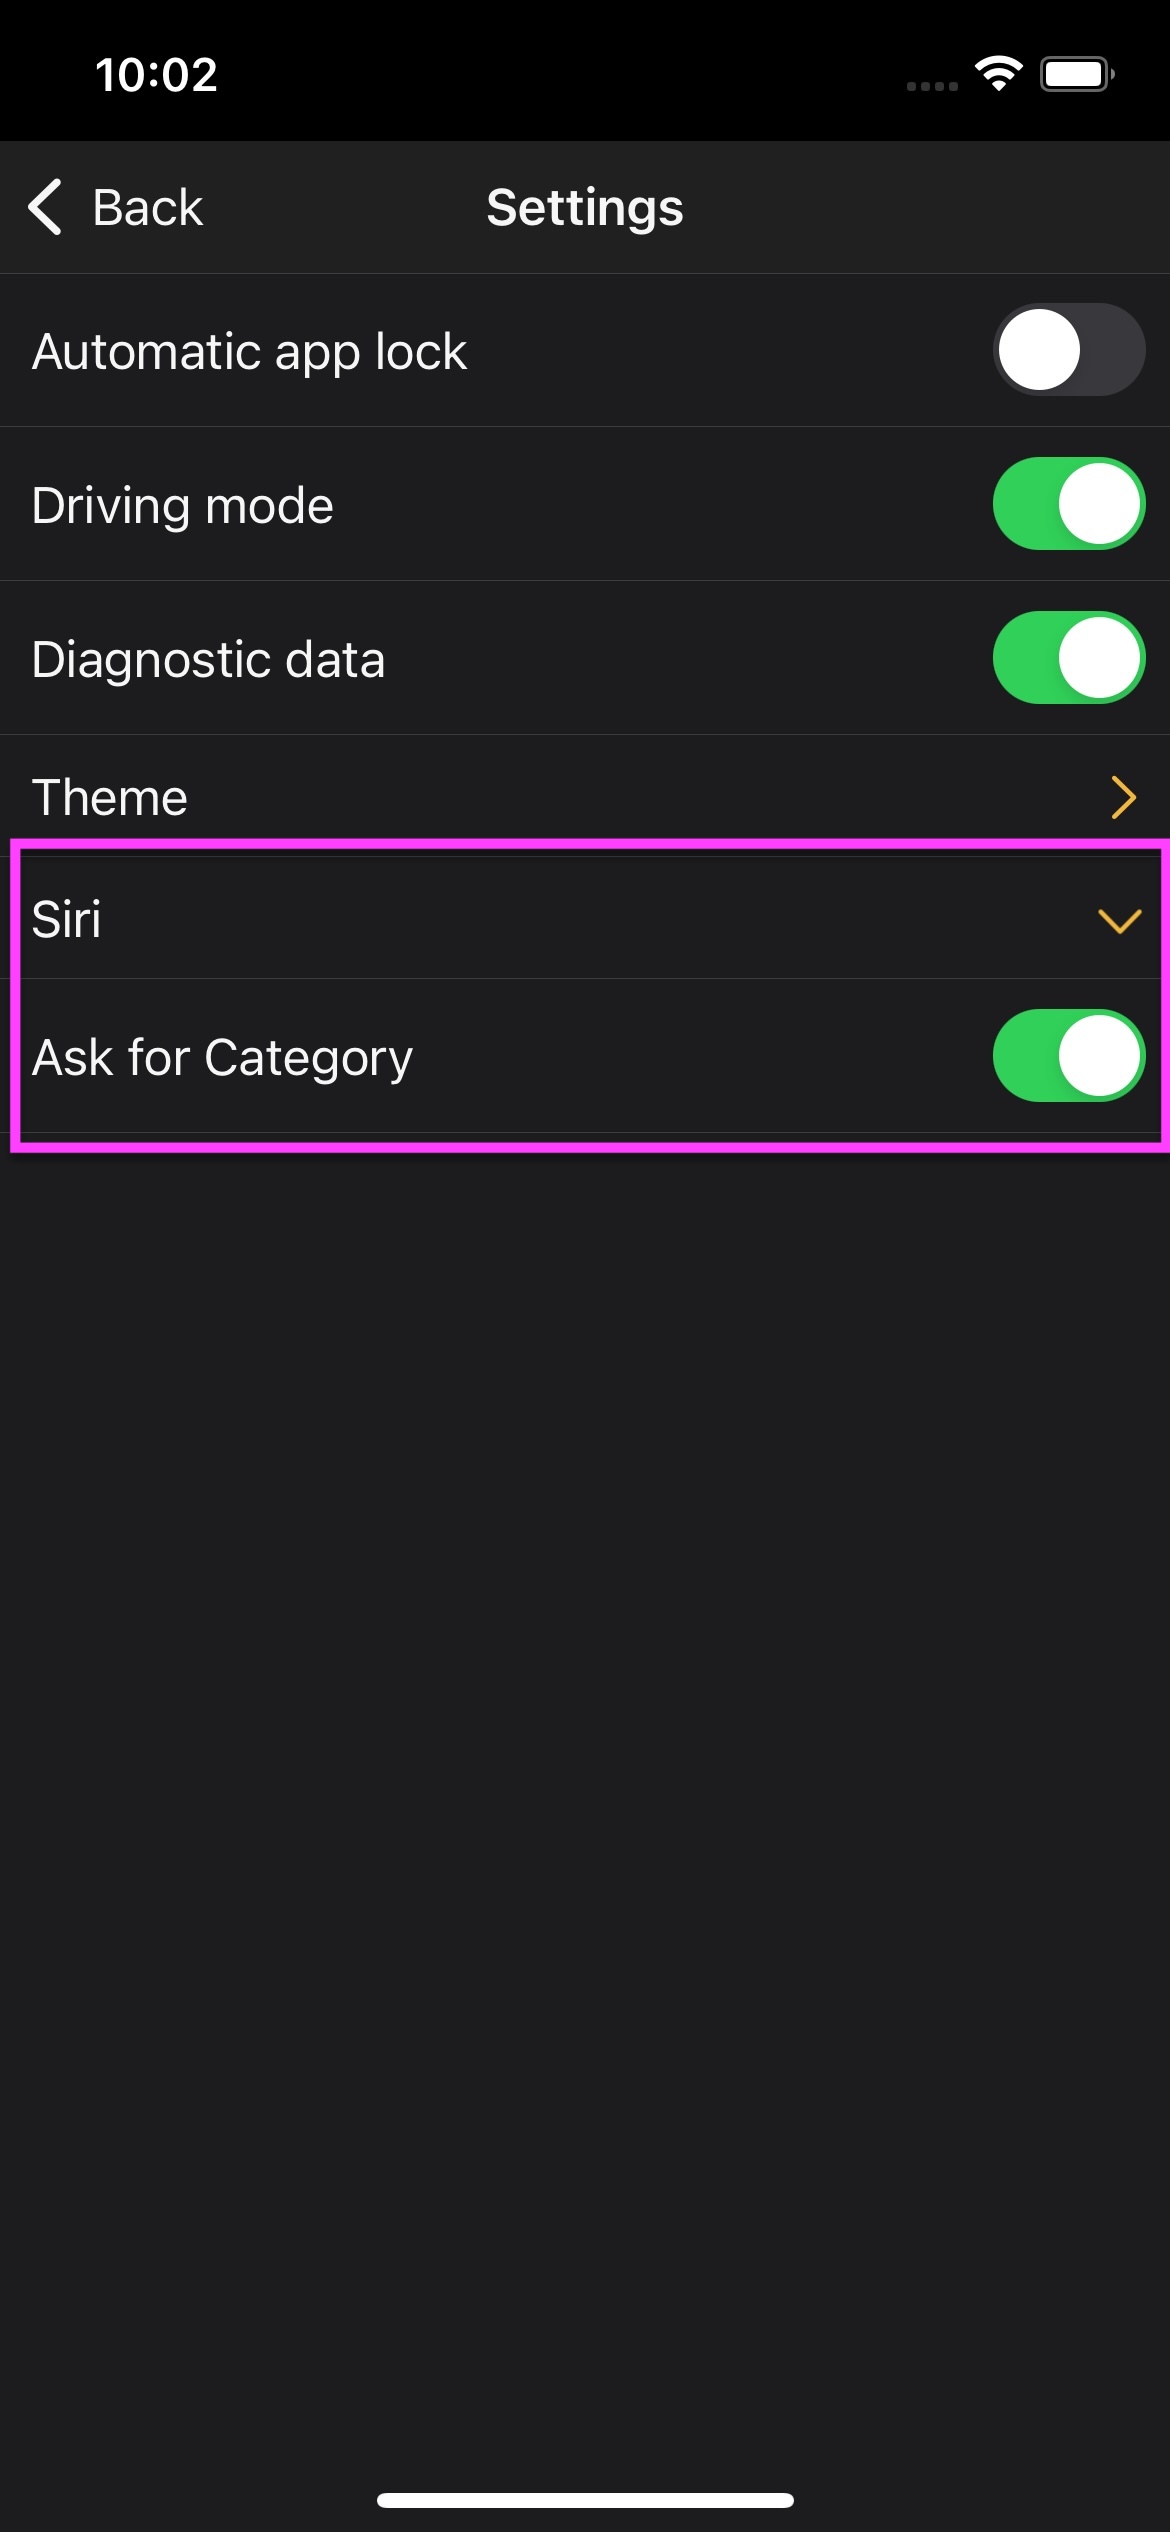
7.5 Siri
After activating this feature, Siri will be accessed in IVA to provide feedback. To do this, you need to say the shortcut command:
"Siri, create feedback"
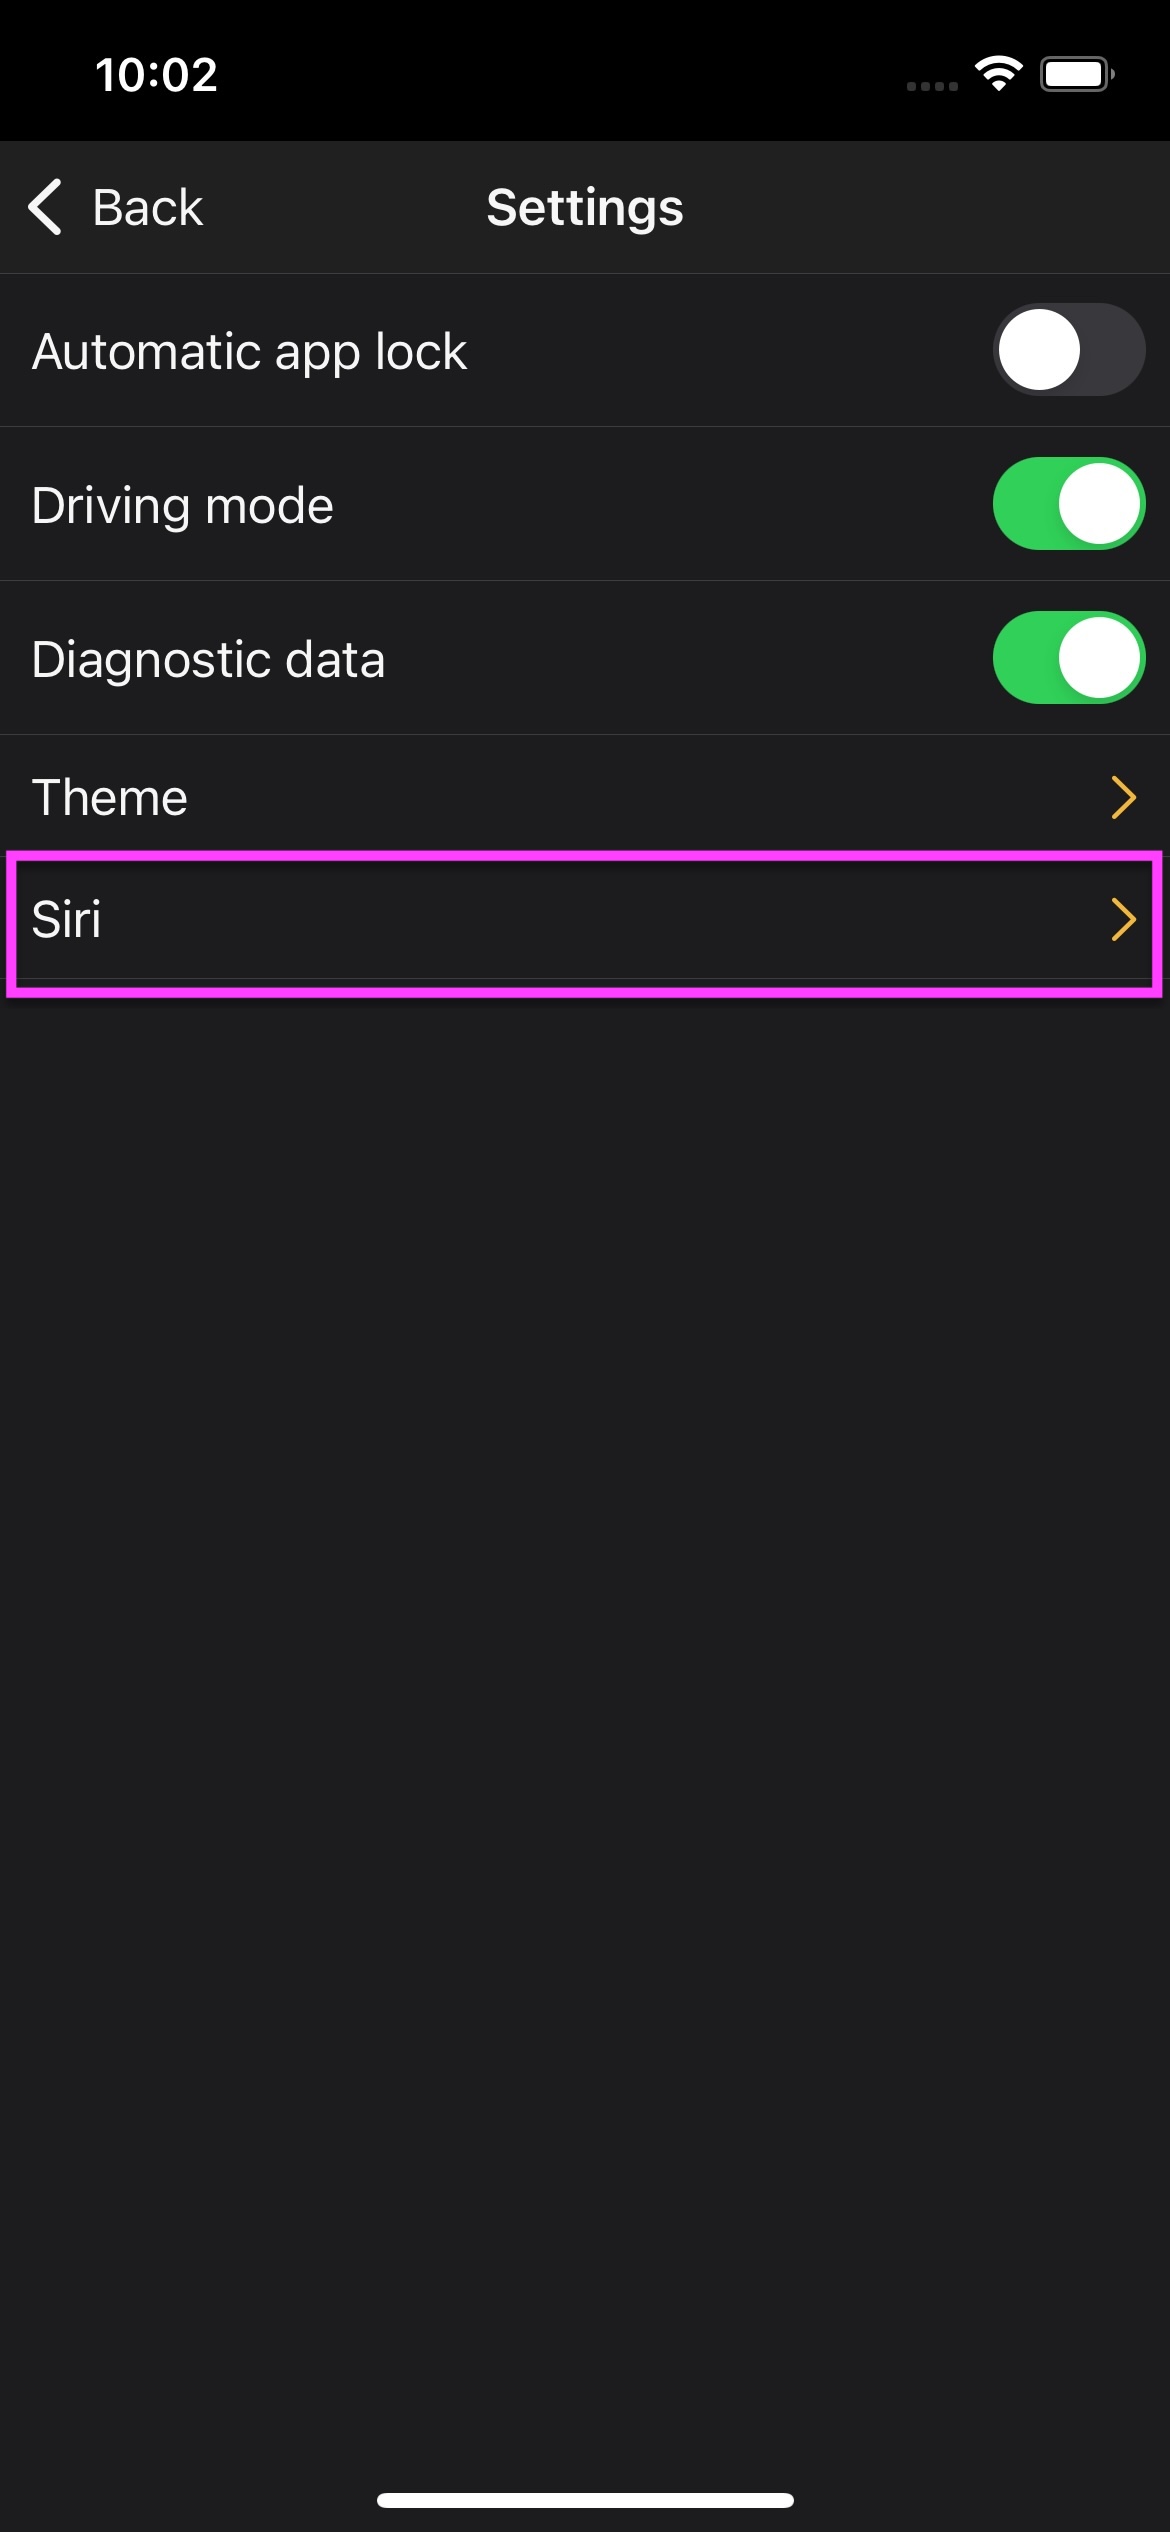
Optionally, you can enable the toggle "Ask Siri about categories," so Siri will ask you about the category in the future.
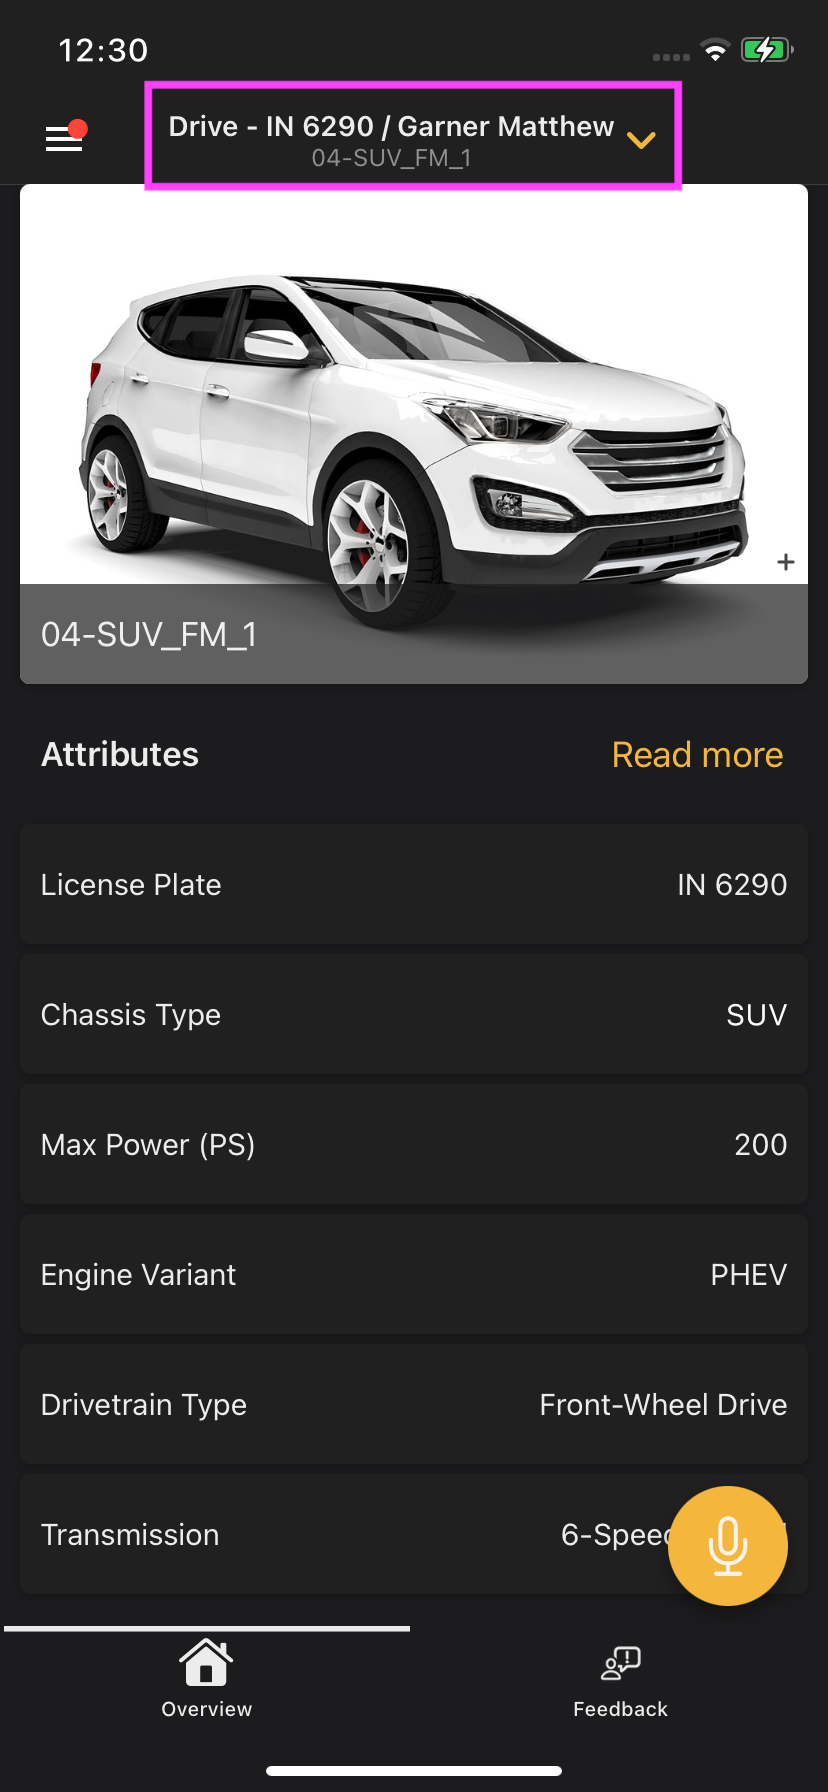
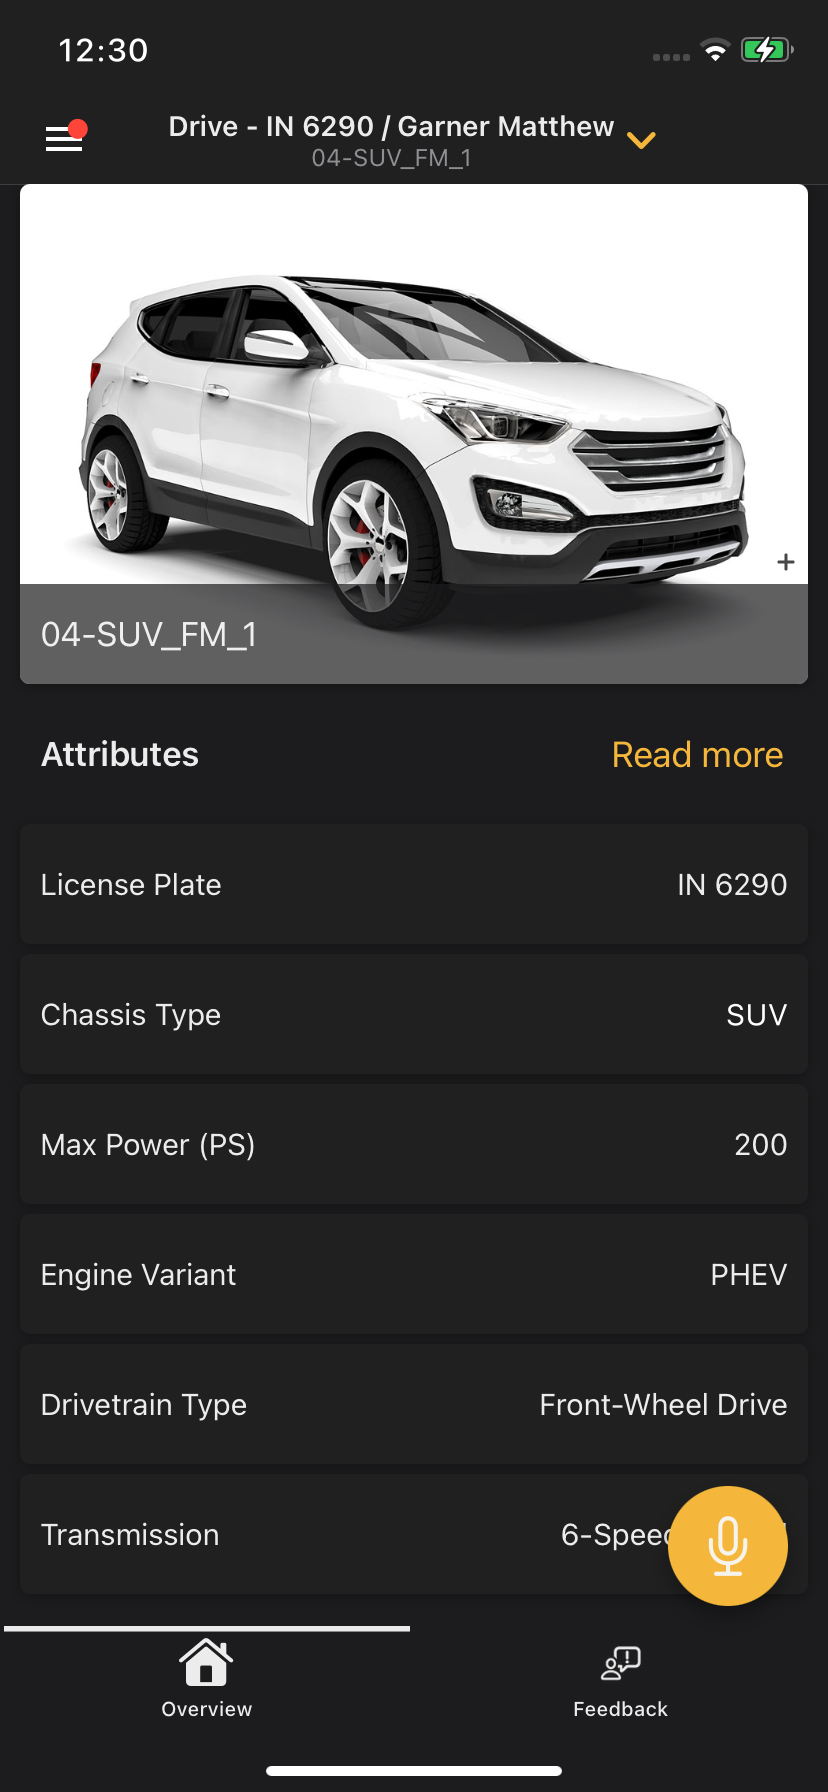
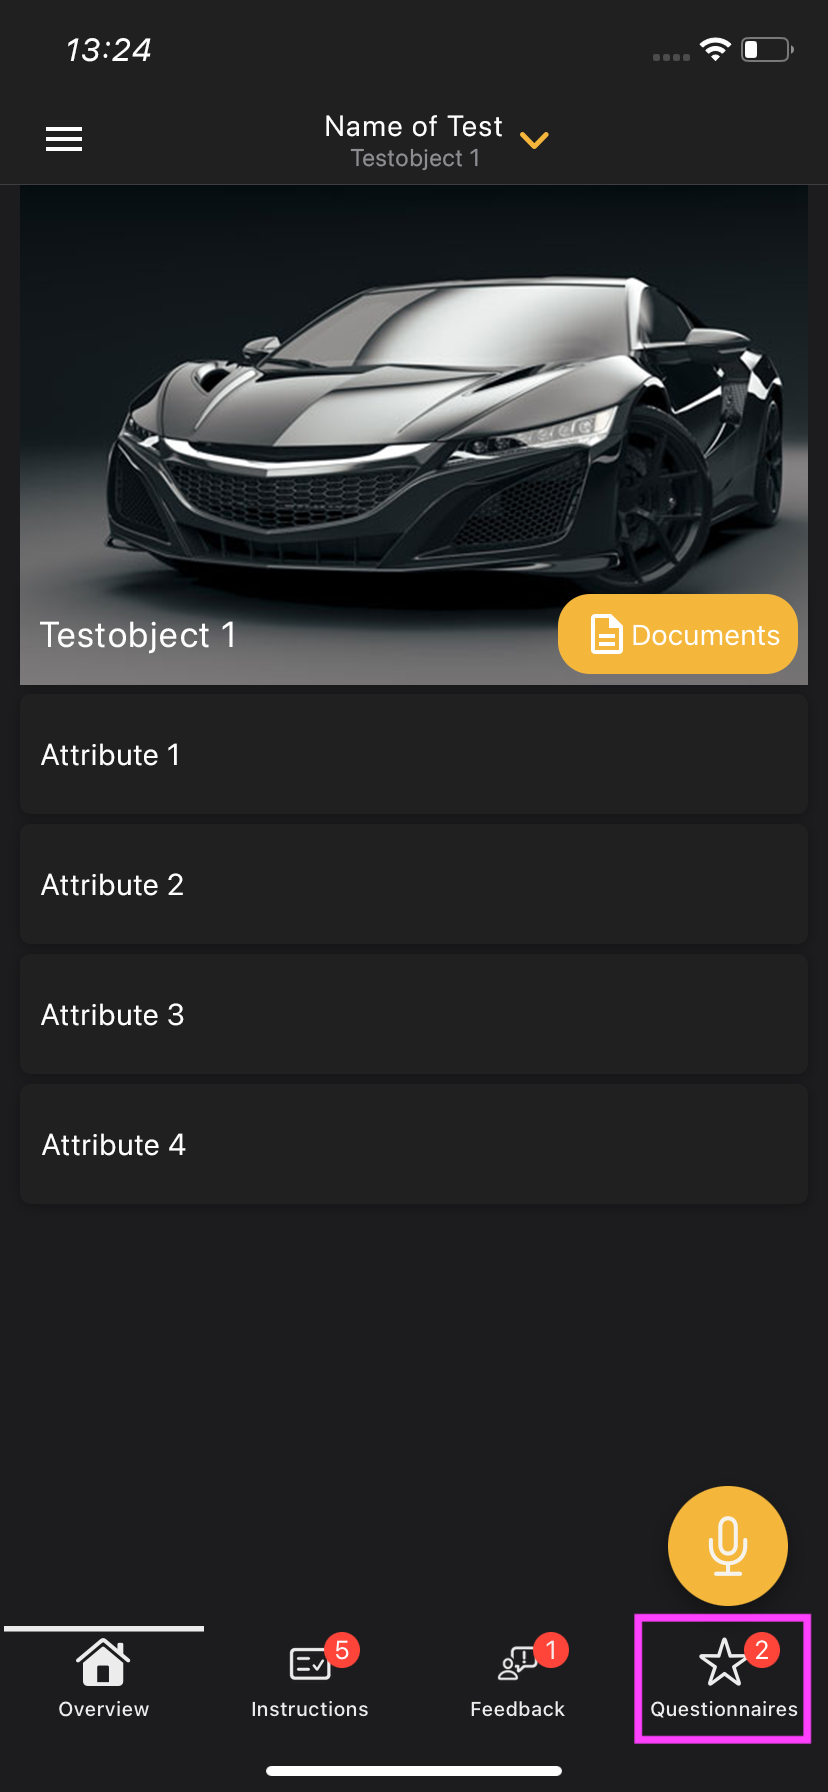
8.0 Overview
8.1 General Information
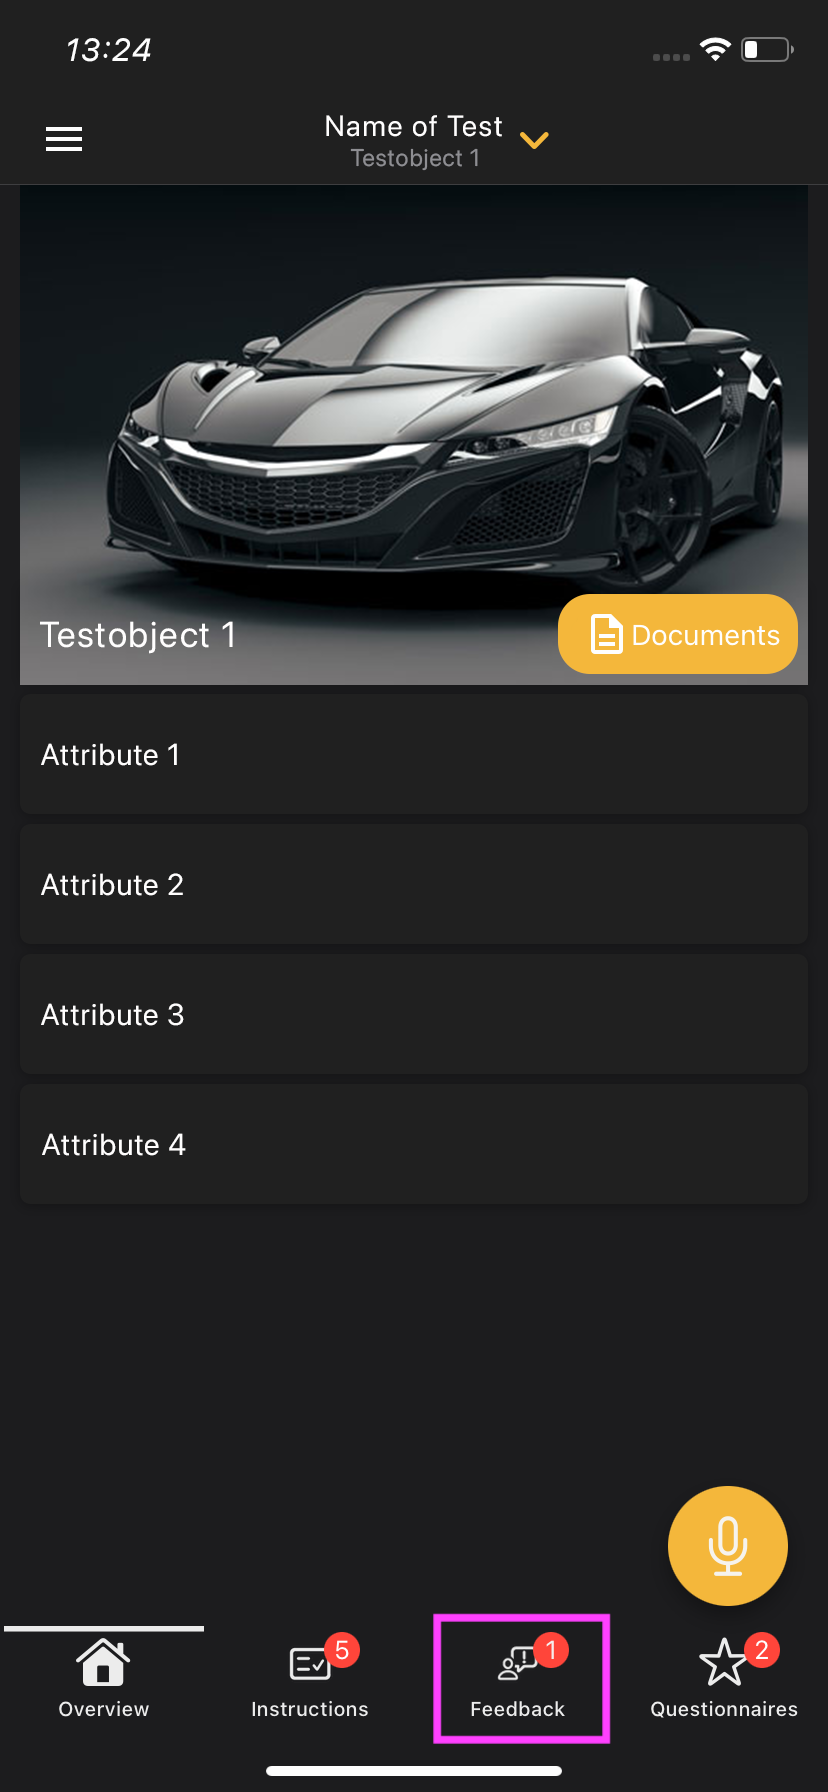
To access the overview, click on the “Overview” tab at the bottom of the display.
Here you will find all relevant information about the test object you have currently selected, as well as a description of the current test above the test object image, if applicable.
9.0 Instructions
9.1 Carrying out instructions
To access the instructions, click on the “Instructions” tab at the bottom of the display.
All instructions created by the planner for a specific test are listed here.
Instructions can be given the following processing status by the tester:
- Gray tick: Instruction has not yet been executed.
- Green tick: Instruction has been carried out successfully.
- Red cross: Instruction has not been carried out successfully
Click either the green "Successful" Button or the red "Not successful" Button to signal if an instruction was able to be carried out.
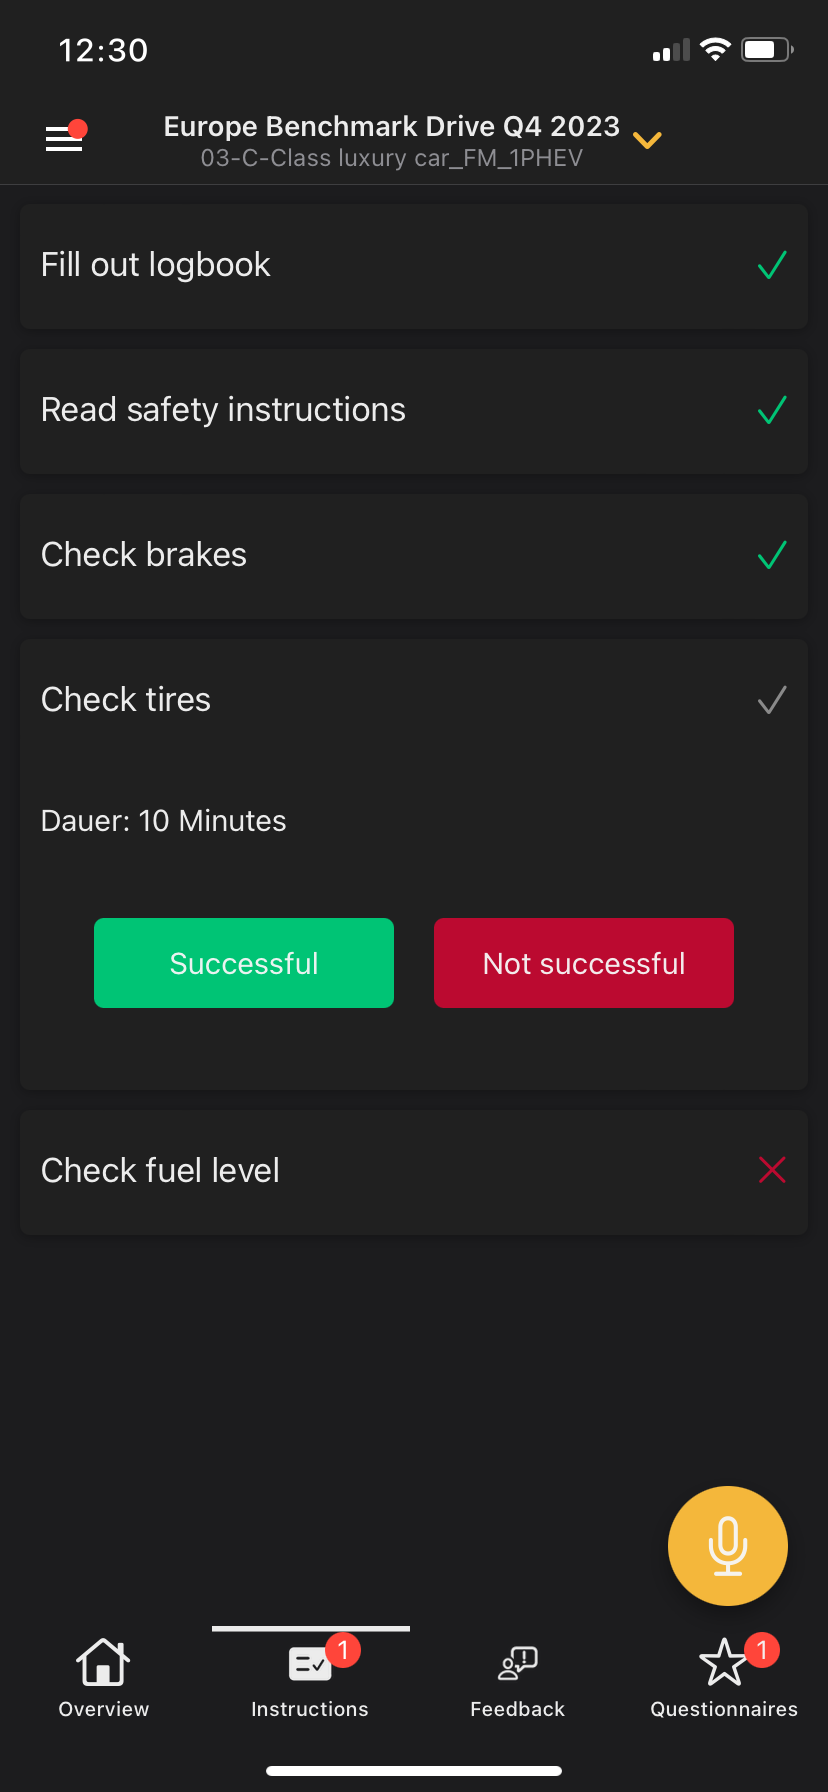
If an instruction cannot be carried out successfully, the tester is asked to explain the reasons and circumstances for this.
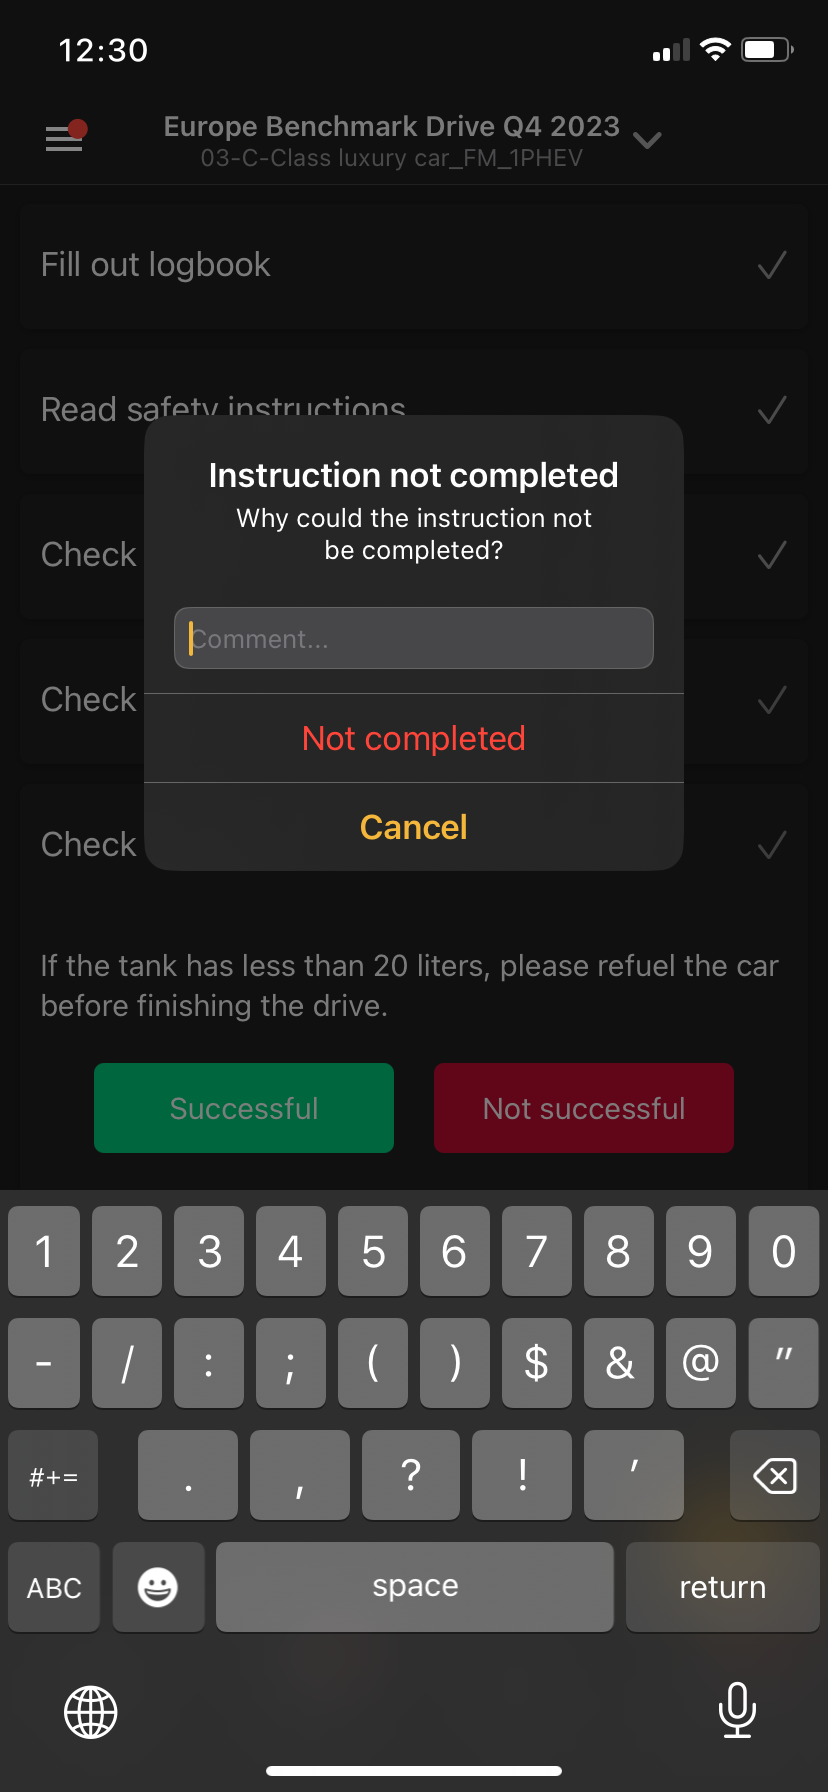
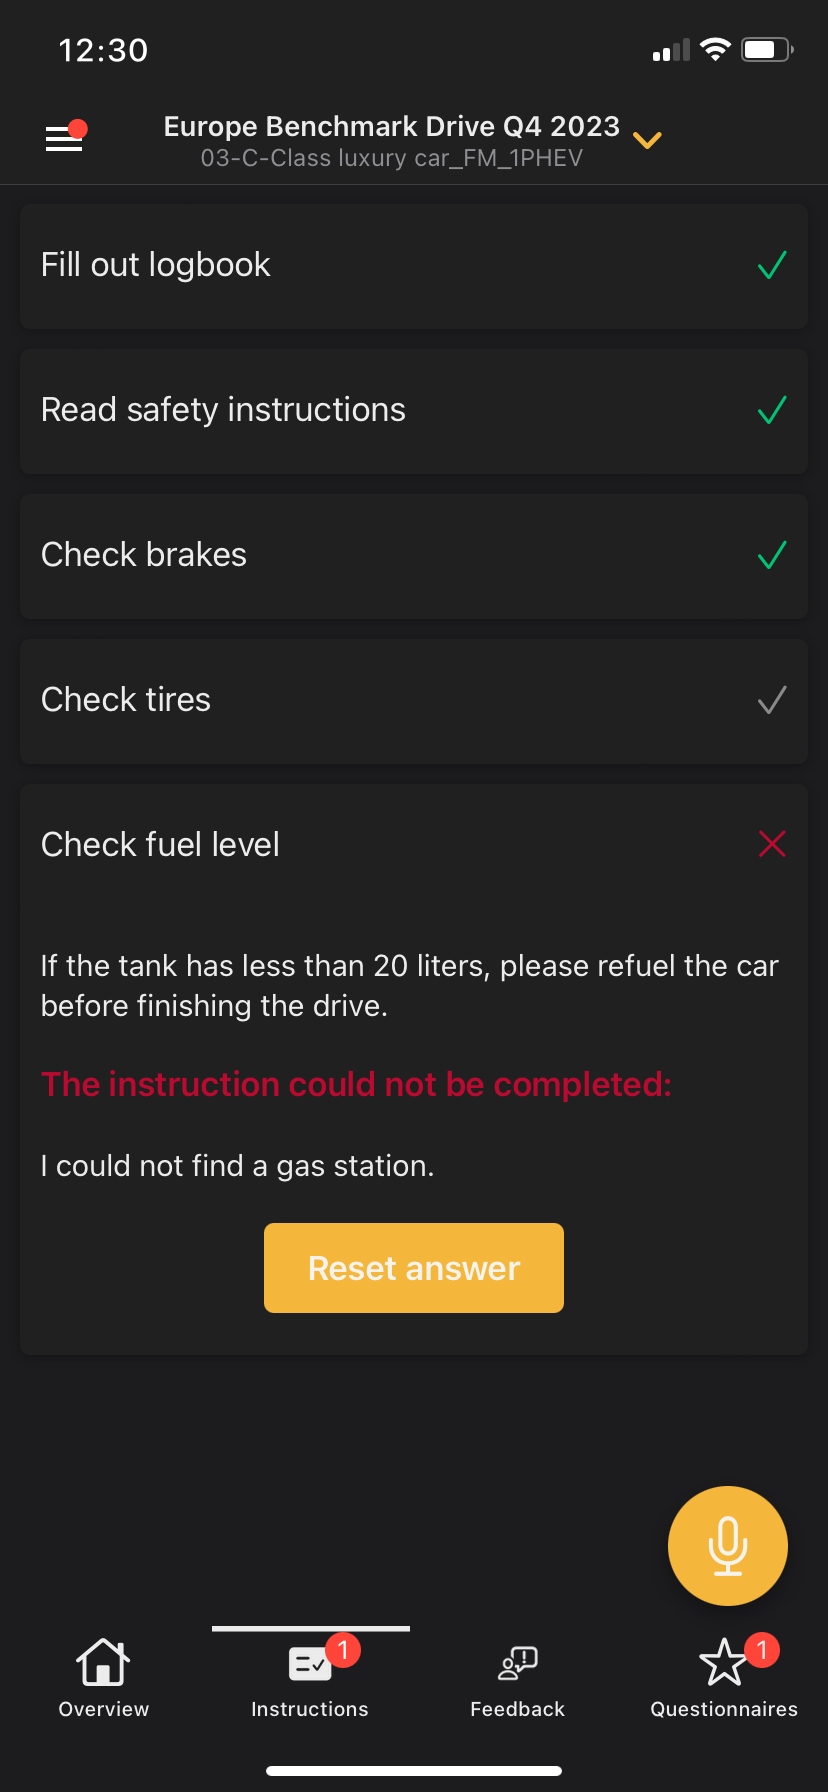
His answer, as well as the processing status of the instruction, can be edited again at any time during an active test.
9.2 Status of Instructions
Within the list of instructions, the processing status of the instructions is shown using various icons on the right-hand edge of the display:
- Gray tick: Instruction has not yet been executed.
- Green tick: Instruction has been carried out successfully.
- Red cross: Instruction has not been carried out successfully
![]()
10.0 Feedback
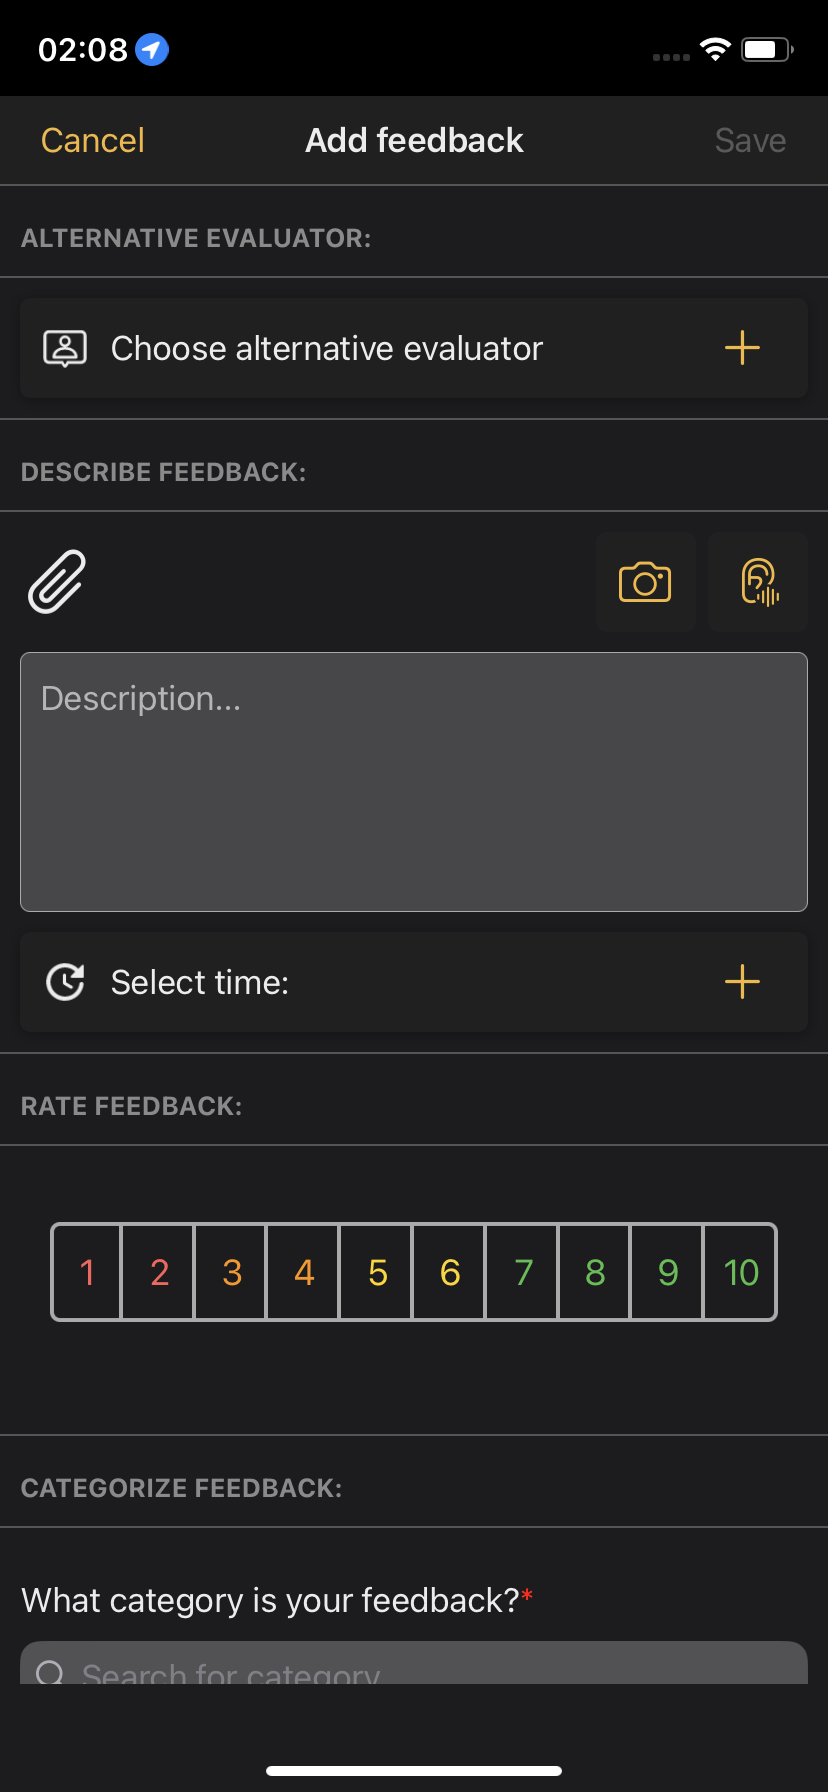
10.1 Add Feedback
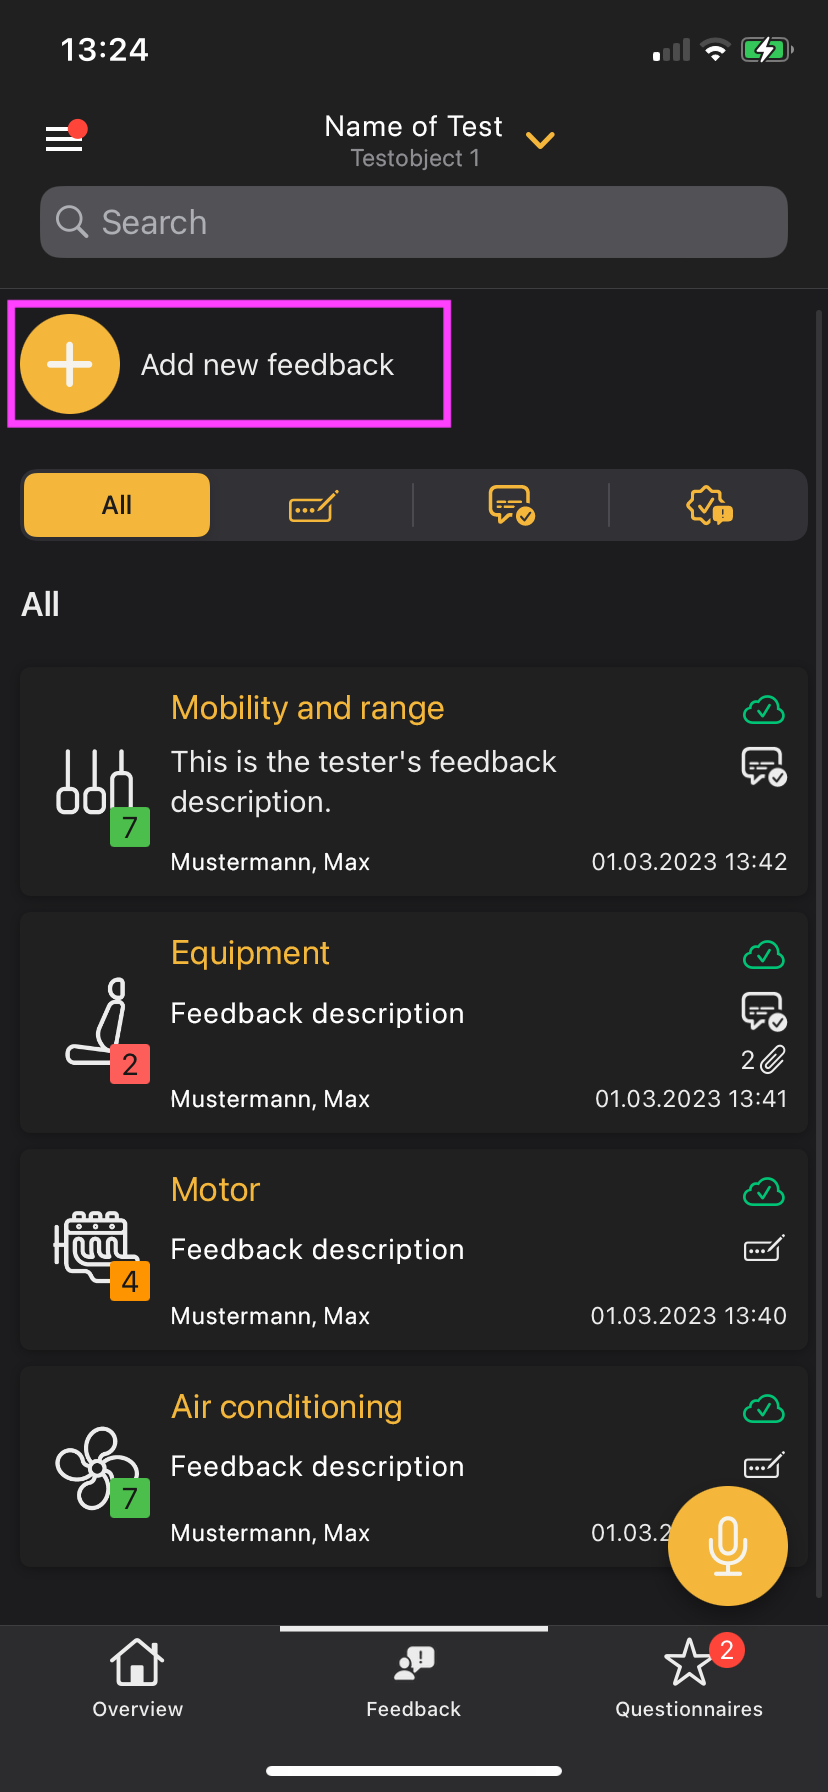
To create feedback, you must first select the relevant test. To do this, scan the QR code of the test or open the corresponding link. Then select the test object and choose the tab "Feedback" on the bottom. Here, click the "+"-button to start creating feedback.
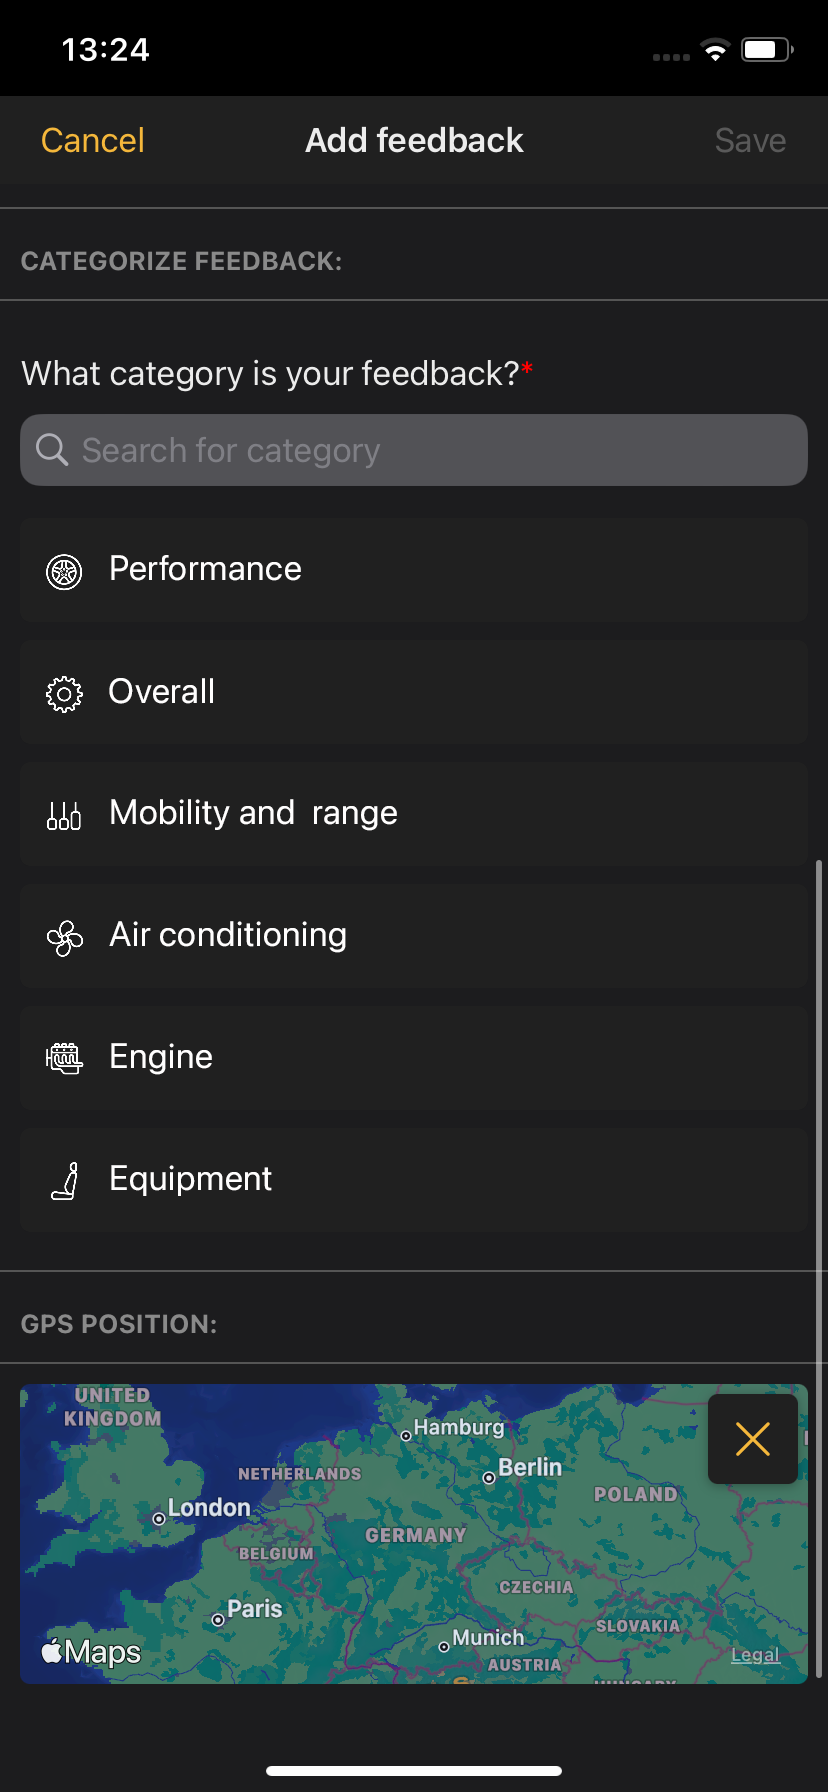
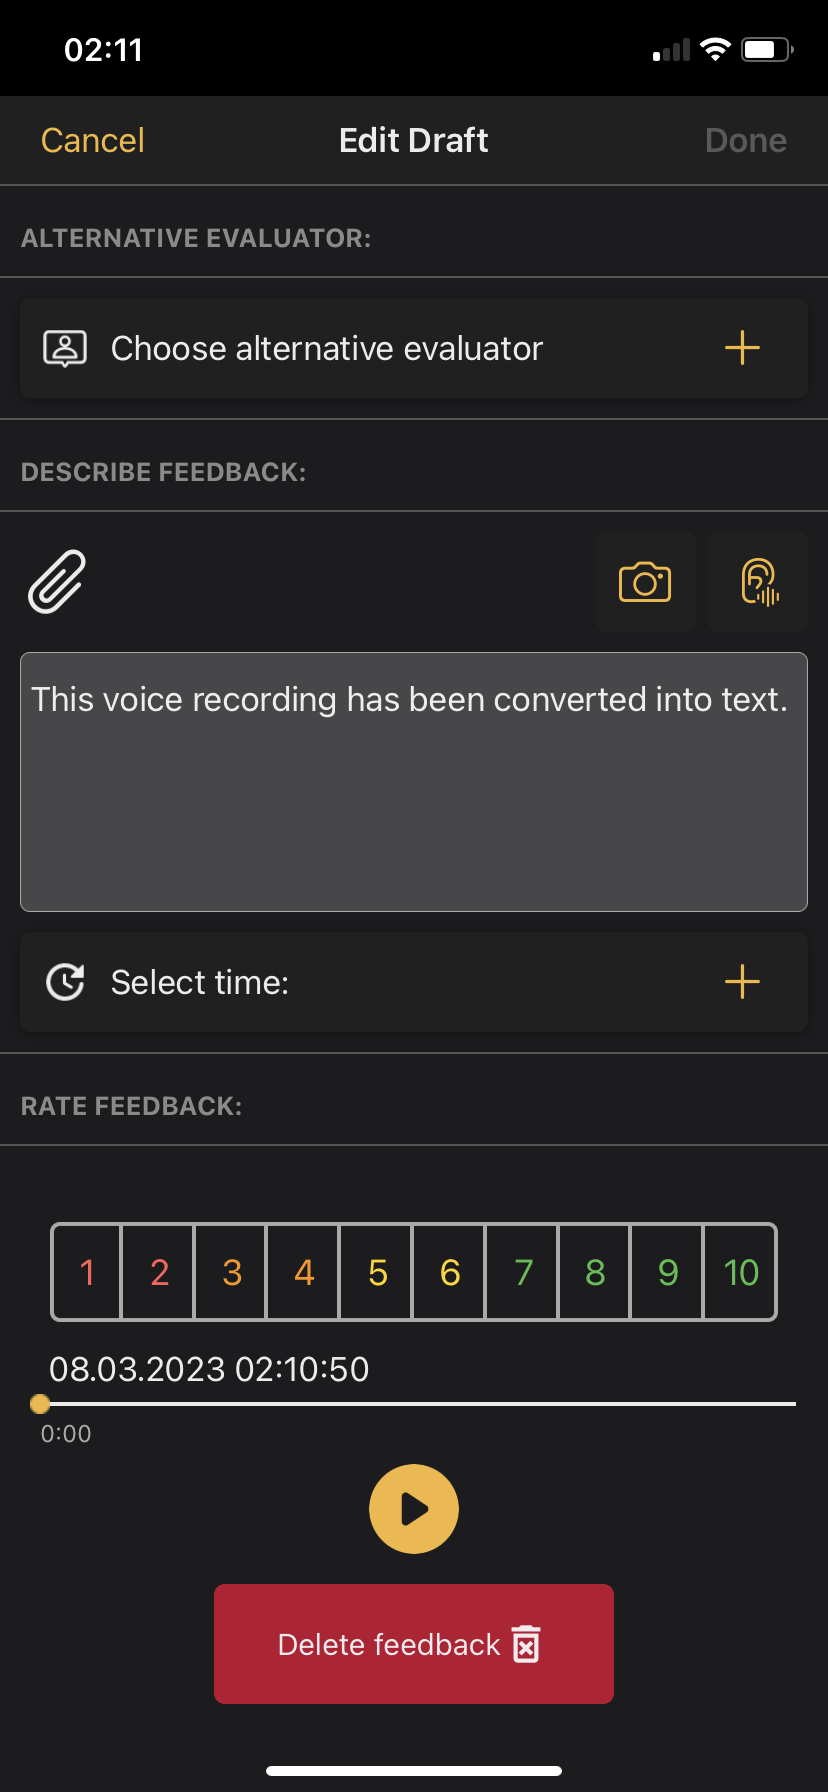
You can add the following information when creating or editing feedback:
- Alternative reviewer
- Feedback description
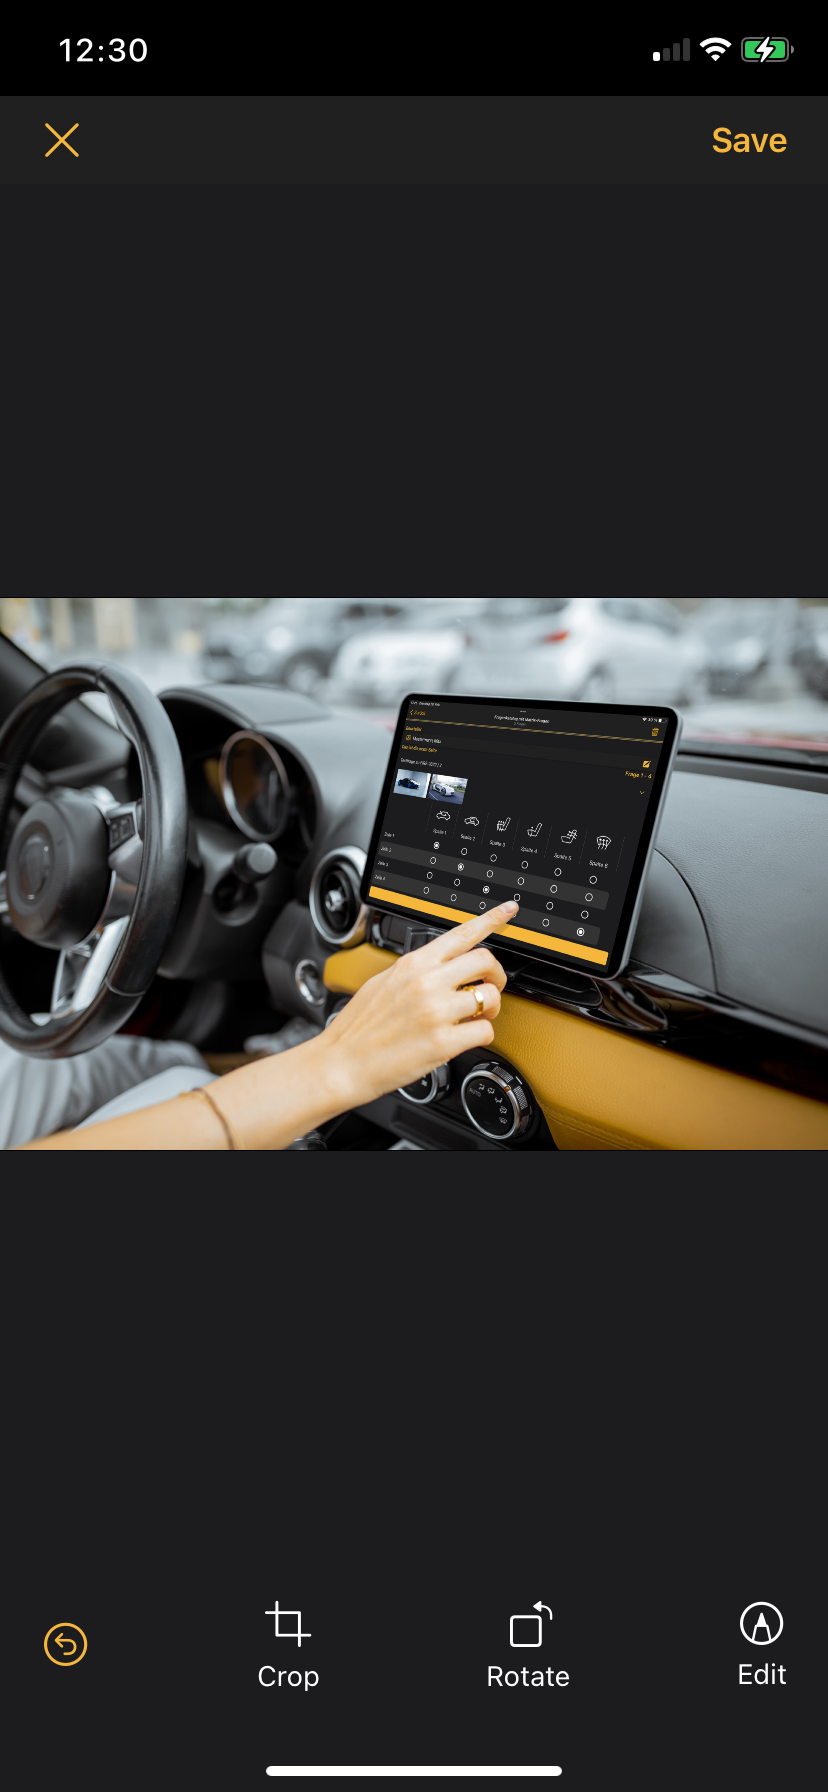
- Photo, video and sound recordings
- Time
- Rating with the help of a predefined scale
- Feedback category
- GPS location
Testers can crop, rotate and draw on the images they upload using the built-in image editing functions.
Please note: Images can only be edited as long as the feedback they are in has not yet been saved. Images can therefore no longer be edited once a feedback has been saved.
You can then save or cancel the feedback. When saving, you can choose between "Complete and send" or "Save as draft".
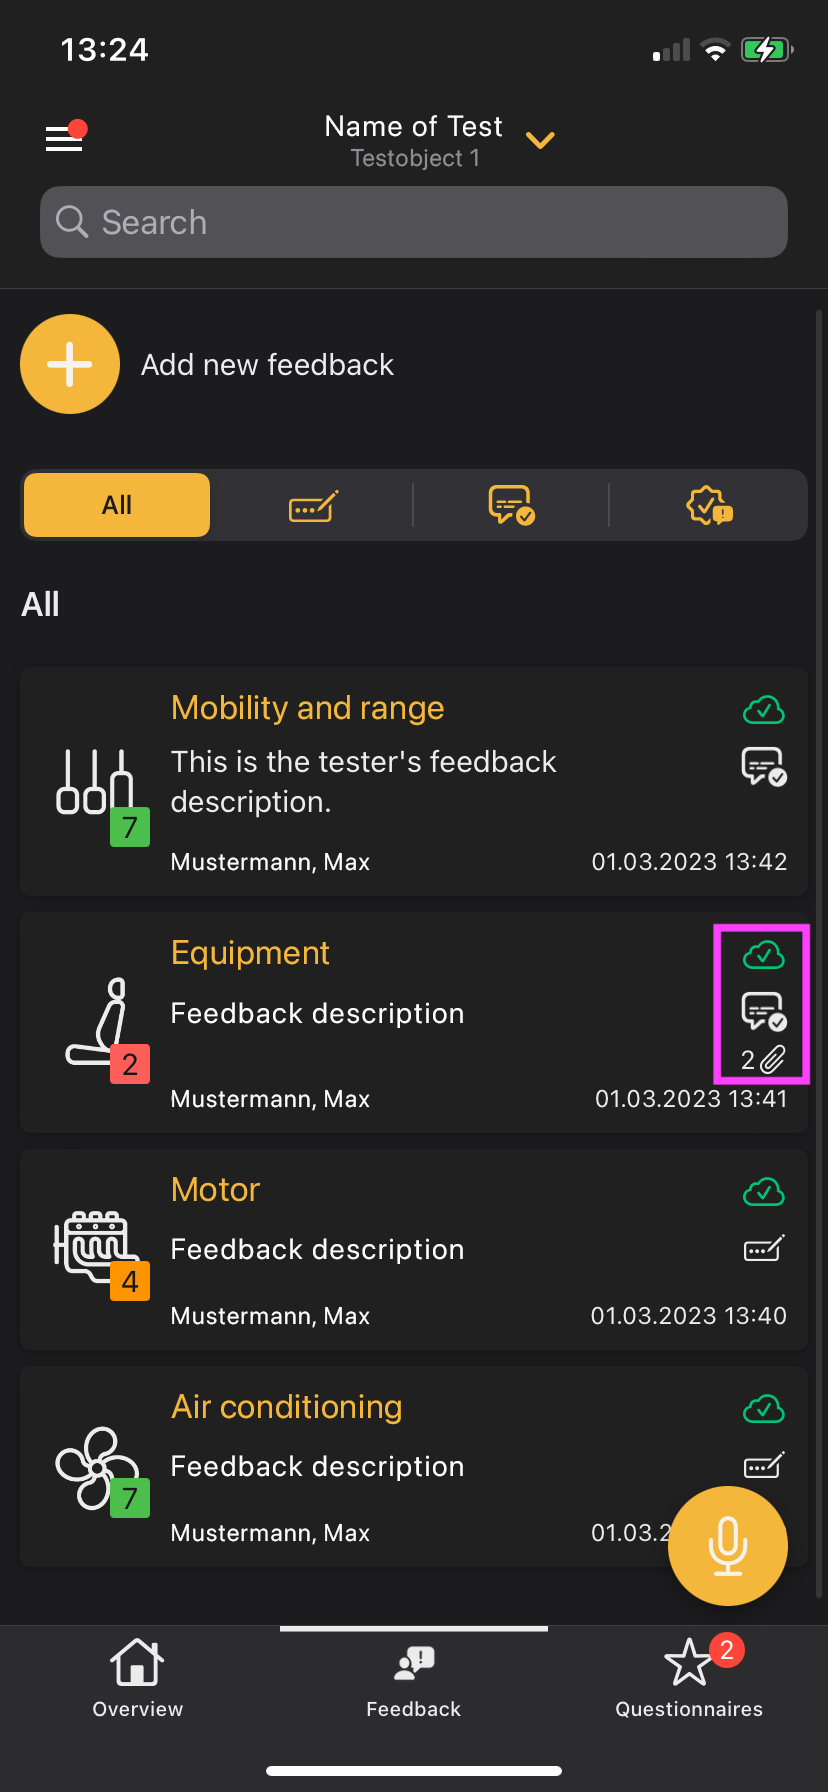
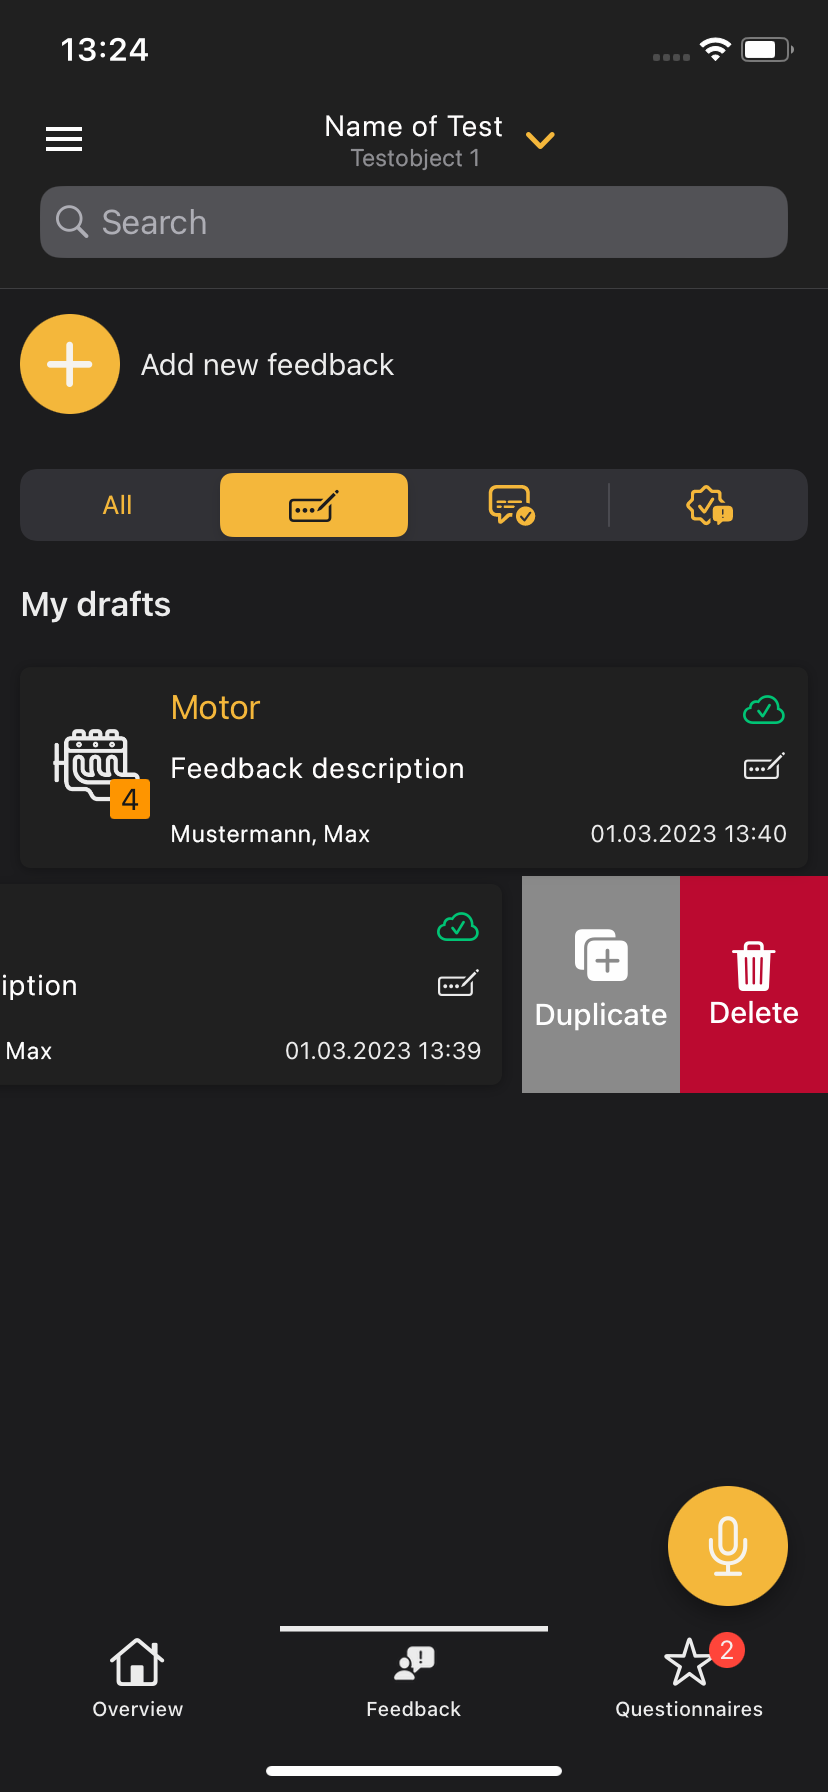
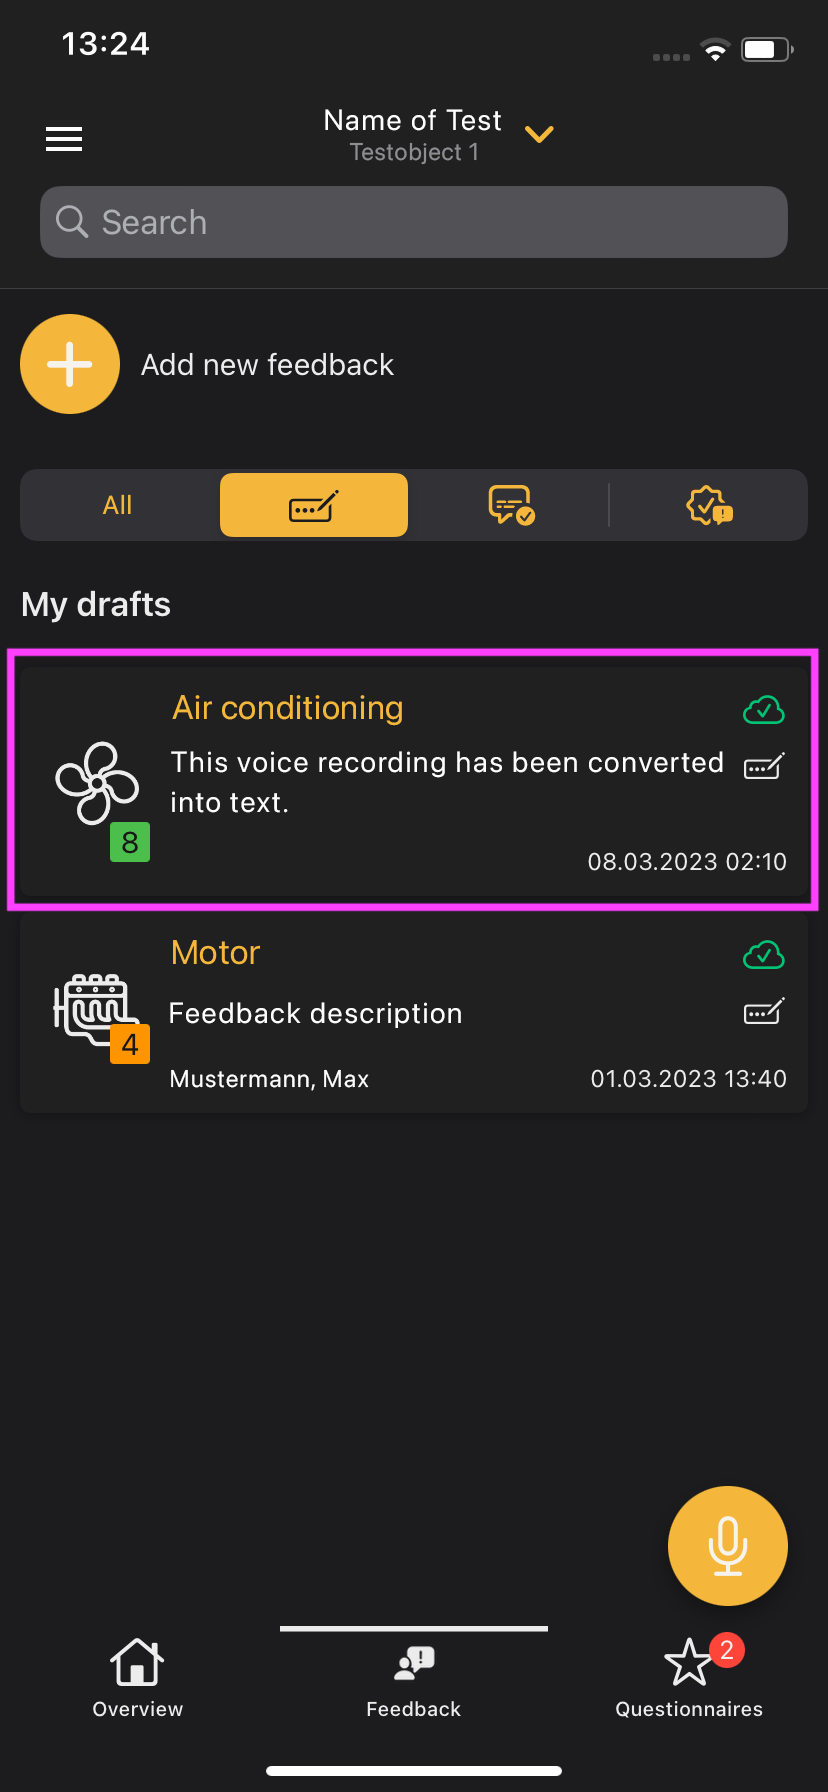
10.2 Status of Feedback
Feedback is assigned one of three statuses depending on their processing status:
- Draft
- Completed
- Validated
You can use the tabs below the “+” button to filter for feedback with a specific status. The tabs from left to right are:
- All
- My drafts
- My completed feedback
- Validated feedback
The respective status is indicated by the corresponding icon on the right edge of a feedback tile.
The number of attachments of a feedback, as well as the synchronization status are also displayed on the right edge of the feedback tiles. The status of the synchronization is shown by different icons:
- Red cloud: Synchronization failed
- Green cloud: Synchronization was successful
If there is an error during synchronization, an error message “Pull down to refresh” appears as a grey banner and with a grey cloud icon at the top of the display.
10.3 Editing and deleting Feedback
Feedback can be duplicated by swiping the corresponding feedback tile to the left and clicking the “Duplicate”-button that appears.
Only feedbacks with the status “Draft” can be edited or deleted.
Delete feedback either by swiping the corresponding feedback tile to the left and clicking the Delete button that appears, or by clicking the feedback tile and clicking the bottom “Delete Feedback”-button in the “Edit Draft”-view.
11.0 Questionnaires
11.1 Questionnaire Overview
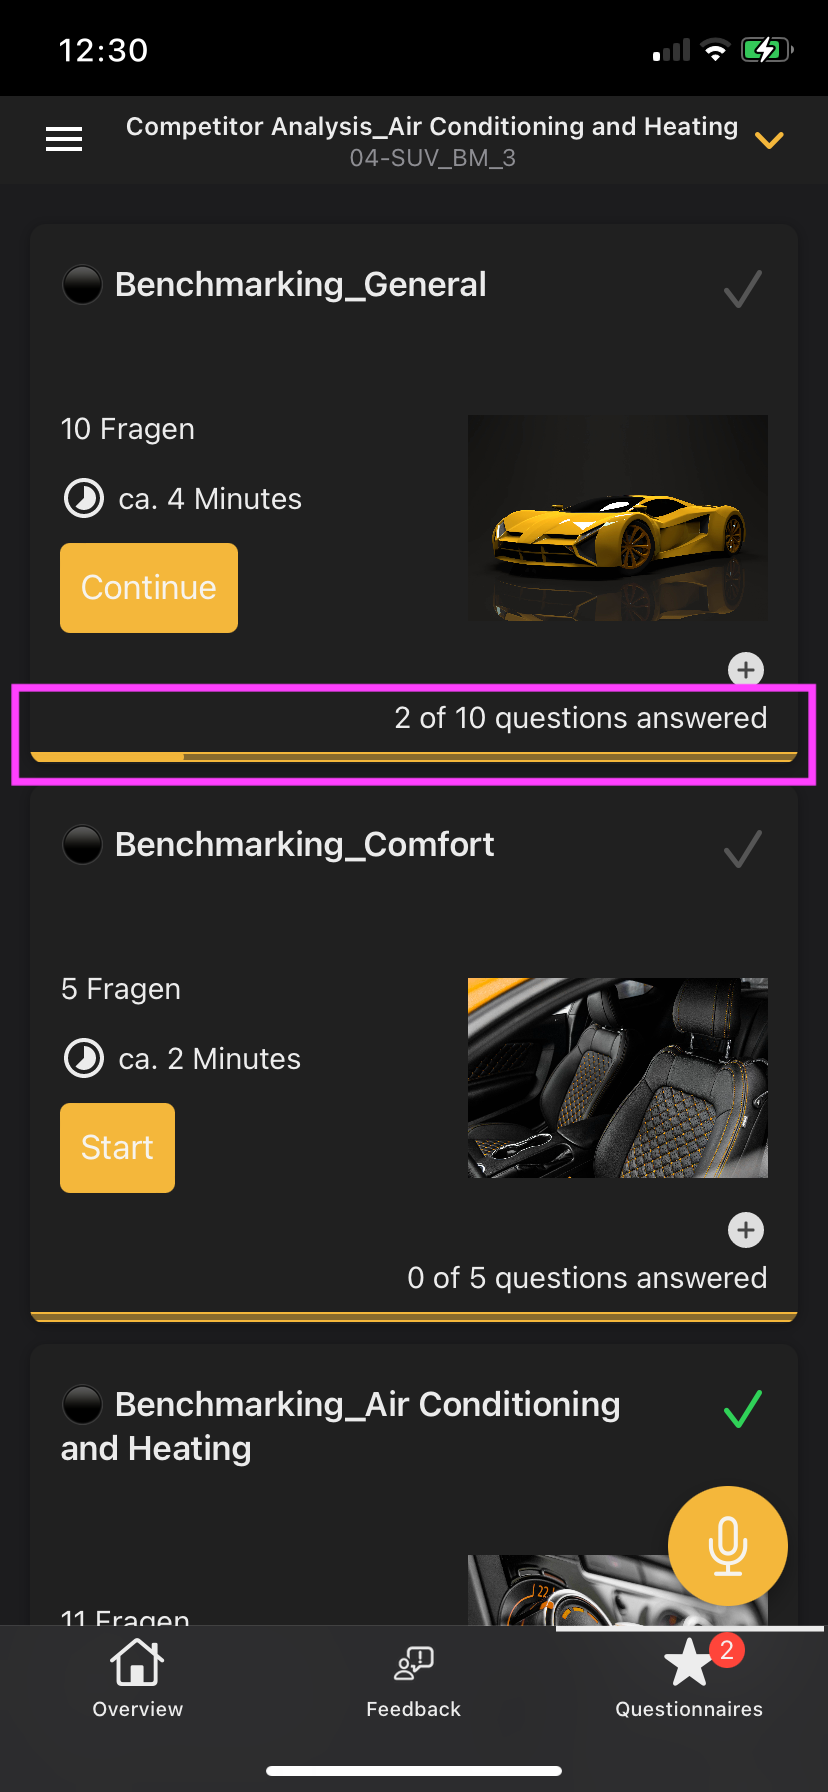
When accessing the “Questionnaires” tab, the user sees an overview of questionnaires with the following information:
- Name of the questionnaire
- Number of questions
- Estimated time
- Cover Image of the questionnaire ( including the option to enlarge the image)
- Number of questions answered
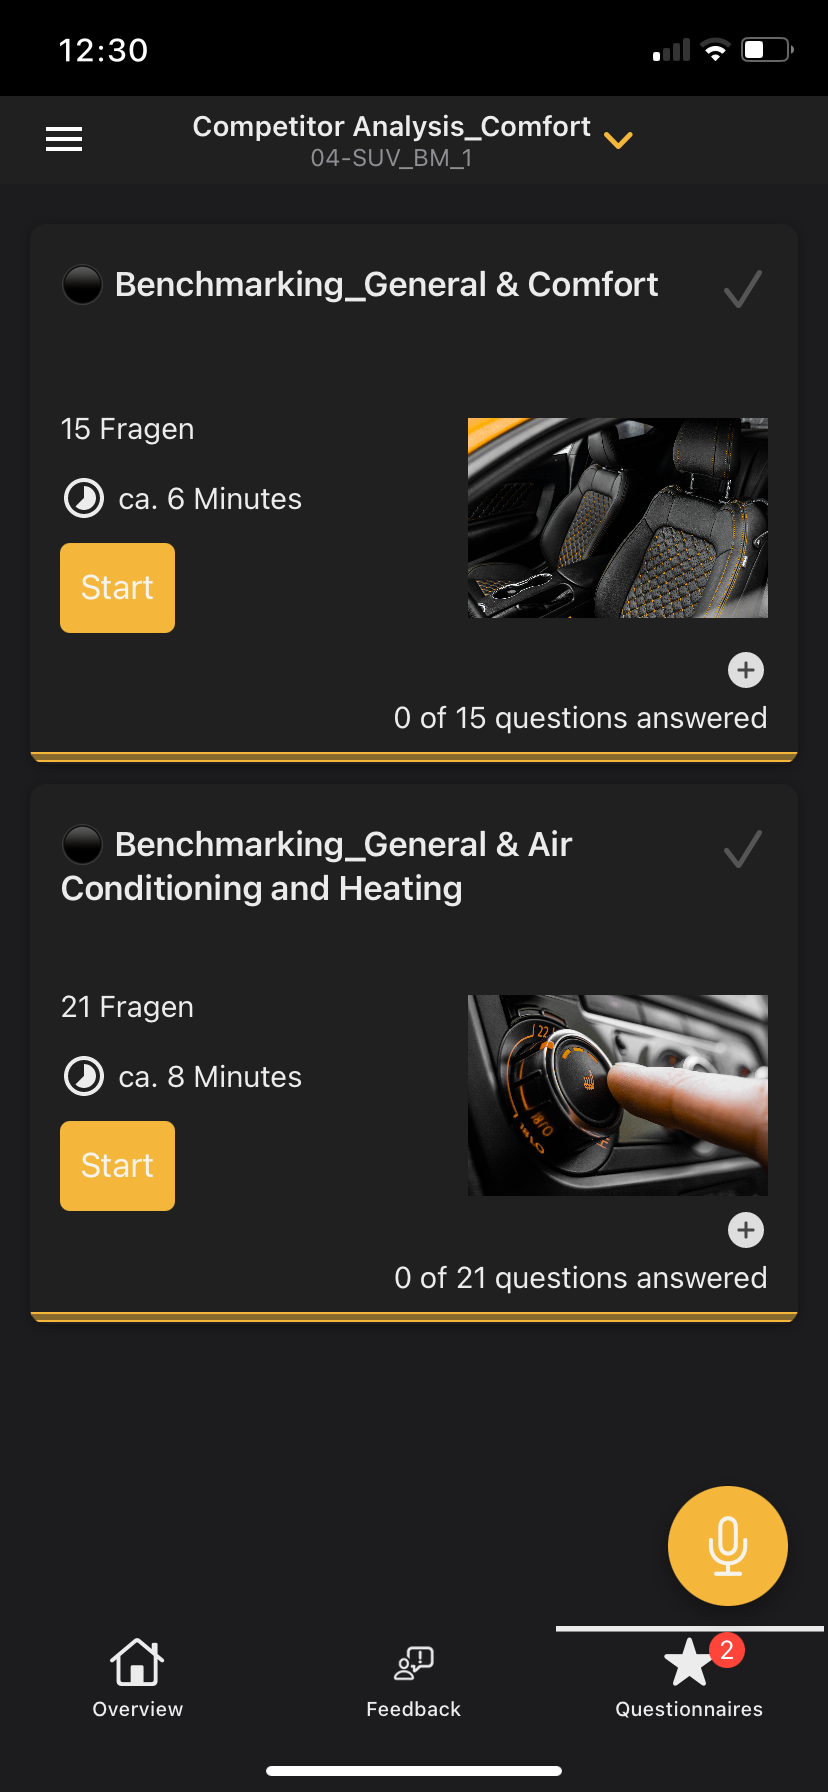
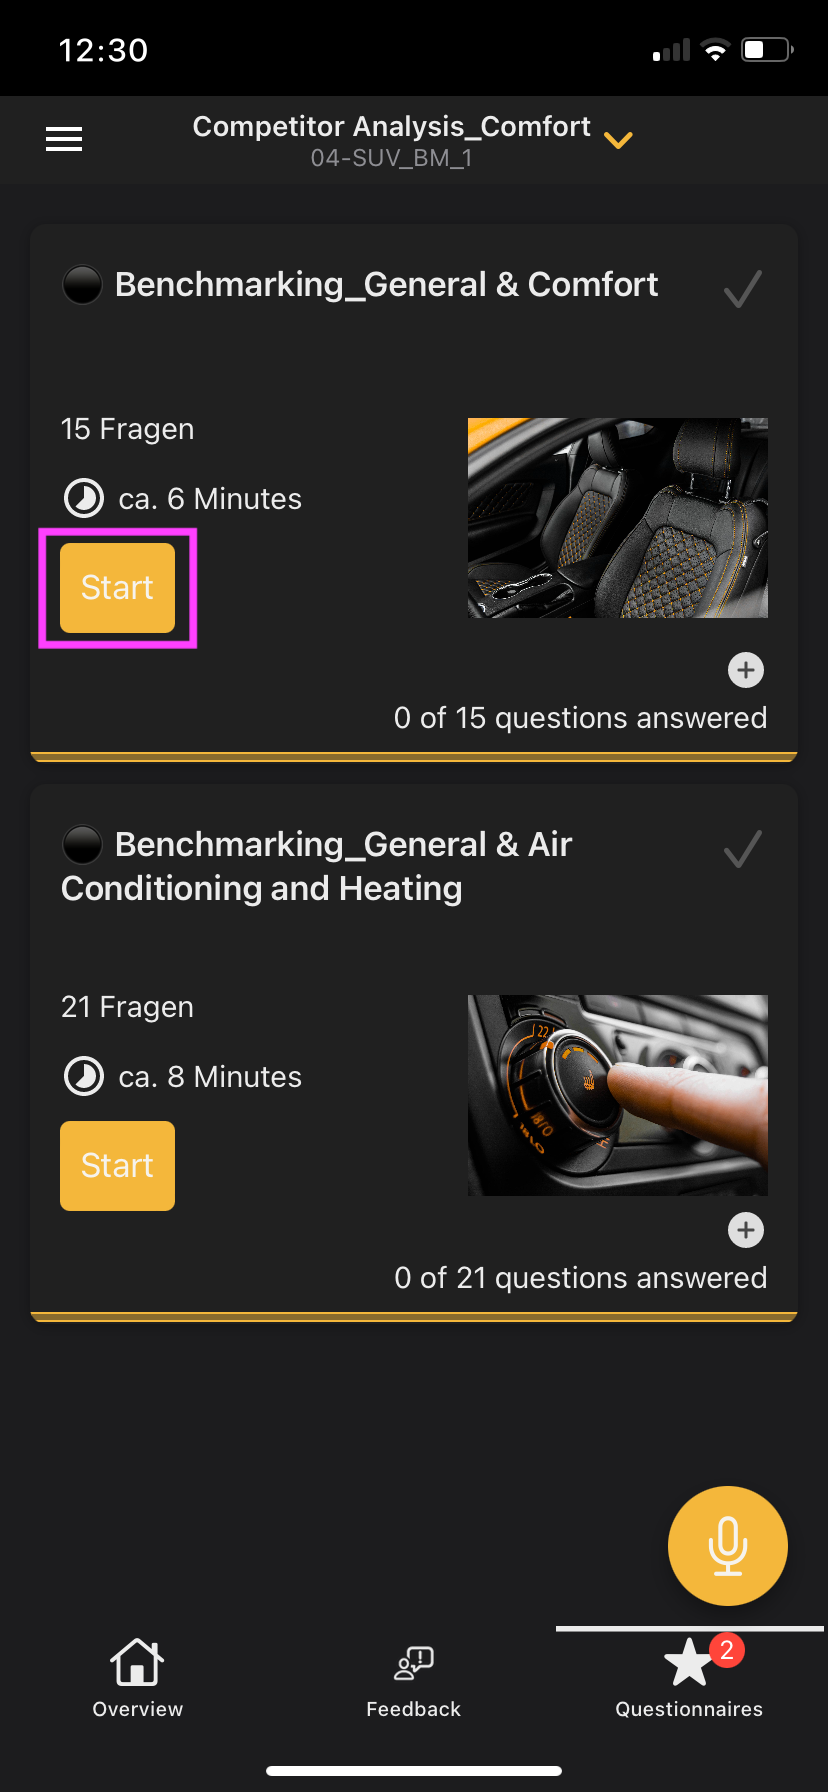
11.2 Starting a questionnaire
To complete a questionnaire, you must first select the associated test. To do this, scan the QR code of the test or open the corresponding link.
Then select the test object and use the tabs below to navigate to the "Questionnaires" item.Here you will find a list with all available questionnaires. Select the questionnaire you want to edit and click "Start".
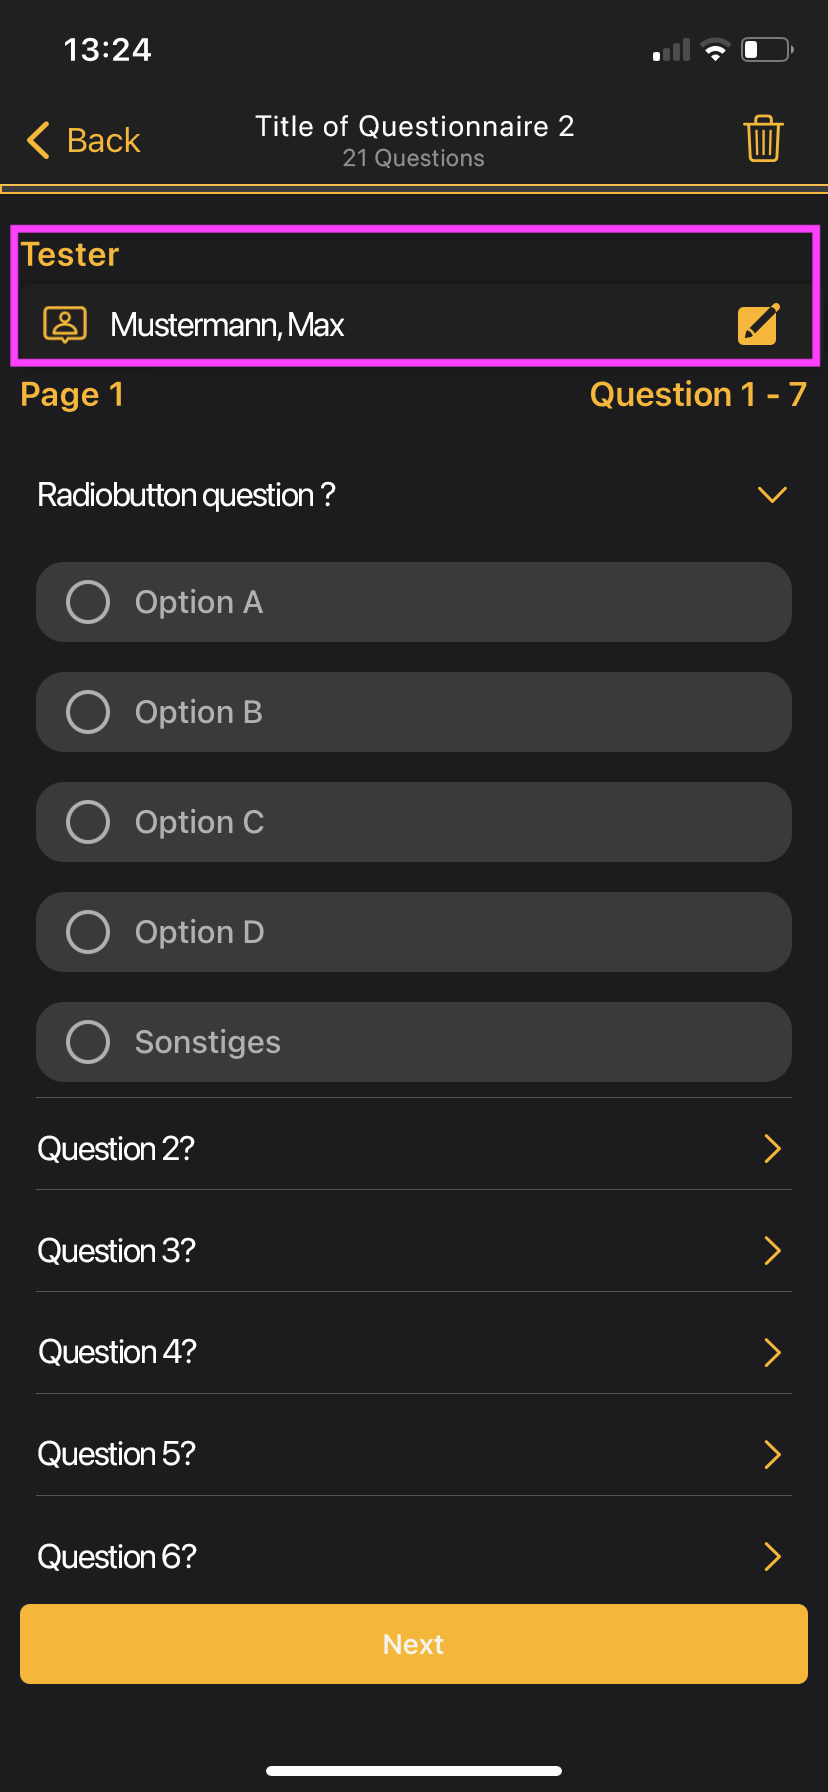
11.3 Selecting an alternative reviewer
Within a questionnaire, an alternative reviewer can be selected to complete the questionnaire instead of the logged-in user.
11.4 Editing and submitting a questionnaire
Questionnaires can consist of several pages. To switch between the pages of a questionnaire, click the "Next"- or "Back"-buttons. You can also swipe left to go to the next page and wipe right to go to the previous page. If there are mandatory questions, these must be answered first before you can switch to the next page or submit the test.
To submit a questionnaire, click the "Complete"-button located at the bottom of the last page.


If you are registered as a tester and logged into the app, you can pause answering a questionnaire by clicking the back button at the top left of the display. You will then return to the overview of all your questionnaires available for answering. The questionnaire can then be processed further in the app or the web application at any time.
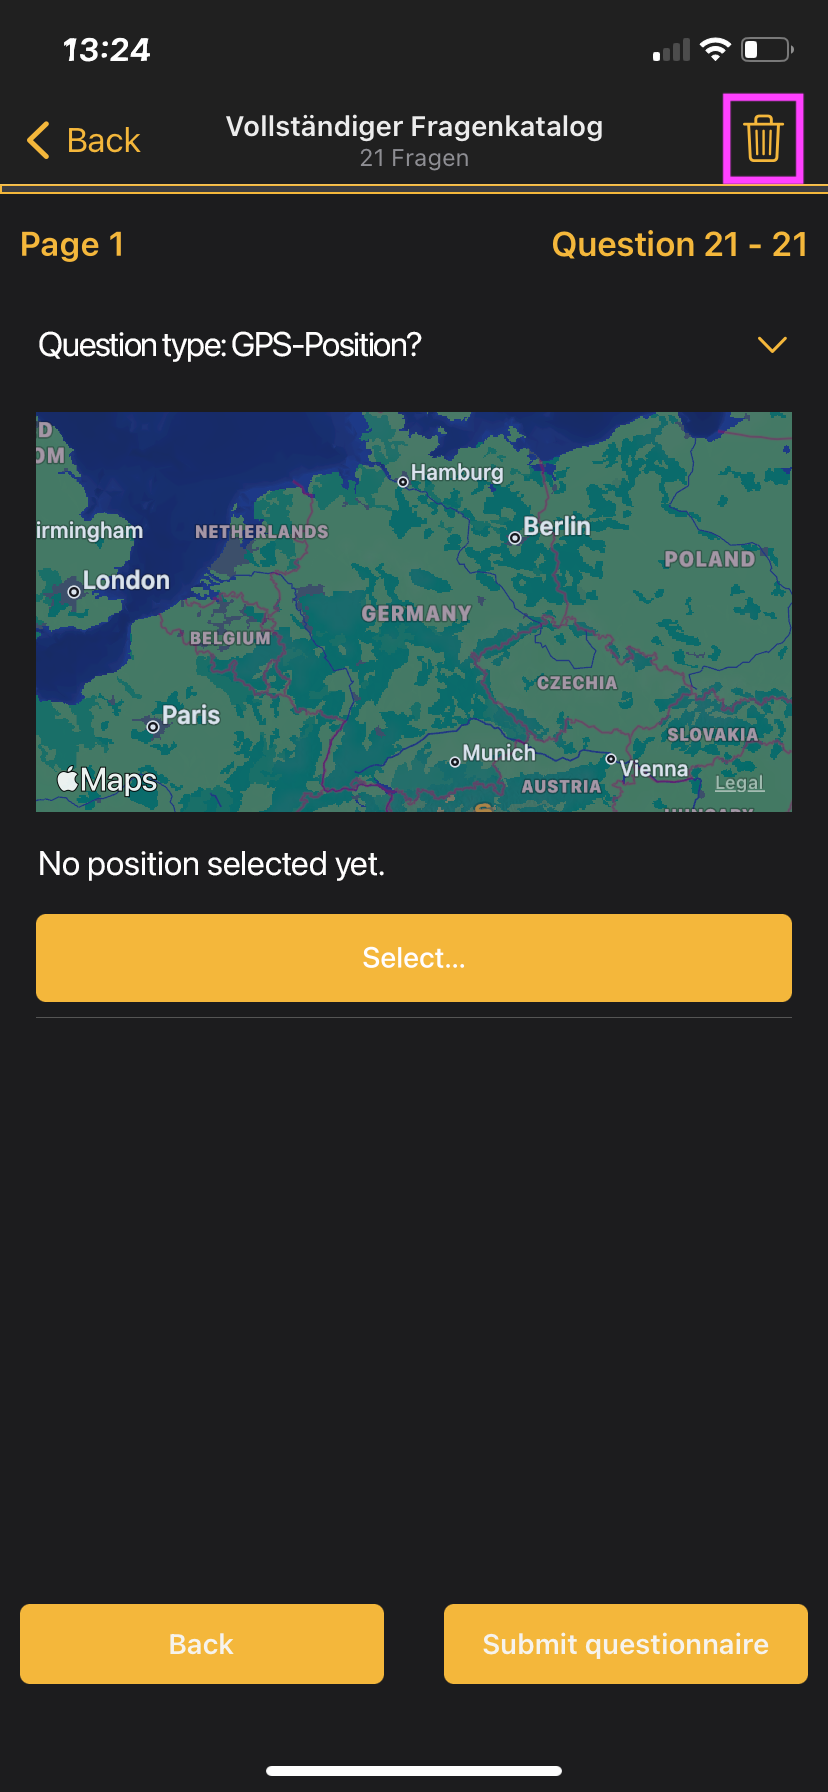
11.5 Deleting answers
The answers to a questionnaire that has not yet been completed can be deleted at any time by clicking on the delete button in the top right-hand corner of the display.
Answers to a questionnaire that has already been completed can no longer be edited or deleted.
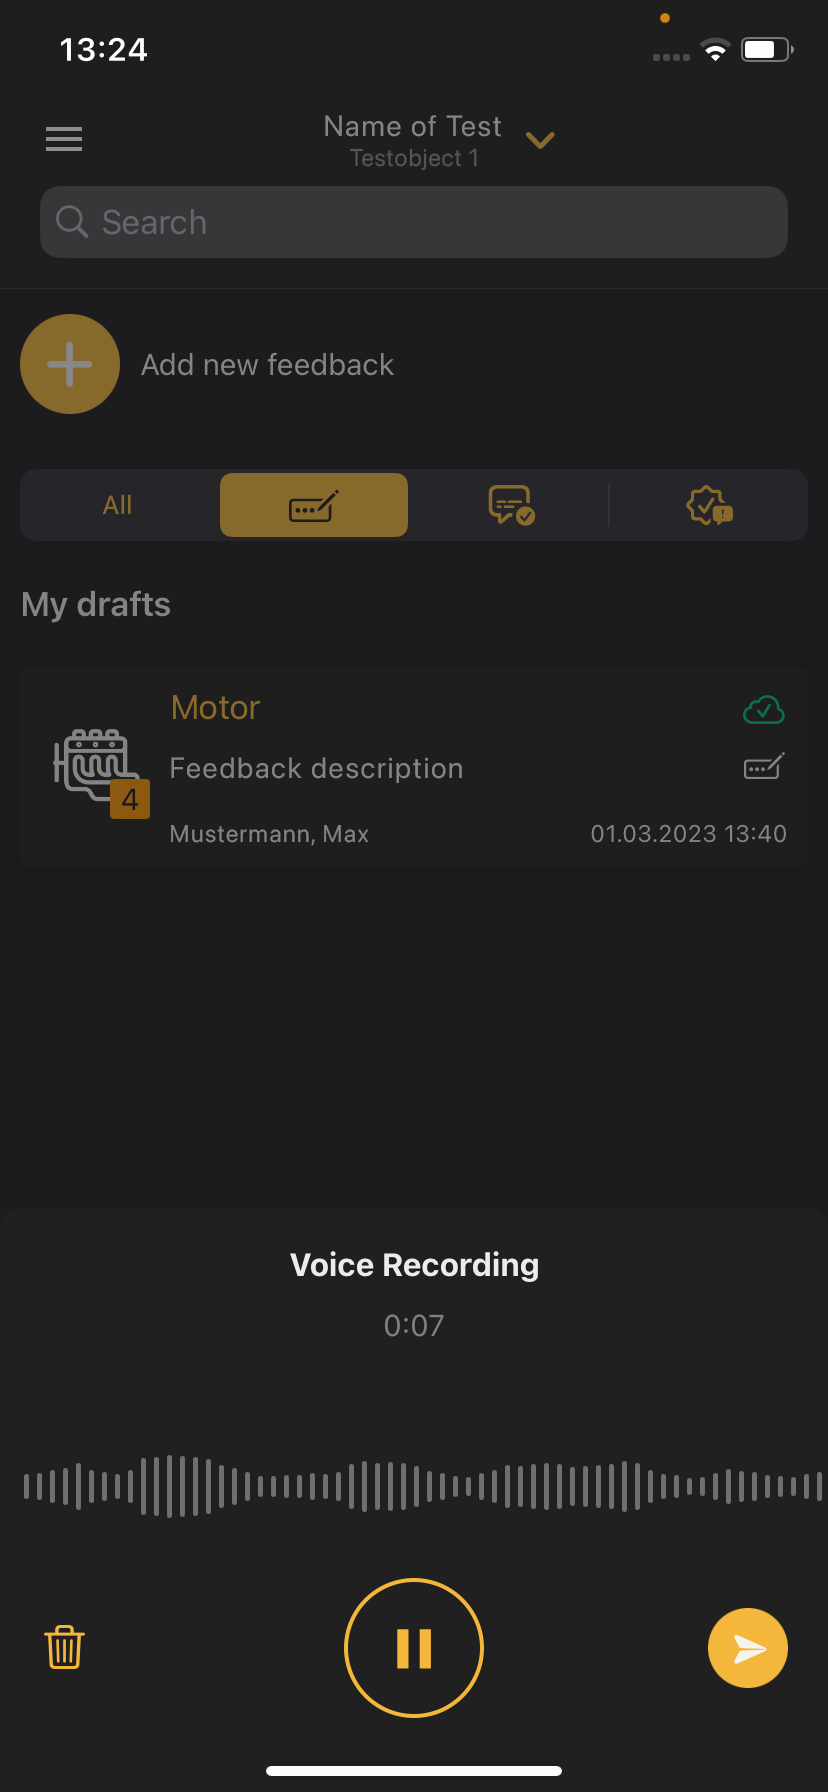
12.0 Driving Mode
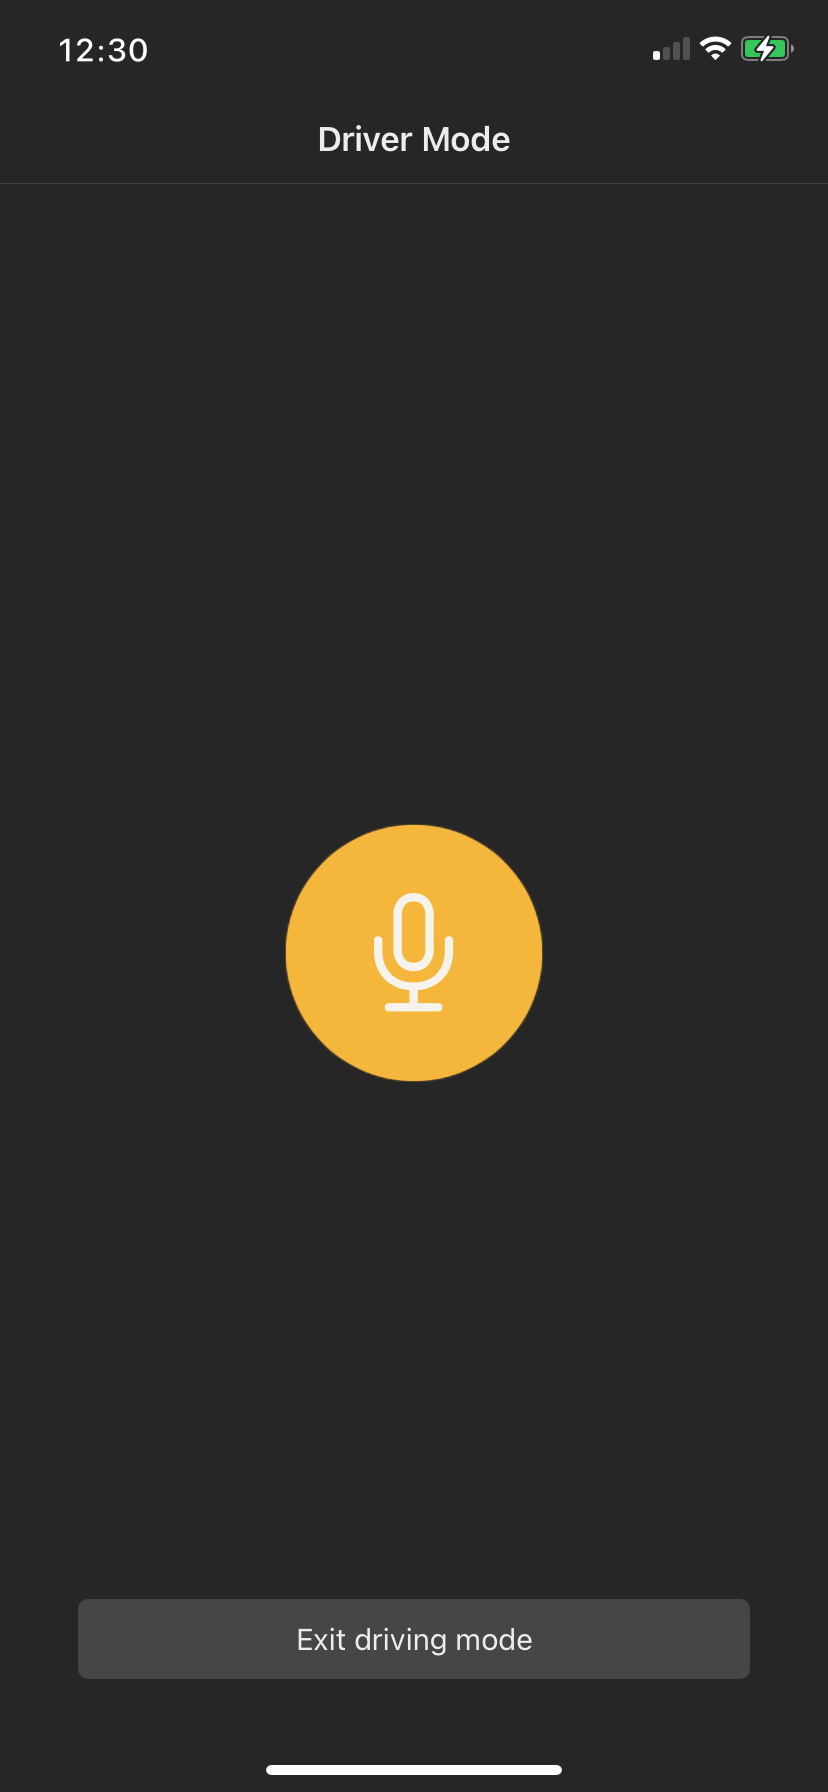
12.1 Using the driving mode
The driving mode allows you to use IVA safely and efficiently while driving as you can enter feedback directly and hands-free.
To start recording, click the microphone button. If you want to stop the recording, click on the pause button. During the recording, the length of the current recording is displayed. You can listen to a stopped recording as often as you like and, if necessary, delete it using the delete button above.
The driving mode can be ended manually at any time and is saved as a draft in the feedback list. If you immediately assign a category to the recording, you will find your recording in “My completed feedbacks”.
13.0 Speech-to-Text
13.1 Using speech-to-text
At the bottom right of the display, there is a microphone icon that you can click to start the speech recording.

During voice recording you will see the voice amplitude, which will help you to check if the recording is running and your voice is being recognized.
Below the voice amplitude are the elements for controlling the recording:
In this function, you can only listen to your recording once it has been saved.
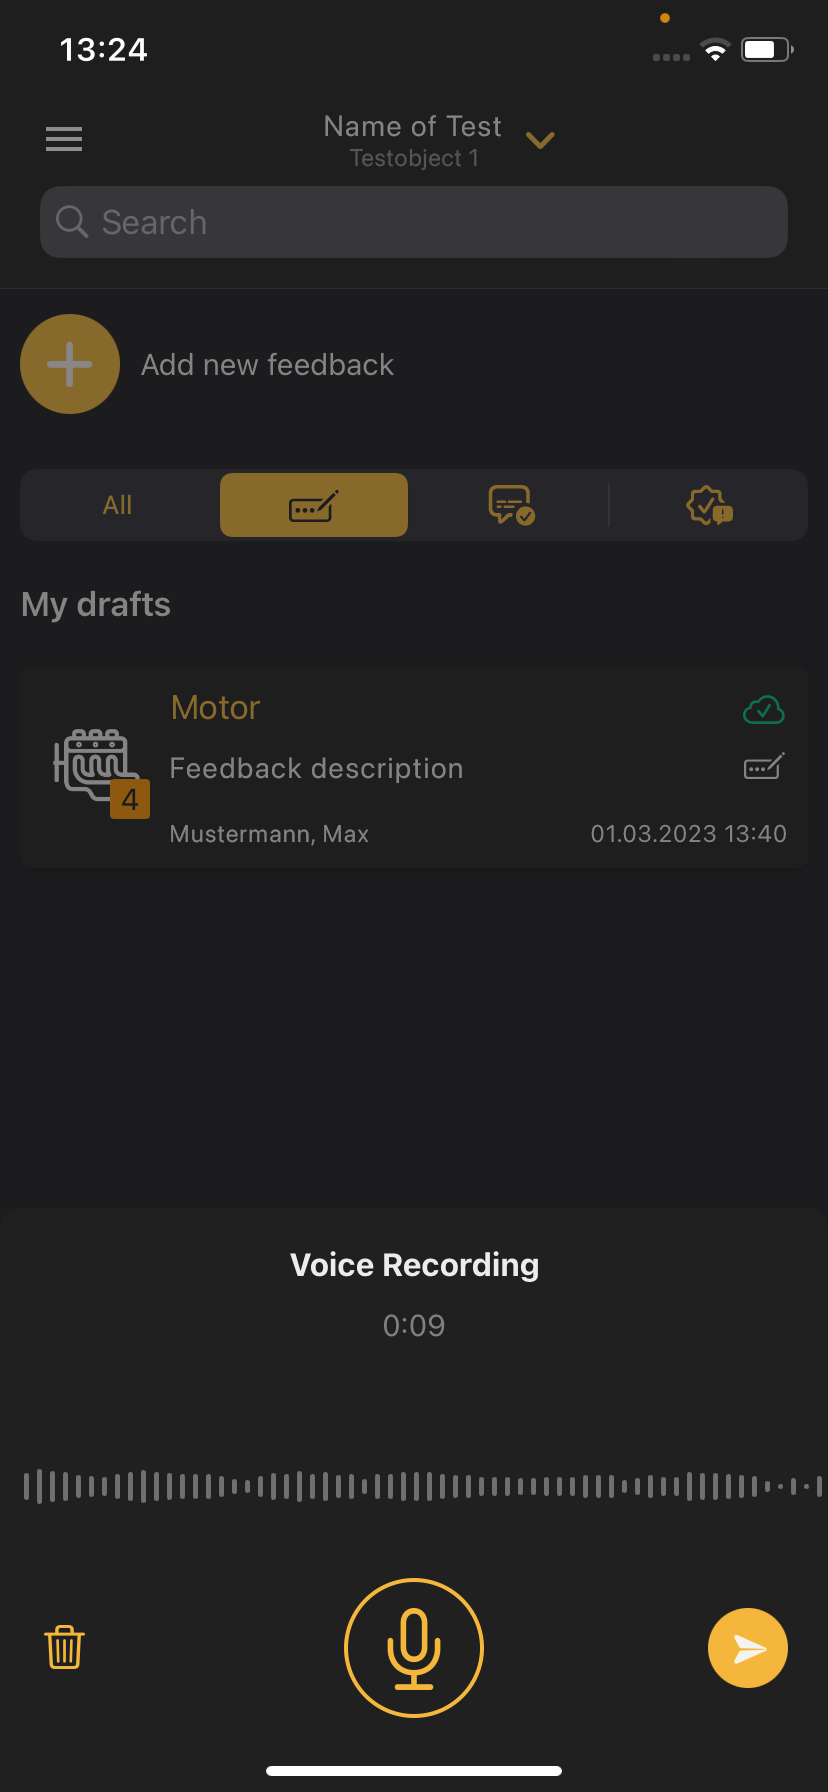
If you are in a moving vehicle, the voice recording will automatically start in driving mode. While in driving mode, click on the microphone icon. The recording can be stopped again at any time by clicking this button once again. In addition, you have the option to delete the recording via the "Delete" button above or to save it with the yellow button below.
After saving, the recording is automatically converted to text and is available for further editing in the feedback list. At this point, the feedback is still incomplete. To complete it, the mandatory information for each feedback must be added here. The mandatory information are the rating assigned to the feedback and the selection of a category.
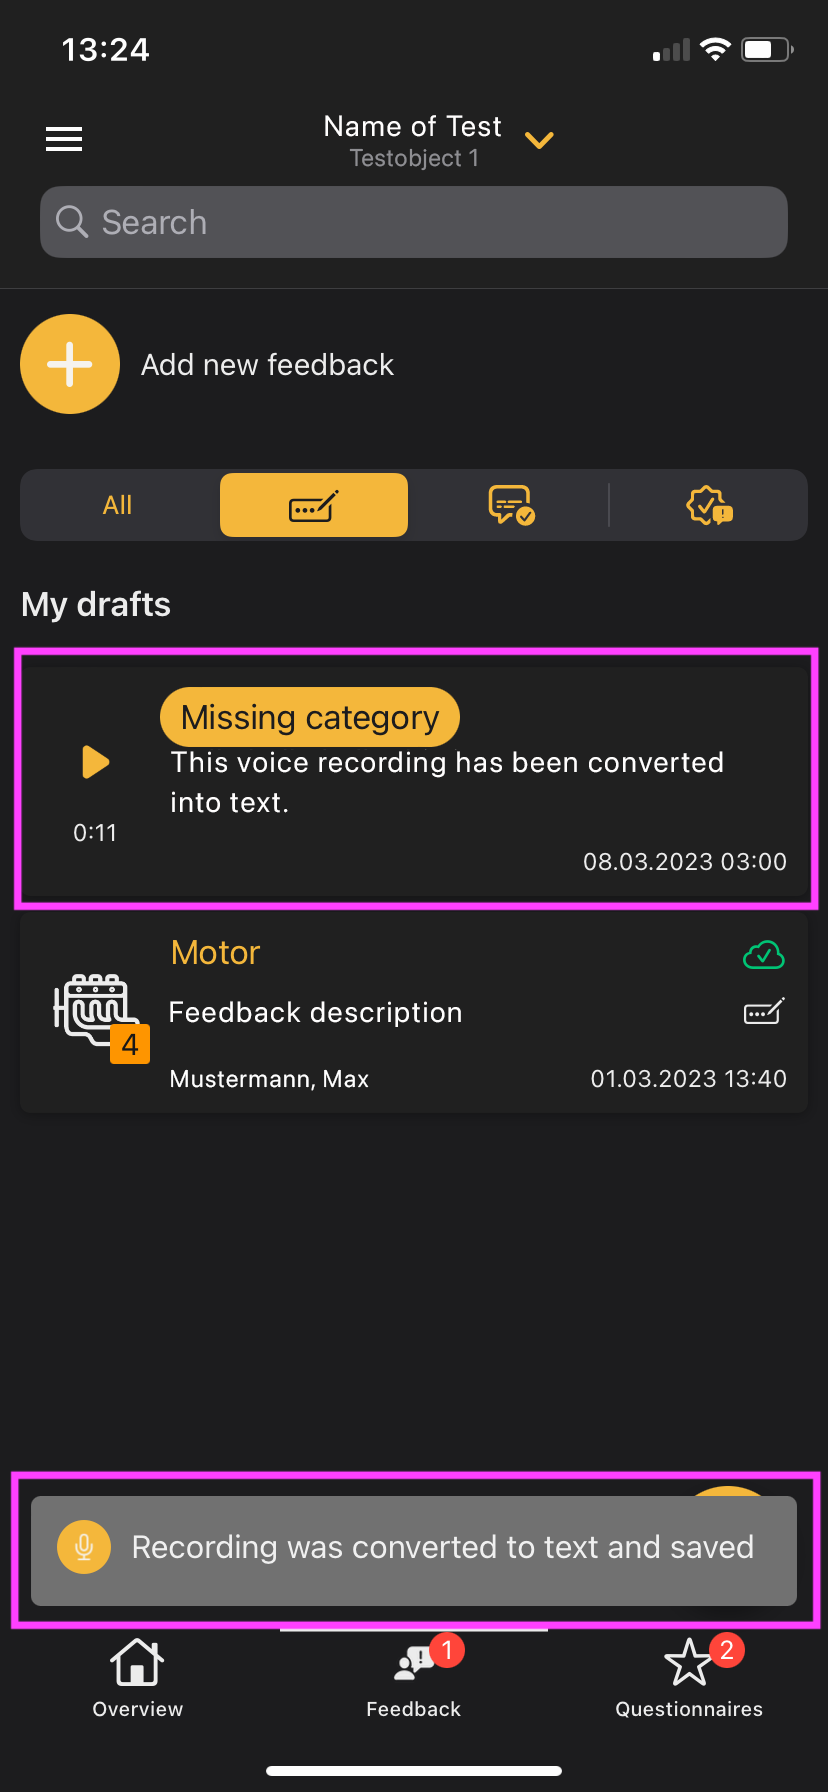
The speech-to-text function is not to be confused with the sound recording, which can only be inserted as an attachment in the feedback and, unlike the speech-to-text function, cannot be converted into text.