Tests
- How do I create a new test?
- How do I edit an existing test?
- Status of a test
- Activating the "Tester can change reviewer" feature
- Feedback validation
- Selecting a Test Type
- Feedback configuration for tests
How do I create a new test?
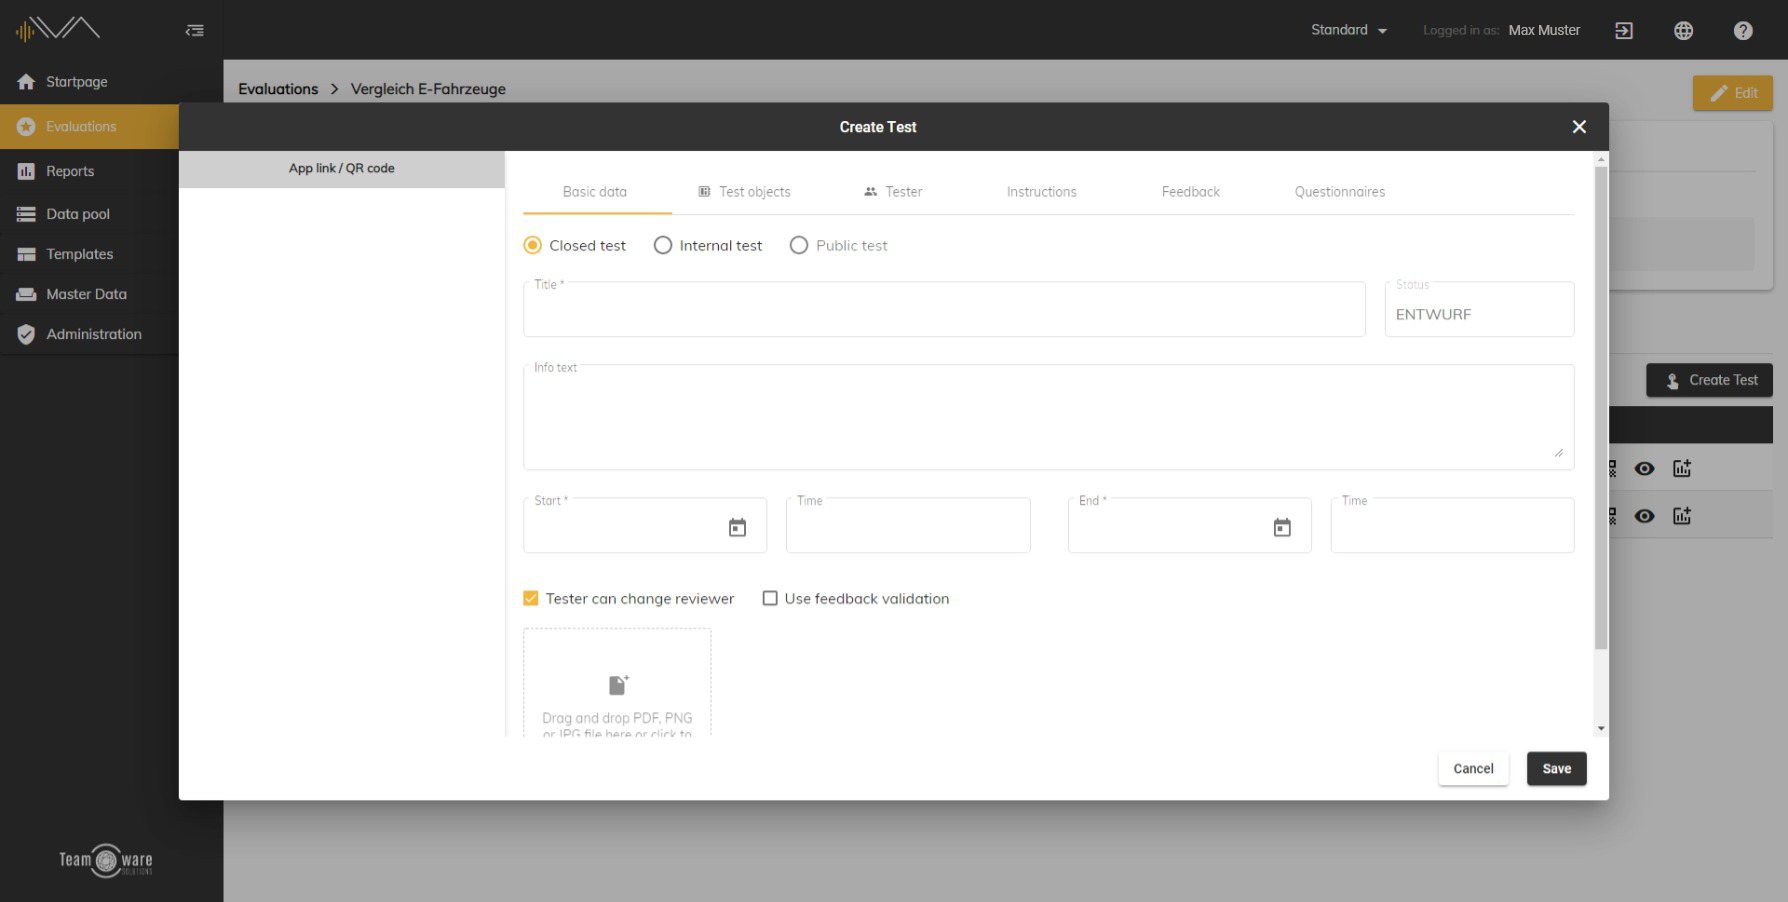
To create a new test, you must first select the desired evaluation. Within an evaluation you will find four different tabs: tests, testers, test objects and categories. At this point, stay in the already active tab "Tests" and click on the button "Create test". A new popup will open with six different tabs.
- Basic data
- Should your test be closed (i.e. only for explicitly assigned testers), open (i.e. for all registered testers) or anonymous (i.e. anyone can participate)?
- Give your test a title and optionally an info text. The status will be added automatically.
- Add a start date (with optional time) and an end date (with optional time).
- Optional: Use alternative assessors (testers do not have to log in separately, but can be selected from a list -> Suitable for "tablet/smartphone sharing".
- Optional: Iterative procedure (input from testers can be marked as validated -> No need for new testers to re-enter)
- Test objects
- In the left column you can see all test objects assigned to the current evaluation or all test objects from the data pool
- By drag & drop or double click you can add a test object to your current test
- Of course, you can also create a new test object directly
- Tip: If you want to import all test objects from the evaluation, click on the button "Import test objects from evaluation" -> This saves time!
- Tester
- In the left column you can see all testers assigned to the current evaluation or all testers from the data pool
- By drag & drop or double click you can add a tester to your current test
- Of course, you can also create a new tester directly
- Tip: If you want to import all testers from the evaluation, click on the button "Import tester from evaluation" -> This saves time!
- Instructions
- In the left column you see all instruction sets resp. all instructions from the data pool
- By drag & drop or double click you can add a set or instruction to your current test
- Of course you can also create a new instruction directly
- Feedback
- In the left column you can see the different feedback types emoticons, star rating as well as the net promoter score (rating). You can switch between the different types at any time.
- Free feedback: Activate this option if you want your testers to be able to enter free (i.e. explorative) feedback
- Configuration: Allow audio (i.e. testers can also record audio to the written feedback), Allow photos and videos (i.e. testers can also add photos and videos to the written feedback), Record GPS coordinates (i.e. testers can also add GPS coordinates to the written feedback), Manual time (i.e. testers can also manually add a time to the written feedback (e.g. if the vehicle clock has a different time zone, ...).
- Depending on the feedback type you have some configuration options. You can also save a configured feedback type as a template and reuse it later.
- Questionnaires
- In the left column you can see all questionnaires
- You can add a questionnaire to your current test by dragging & dropping or double-clicking
- Of course, you can also directly create a new questionnaire
Remember to click on the Save button after the editing is done.
How do I edit an existing test?
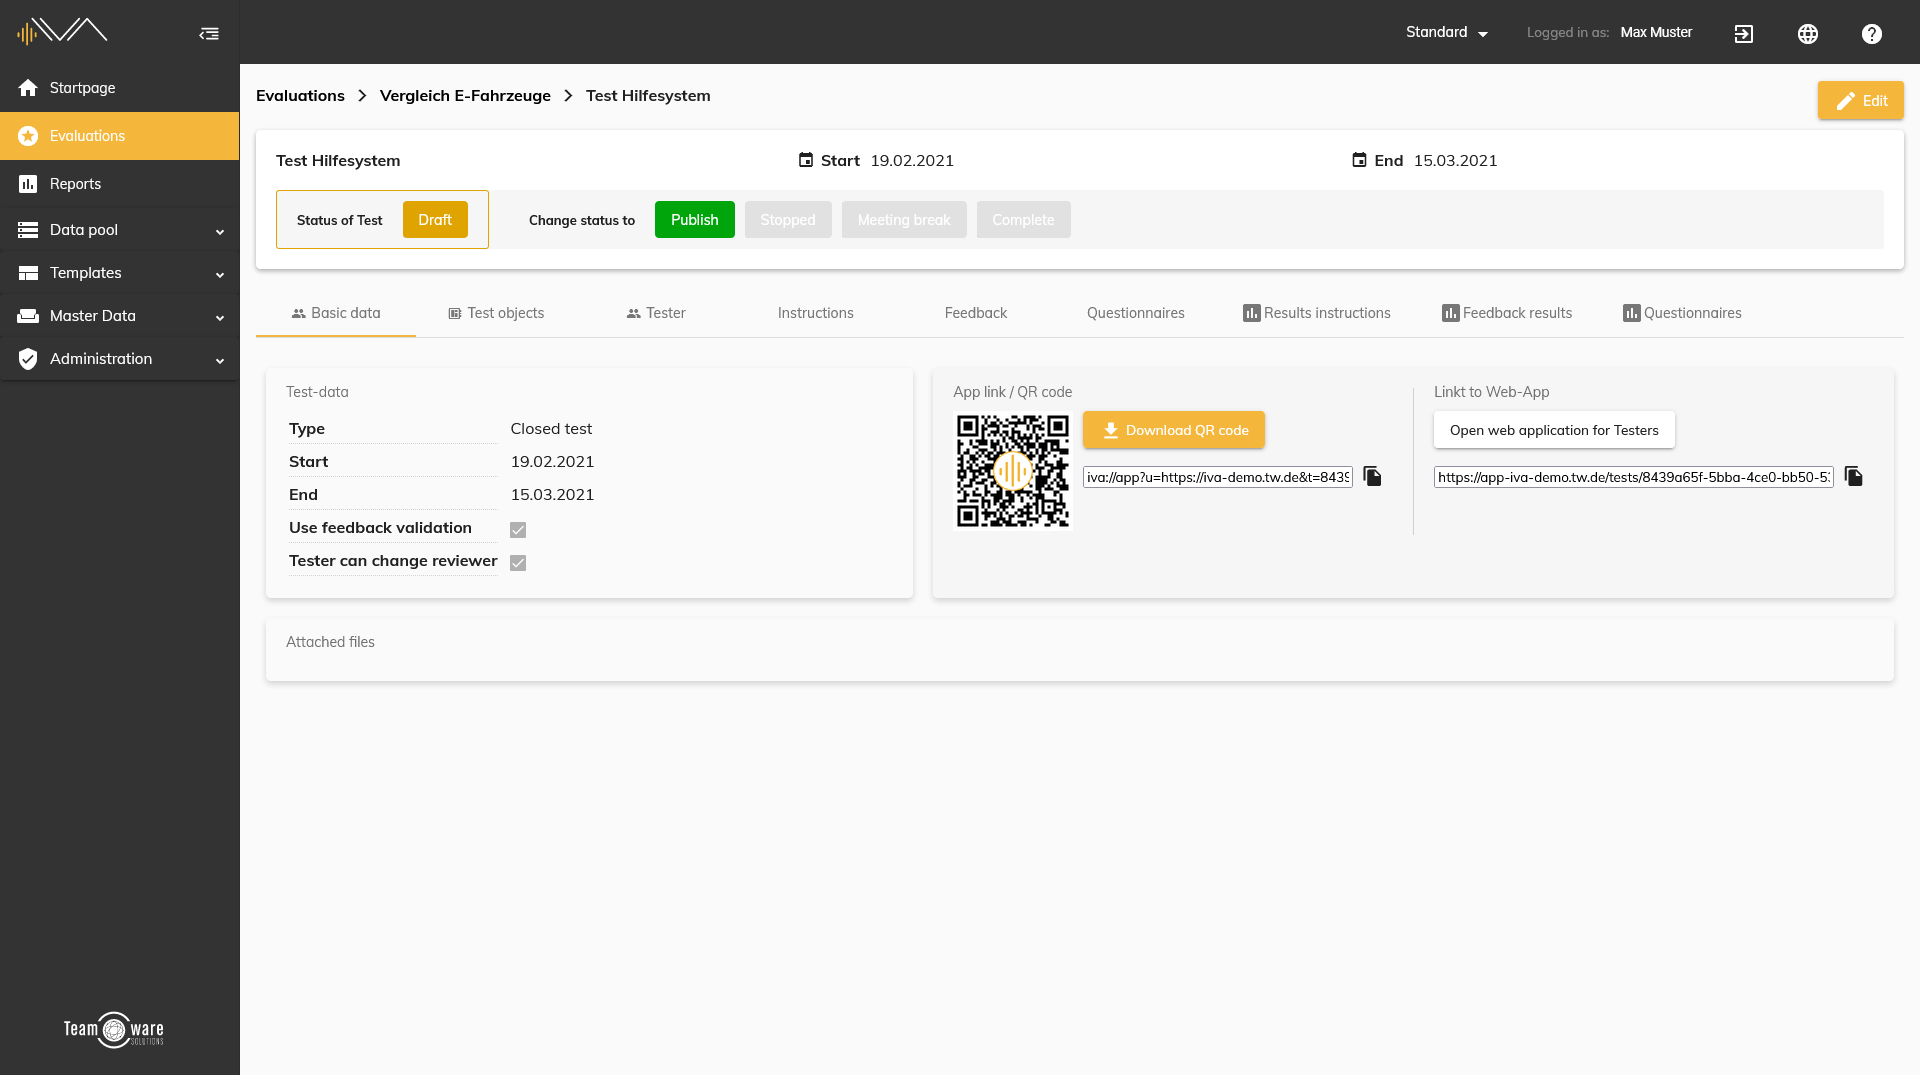
To edit an existing test, you must first select the corresponding evaluation. In the detailed view of the evaluation, you then double-click on the line or on the eye symbol of the corresponding test. Now a new page opens with detailed information about the test. On the top right there is a button called "Edit". However, this button can only be clicked if you change the status of the evaluation. To do this, click on "Stop". Please be aware that testers can no longer participate in a stopped test.
- Basic data
- Should your test be closed (i.e. only for explicitly assigned testers), open (i.e. for all registered testers) or anonymous (i.e. anyone can participate)?
- Give your test a title and optionally an info text. The status will be added automatically.
- Add a start date (with optional time) and an end date (with optional time).
- Optional: Use alternative assessors (testers do not have to log in separately, but can be selected from a list -> Suitable for "tablet/smartphone sharing".
- Optional: Iterative procedure (input from testers can be marked as validated -> No need for new testers to re-enter)
- Test objects
- In the left column you can see all test objects assigned to the current evaluation or all test objects from the data pool
- By drag & drop or double click you can add a test object to your current test
- Of course, you can also create a new test object directly
- Tip: If you want to import all test objects from the evaluation, click on the button "Import test objects from evaluation" -> This saves time!
- Tester
- In the left column you can see all testers assigned to the current evaluation or all testers from the data pool
- By drag & drop or double click you can add a tester to your current test
- Of course, you can also create a new tester directly
- Tip: If you want to import all testers from the evaluation, click on the button "Import tester from evaluation" -> This saves time!
- Instructions
- In the left column you see all instruction sets resp. all instructions from the data pool
- By drag & drop or double click you can add a set or instruction to your current test
- Of course you can also create a new instruction directly
- Feedback
- In the left column you can see the different feedback types emoticons, star rating as well as the net promoter score (rating). You can switch between the different types at any time.
- Free feedback: Activate this option if you want your testers to be able to enter free (i.e. explorative) feedback
- Configuration: Allow audio (i.e. testers can also record audio to the written feedback), Allow photos and videos (i.e. testers can also add photos and videos to the written feedback), Record GPS coordinates (i.e. testers can also add GPS coordinates to the written feedback), Manual time (i.e. testers can also manually add a time to the written feedback (e.g. if the vehicle clock has a different time zone, ...).
- Depending on the feedback type you have some configuration options. You can also save a configured feedback type as a template and reuse it later.
- Questionnaires
- In the left column you can see all questionnaires
- You can add a questionnaire to your current test by dragging & dropping or double-clicking
- Of course, you can also directly reate a new questionnaire
Remember to click on the Save button after the editing is done.
Status of a test
You can change the status of a test if necessary by navigating to the test detail page. There you will see the current status of the test halfway up on the left. To the right, you will find a series of buttons that allow you to change the status of the test. Below is a brief explanation of each status.
PUBLISHED: This means that a test is live and testers can participate in it.
STOPPED: Testers can no longer participate in the test, but the status can be changed back to RELEASED at any time.
MEETING BREAK: Select this option if you have chosen an iterative approach and want to conduct a discussion of the results during the discussion break. No further participation by testers is possible during this time.
COMPLETE: If all testers have participated and you want to close the test, activate this status
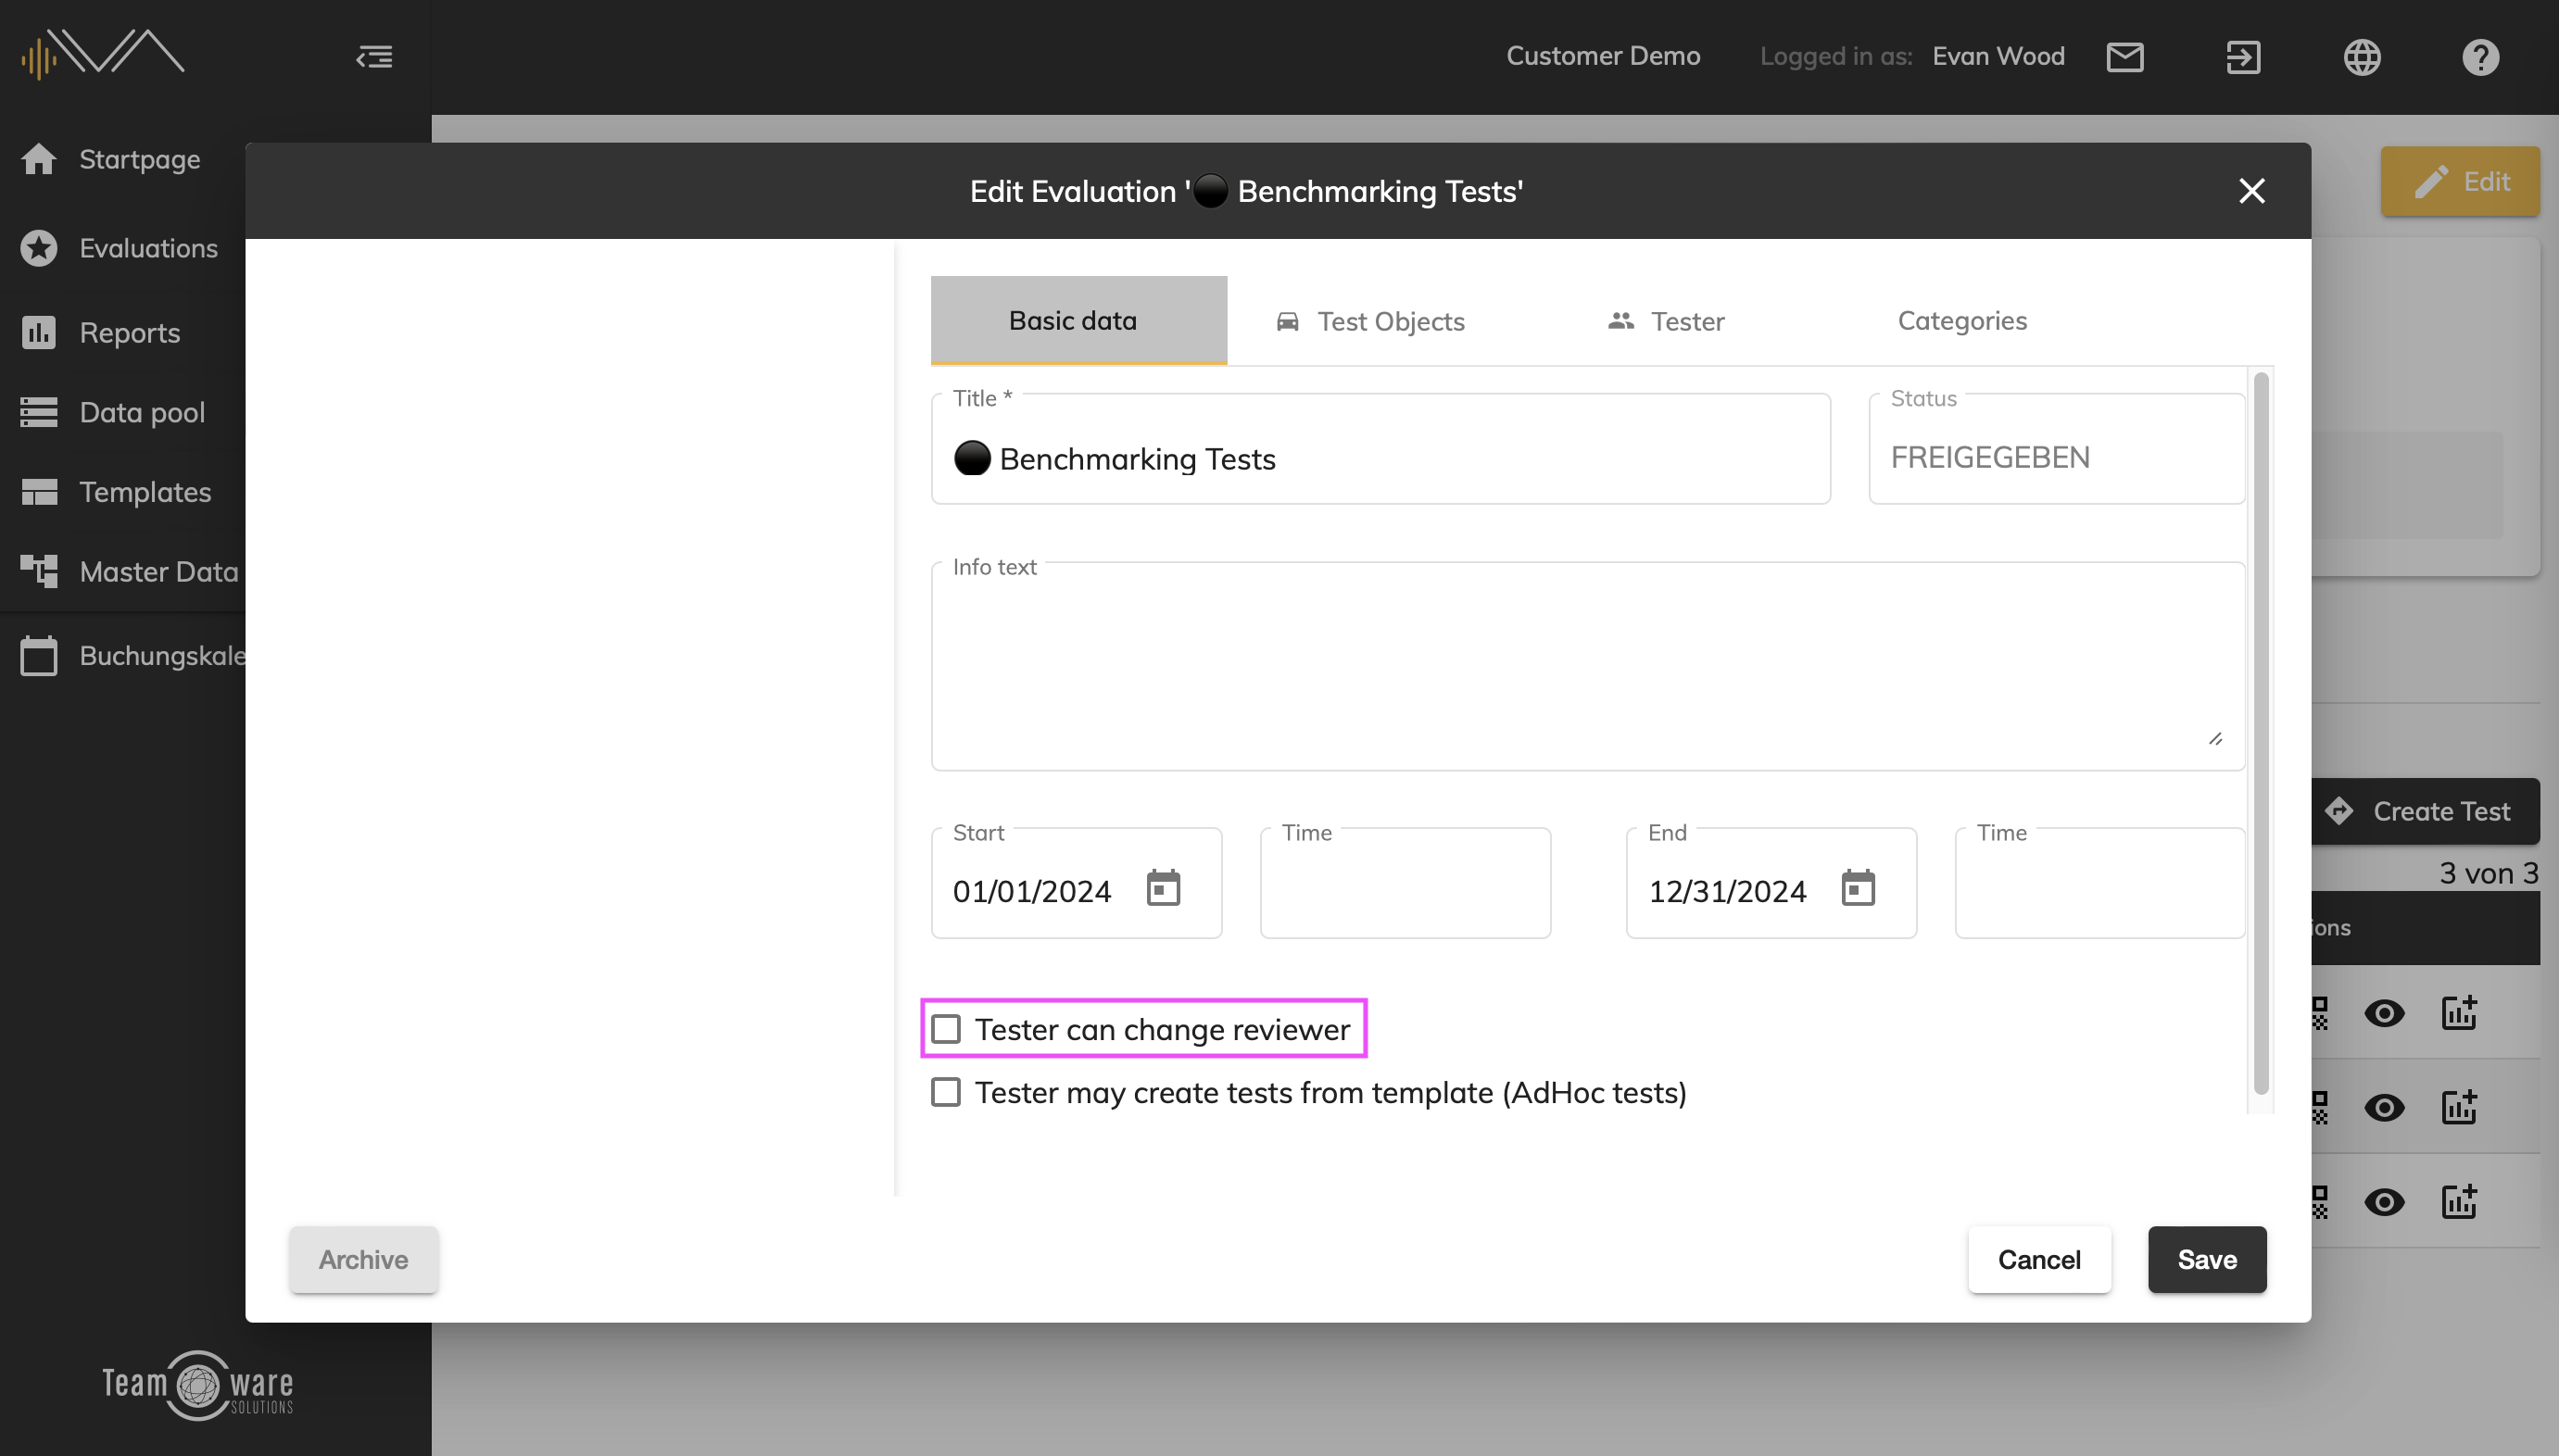
Activating the "Tester can change reviewer" feature
Activate the checkbox for “Tester can change reviewer” in a test or evaluation if you want to use this function.
This makes it possible for testers to select another tester from a list and assign free feedback to them, without them having to be logged in themselves. This is useful, for example, if several testers share an iPhone/iPad for joint assessment.
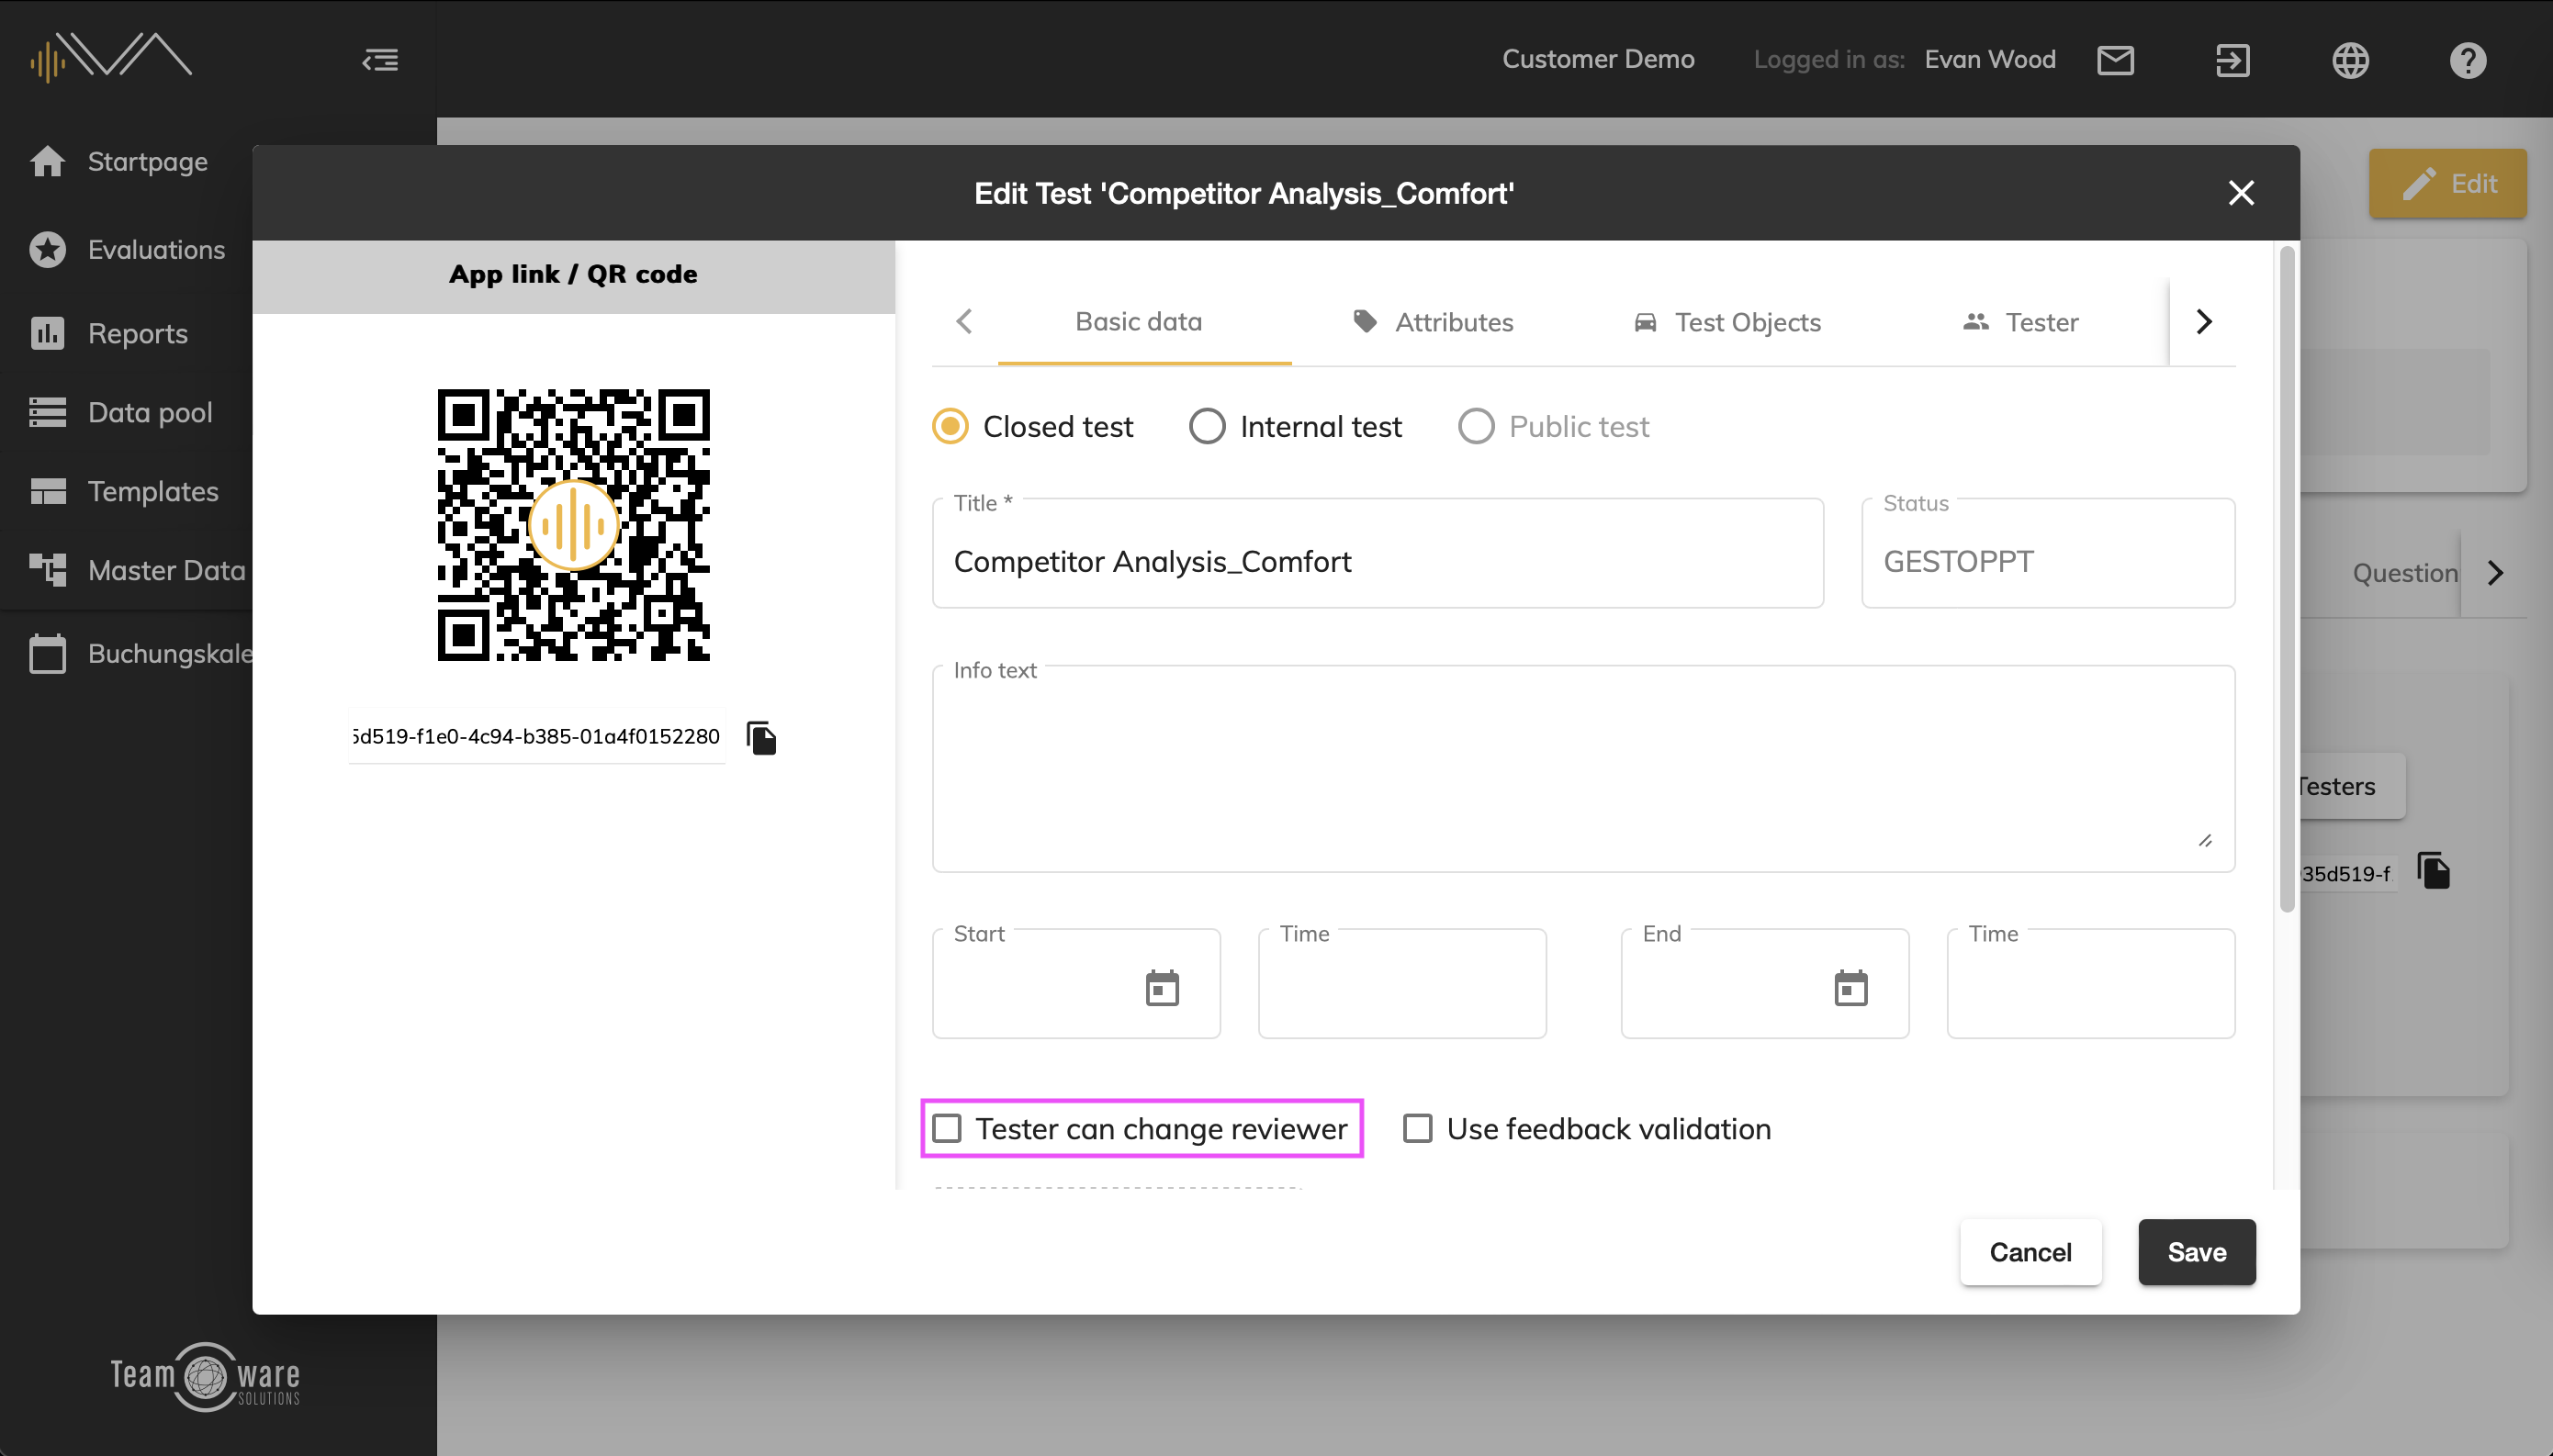
Feedback validation
If you want to activate the feedback validation, first navigate to the corresponding test. There you can set the checkmark on 'Use feedback validation' in the Edit mode. You then have the option of setting the status of the test to MEETING BREAK whenever you like. During this time, you can then review the free feedback received and mark it as validated if necessary. This will indicate to future testers that you do not need to report this specific item again.
Selecting a Test Type
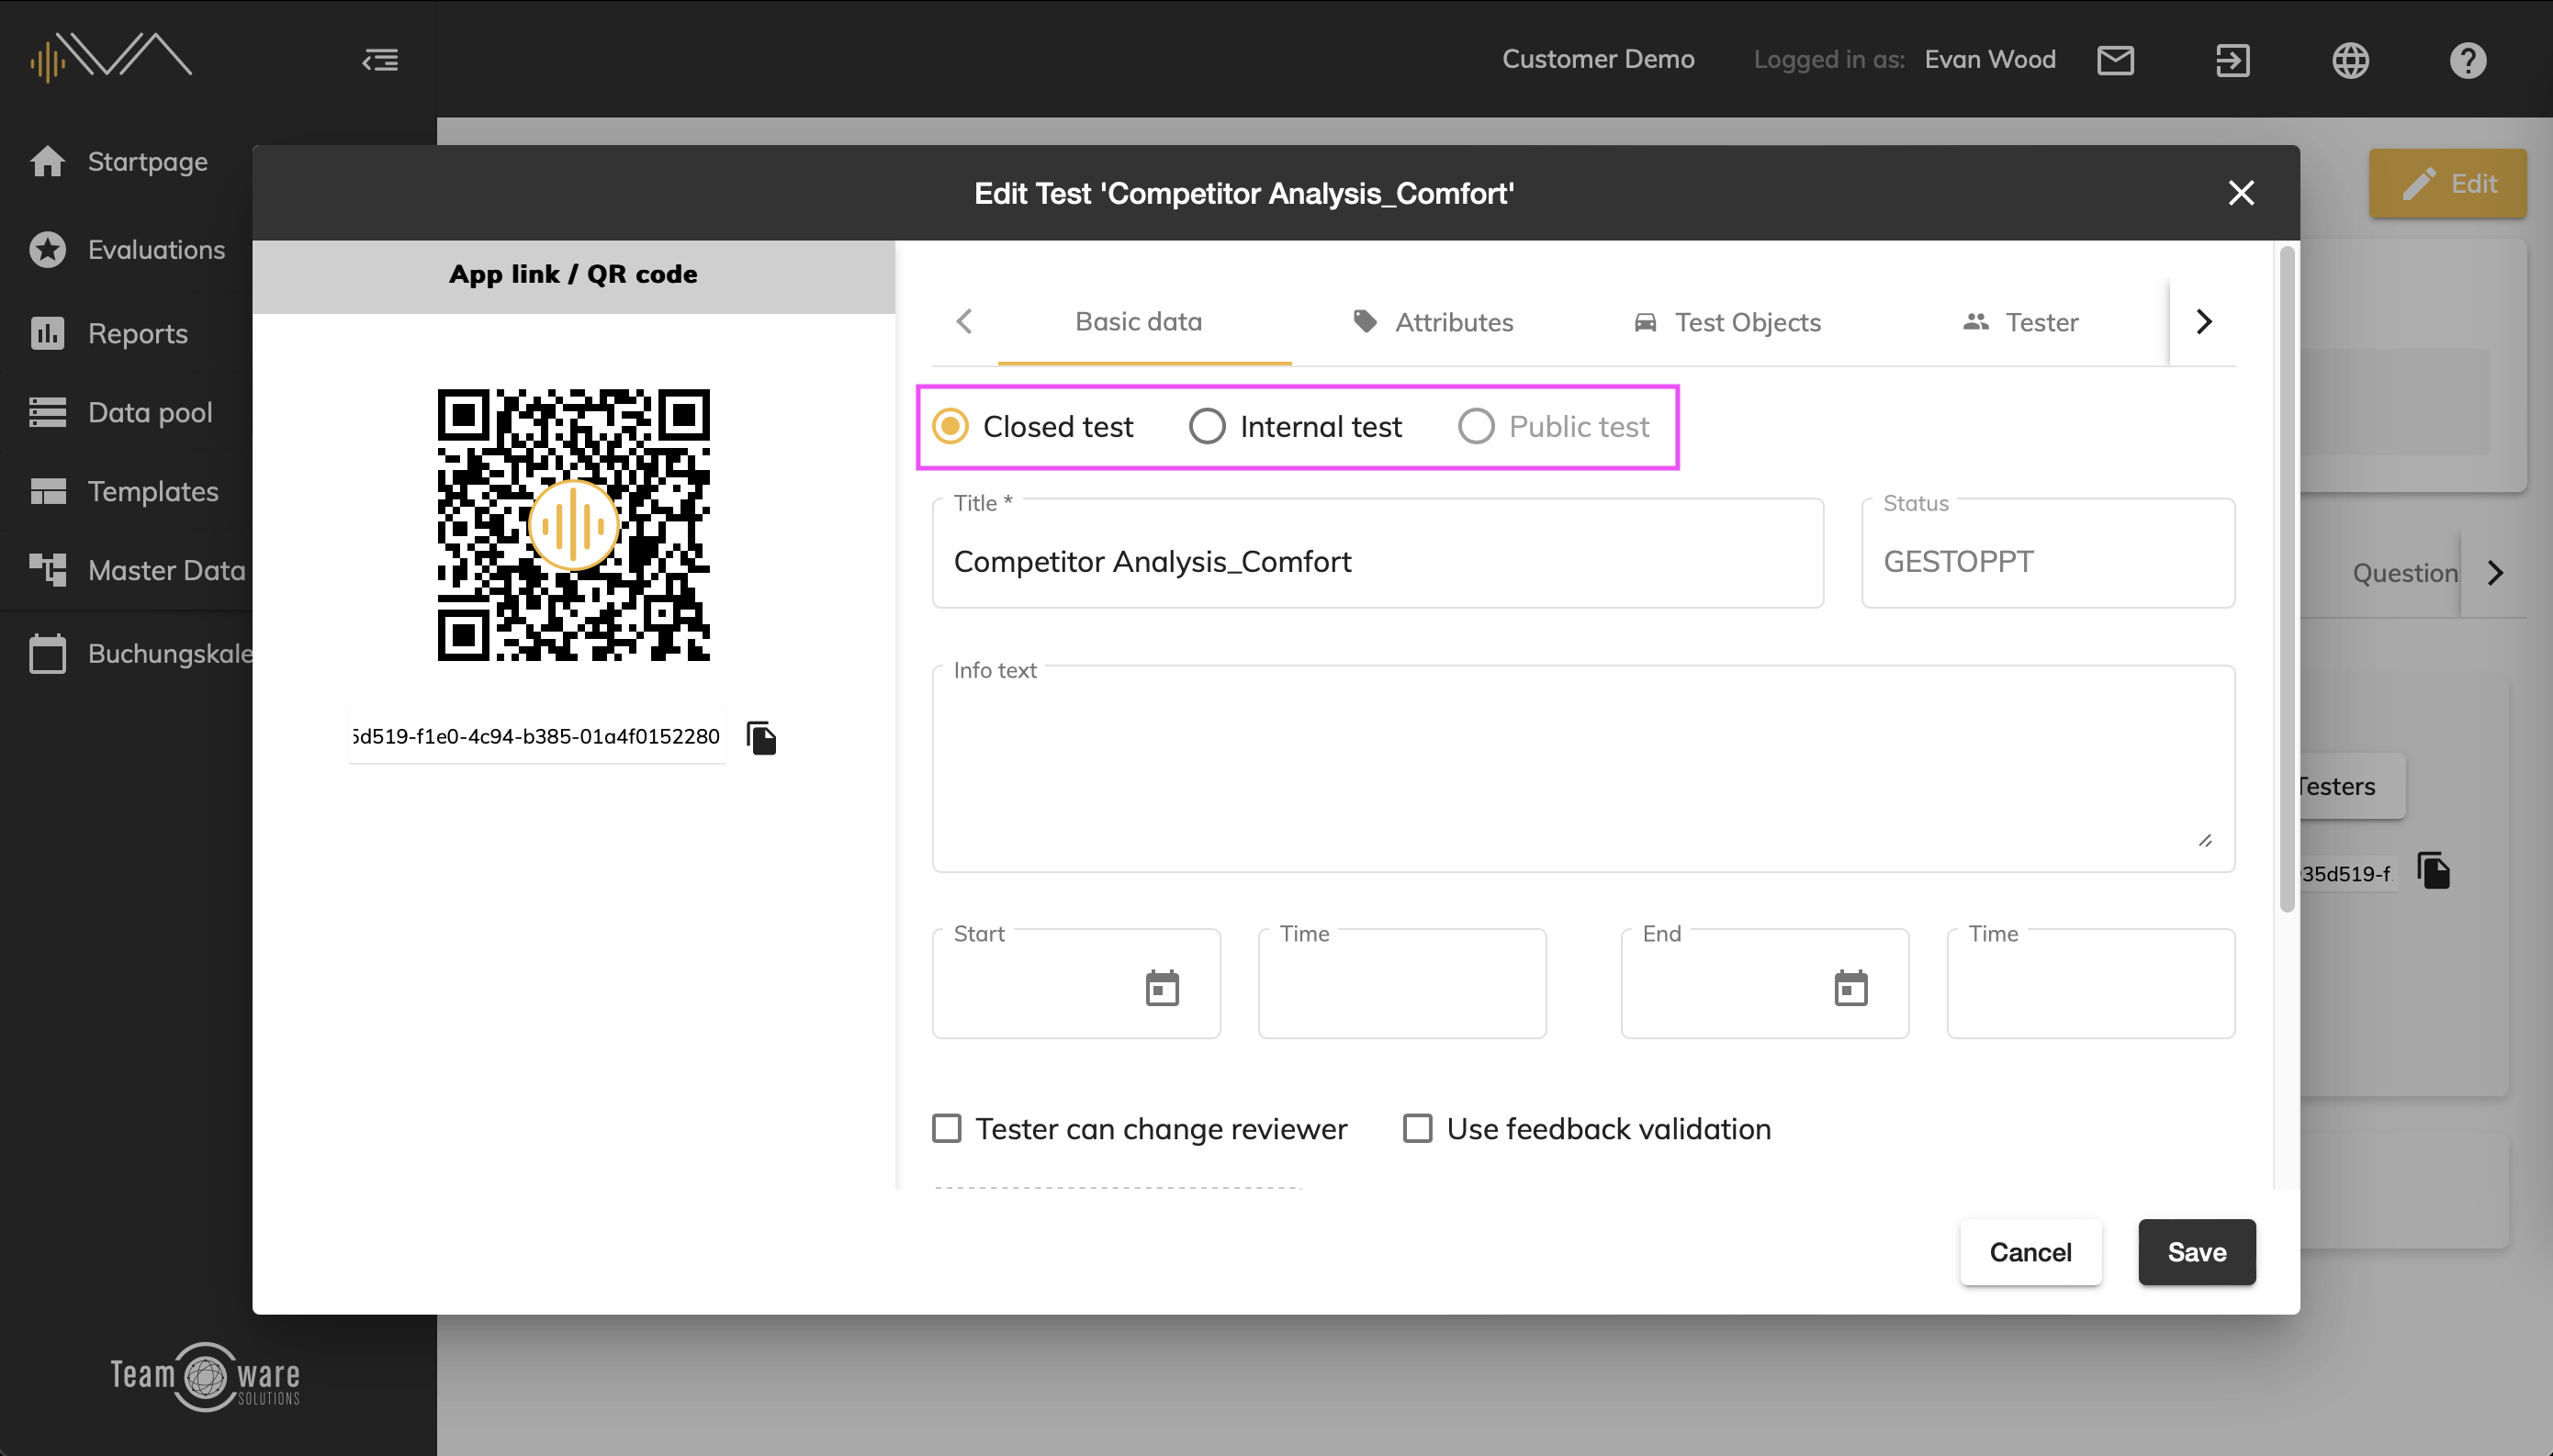
If you create a new test, you have the option of defining it as one of the following three test types:
Public test
- A public test can only be accessed via a link or QR-code. The tester can either participate as a guest (a temporary user account is automatically created in the background) or log in with their tester account in which case he requires the “Tester” role for the test division.
- For testers public tests do not appear in the test overview
- The list of evaluations is not visible to testers, the vehicle list remains visible
Internal test
Tester requires:
- User account
- "Tester" role for the test division
Closed test
- Same conditions as for internal tests apply
- Tester must also be included in the list of testers for the relevant test
Feedback configuration for tests
Once you have opened the “Create test” or “Edit test” pop-up, you will see that it is divided into two sections:
- On the left “Select feedback type”
- On the right a tab bar
To continue configuring the feedback, navigate to “Feedback” in the top tab bar.
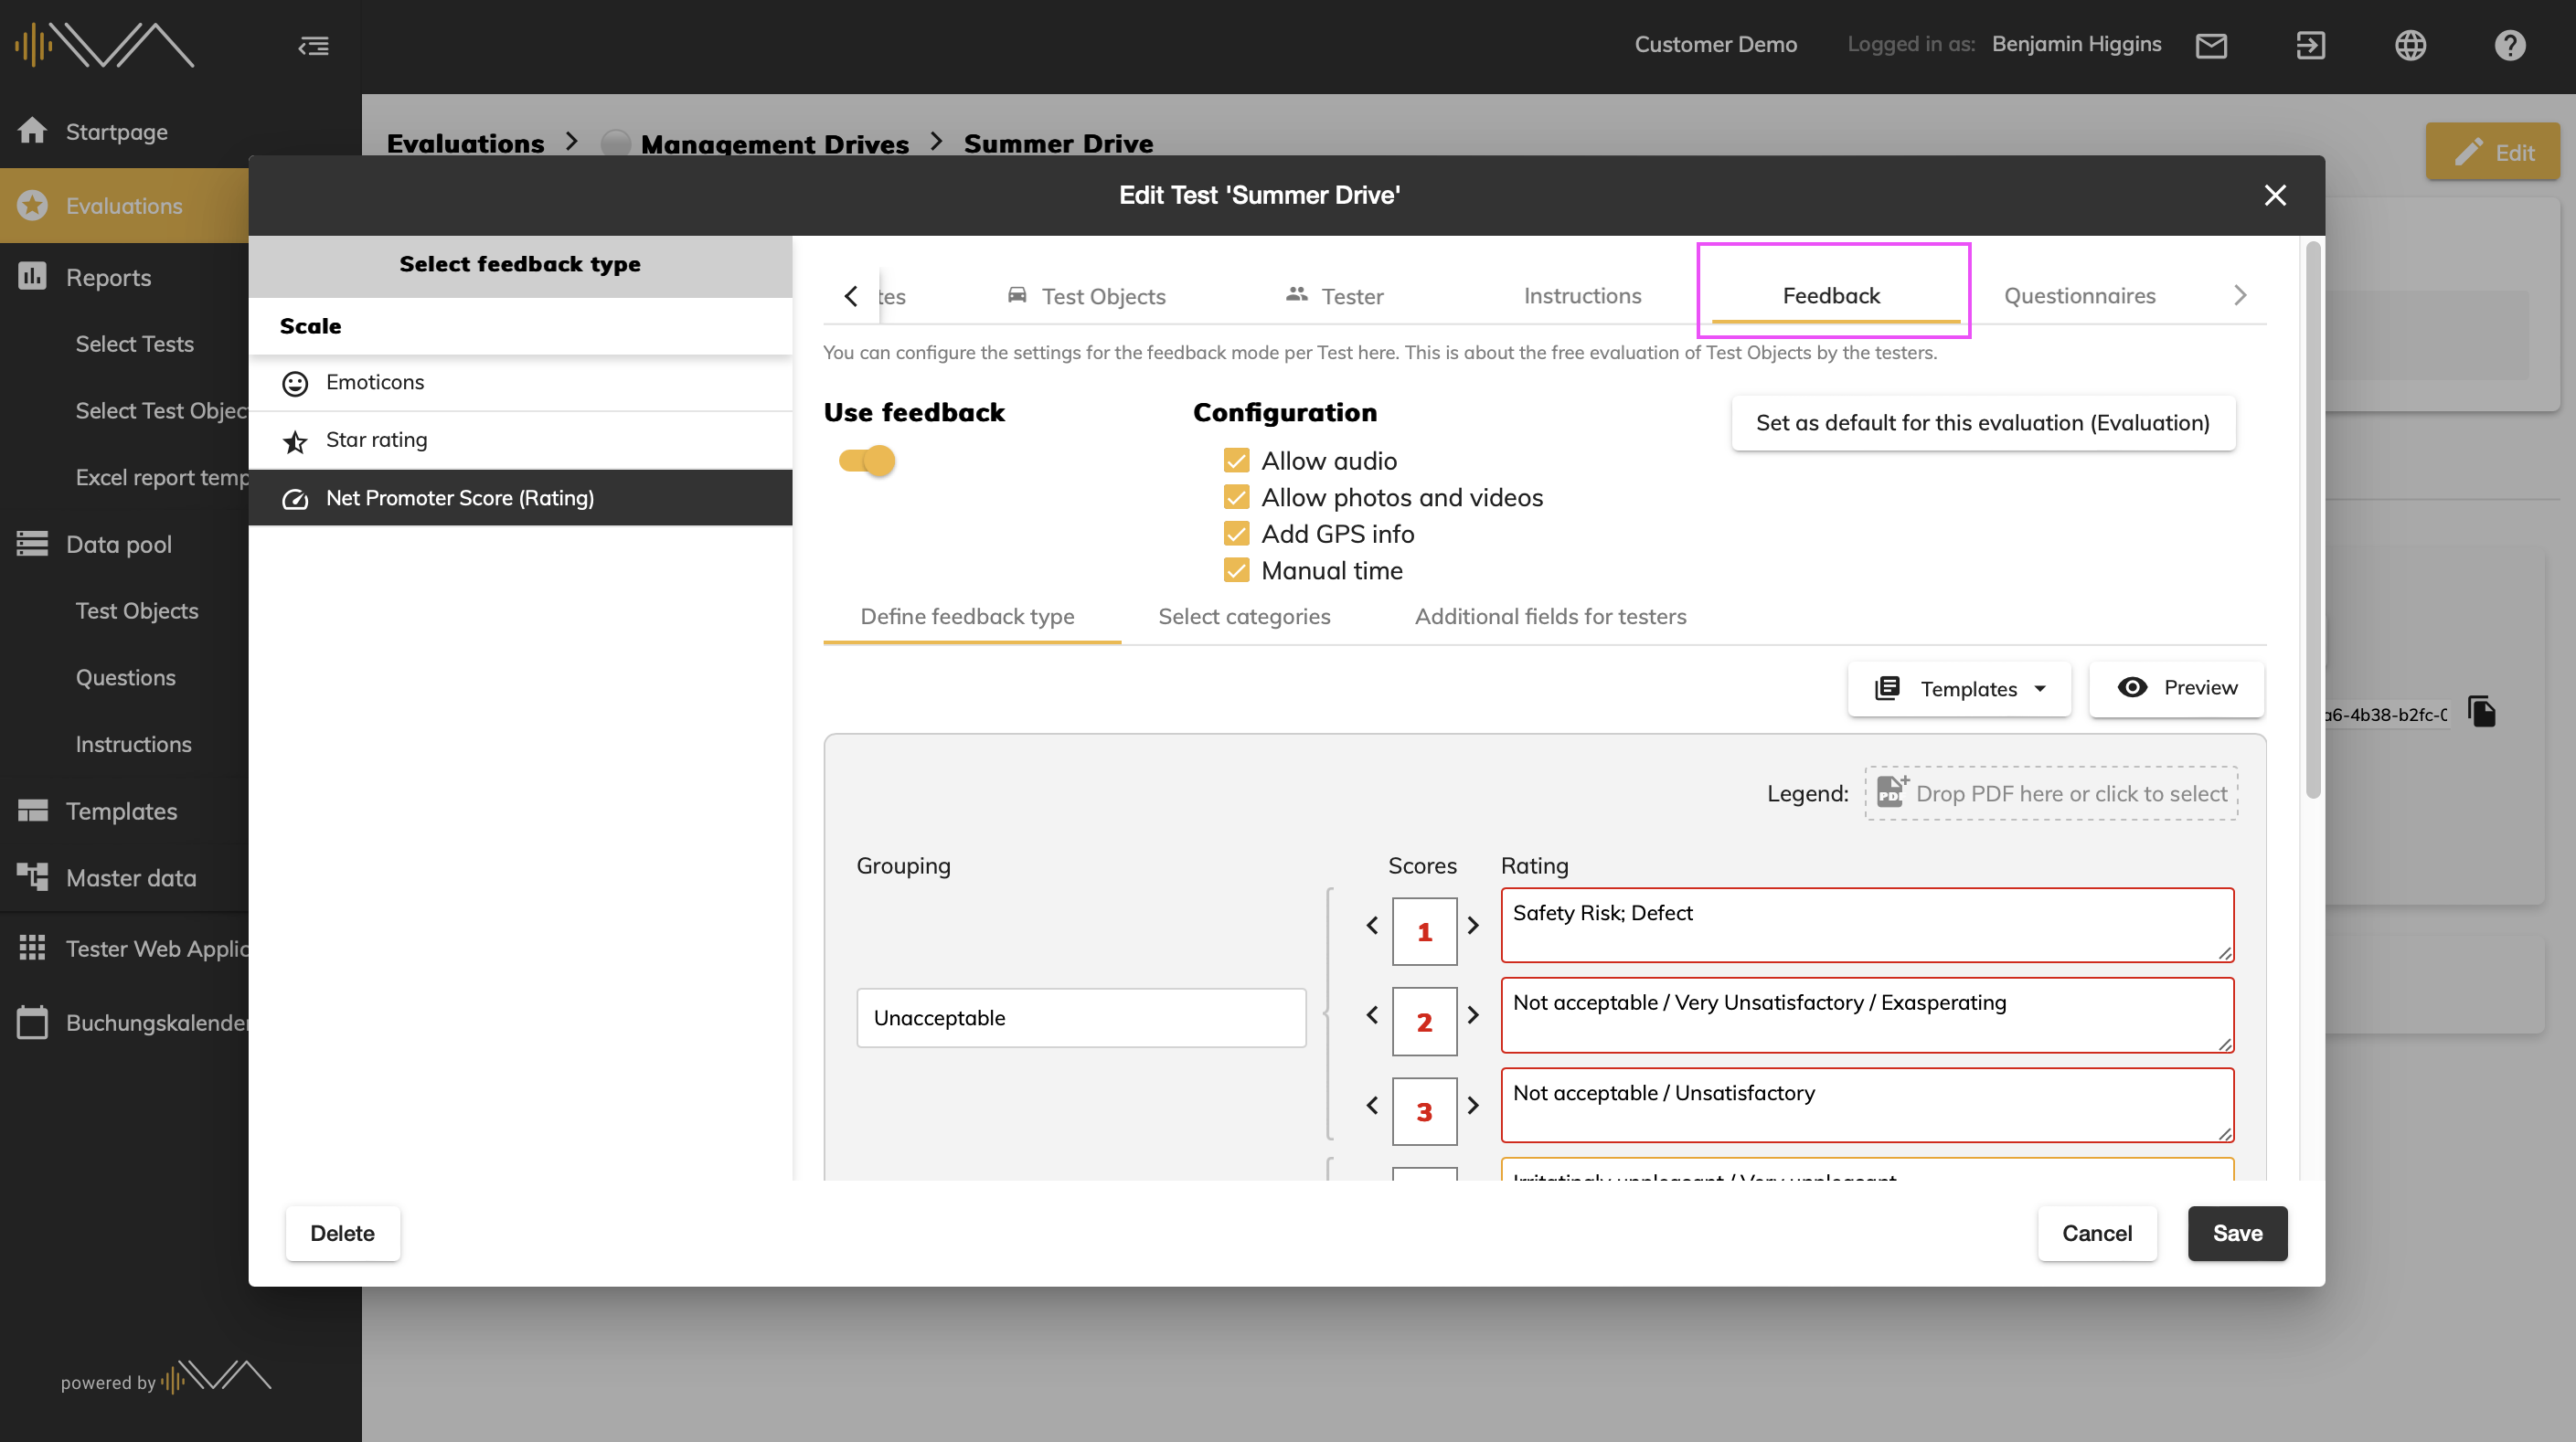
In the left column you can see the different types of feedback:
- Emoticons - with rating scale from 1 to 5
- Star rating - with a rating scale from 1 to 10
- Net promoter score (rating)- with a rating scale from 1 to 10
- Grouping and description are possible here
You can switch between the different types at any time and you have several configuration options depending on the feedback type.
In the right area you can see:
- Use feedback: Check this option if testers should enter free-form (i.e. exploratory) feedback in the app
- Configuration:
- Allow audio (i.e. testers can also record audio for written feedback),
- Allow photos and videos (i.e. testers can also add photos and videos to the written feedback),
- Allow GPS info (i.e. testers can also add GPS coordinates to the written feedback),
- Manual time (i.e. testers can also manually add a time to the written feedback (e.g. if the vehicle clock has a different time zone,...)
- Allow audio (i.e. testers can also record audio for written feedback),
- a button: Set as default for this evaluation
- Here you can also save a configured feedback type as a template and reuse it later.
There are three tabs in the middle of the pop-up:
- Define feedback type, as described above and automatically selected
- Select categories for assigning the feedback
- Additional fields for testers, with additional attributes that can be filled in by testers in the iOS app and web app.
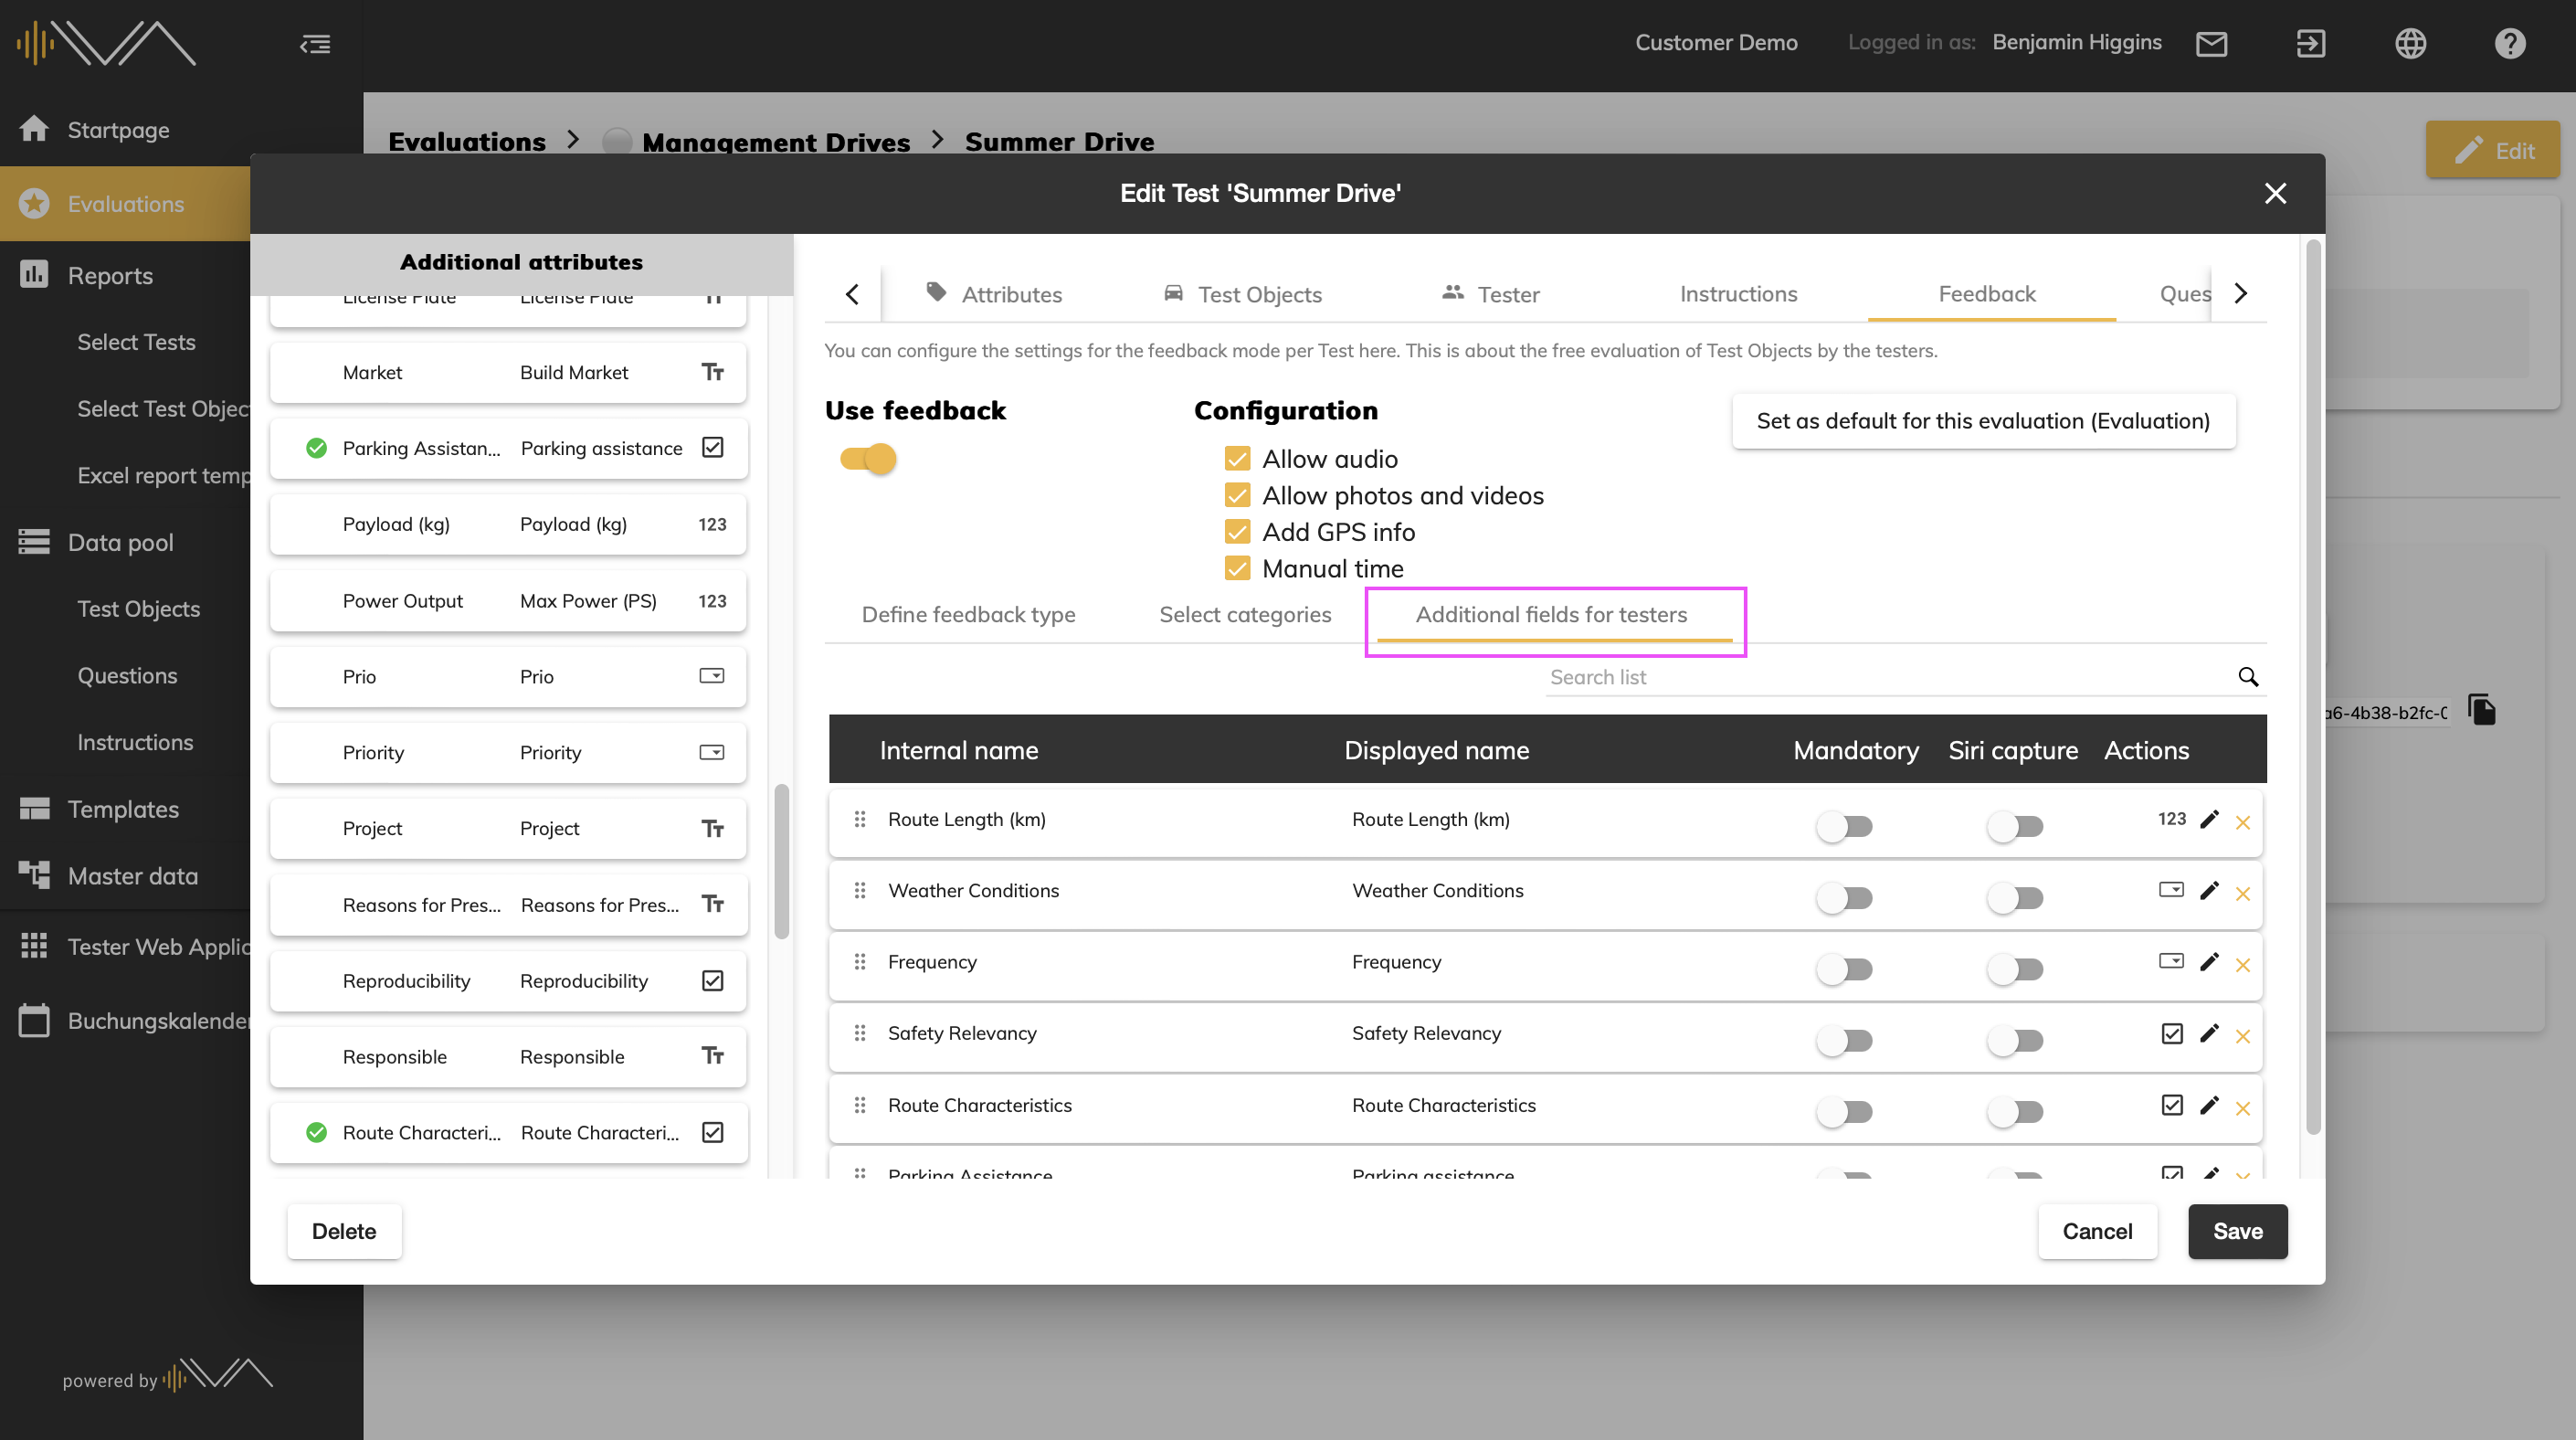
Additional fields can be assigned when creating or editing a test by going to the “Feedback” tab in the top tab bar and clicking on the “Additional fields for testers” tab at the bottom of the tab bar. This allows the planner to drag and drop or double-click the additional attributes from the left-hand section into the right-hand pop-up page.